Note: This guide is for Kinetic (22.10). For newer versions of Vanilla OS, refer to https://docs.vanillaos.org/collections/handbook for the latest documentation.
Introduction
If you are interested in Vanilla OS, it’s a good idea to try it out in a VM before using it on your hardware to get used to the Vanilla OS components. This guide will guide you through installing Vanilla OS with various VM software.
Install Vanilla OS in Gnome Boxes
Prerequisites
-
Check whether Flatpak is installed. If it isn’t present, you can check out how to install it here.
-
Install “Gnome Boxes” from the “Gnome Software” application. Alternatively, you can install it with the following command:-
flatpak install flathub org.gnome.Boxes
- Install the Vanilla OS ISO from here.
Installation
Launch Gnome Boxes from the App Grid. Alternatively, you can run it with the following command:-
flatpak run org.gnome.Boxes
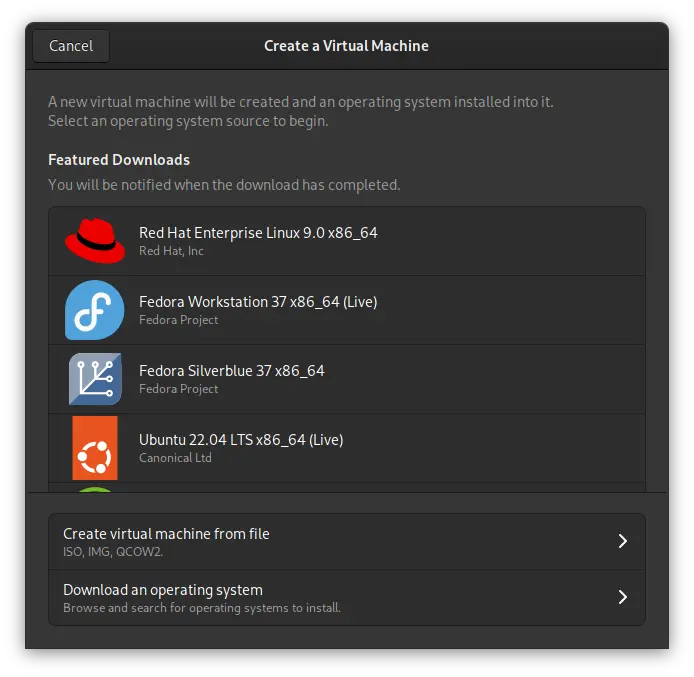
Click on the “+” icon.
Click on “Create virtual machine from file”.
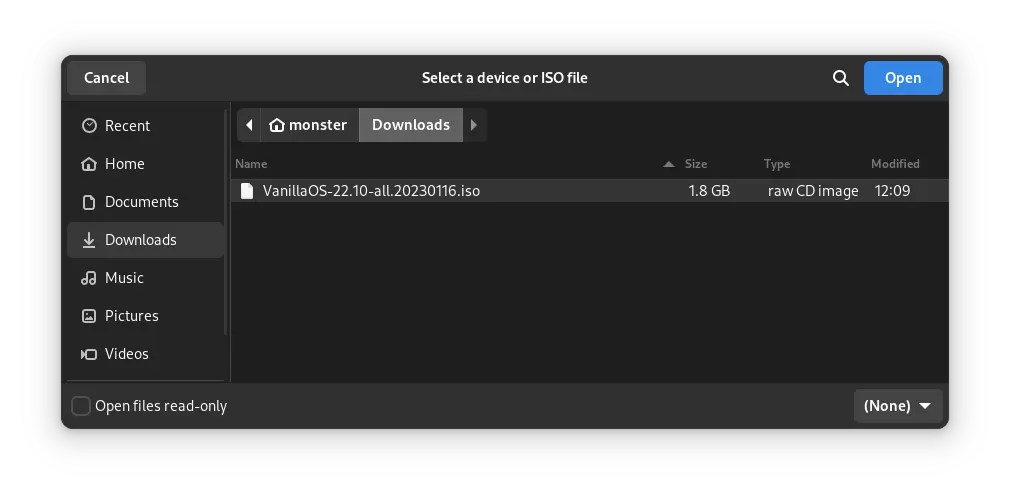
Choose the Vanilla OS ISO from the file picker and click on “Open”.
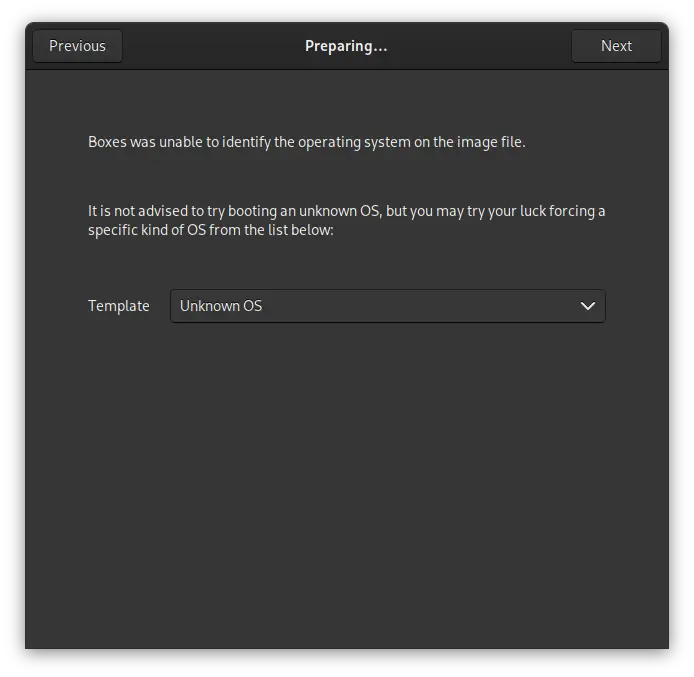
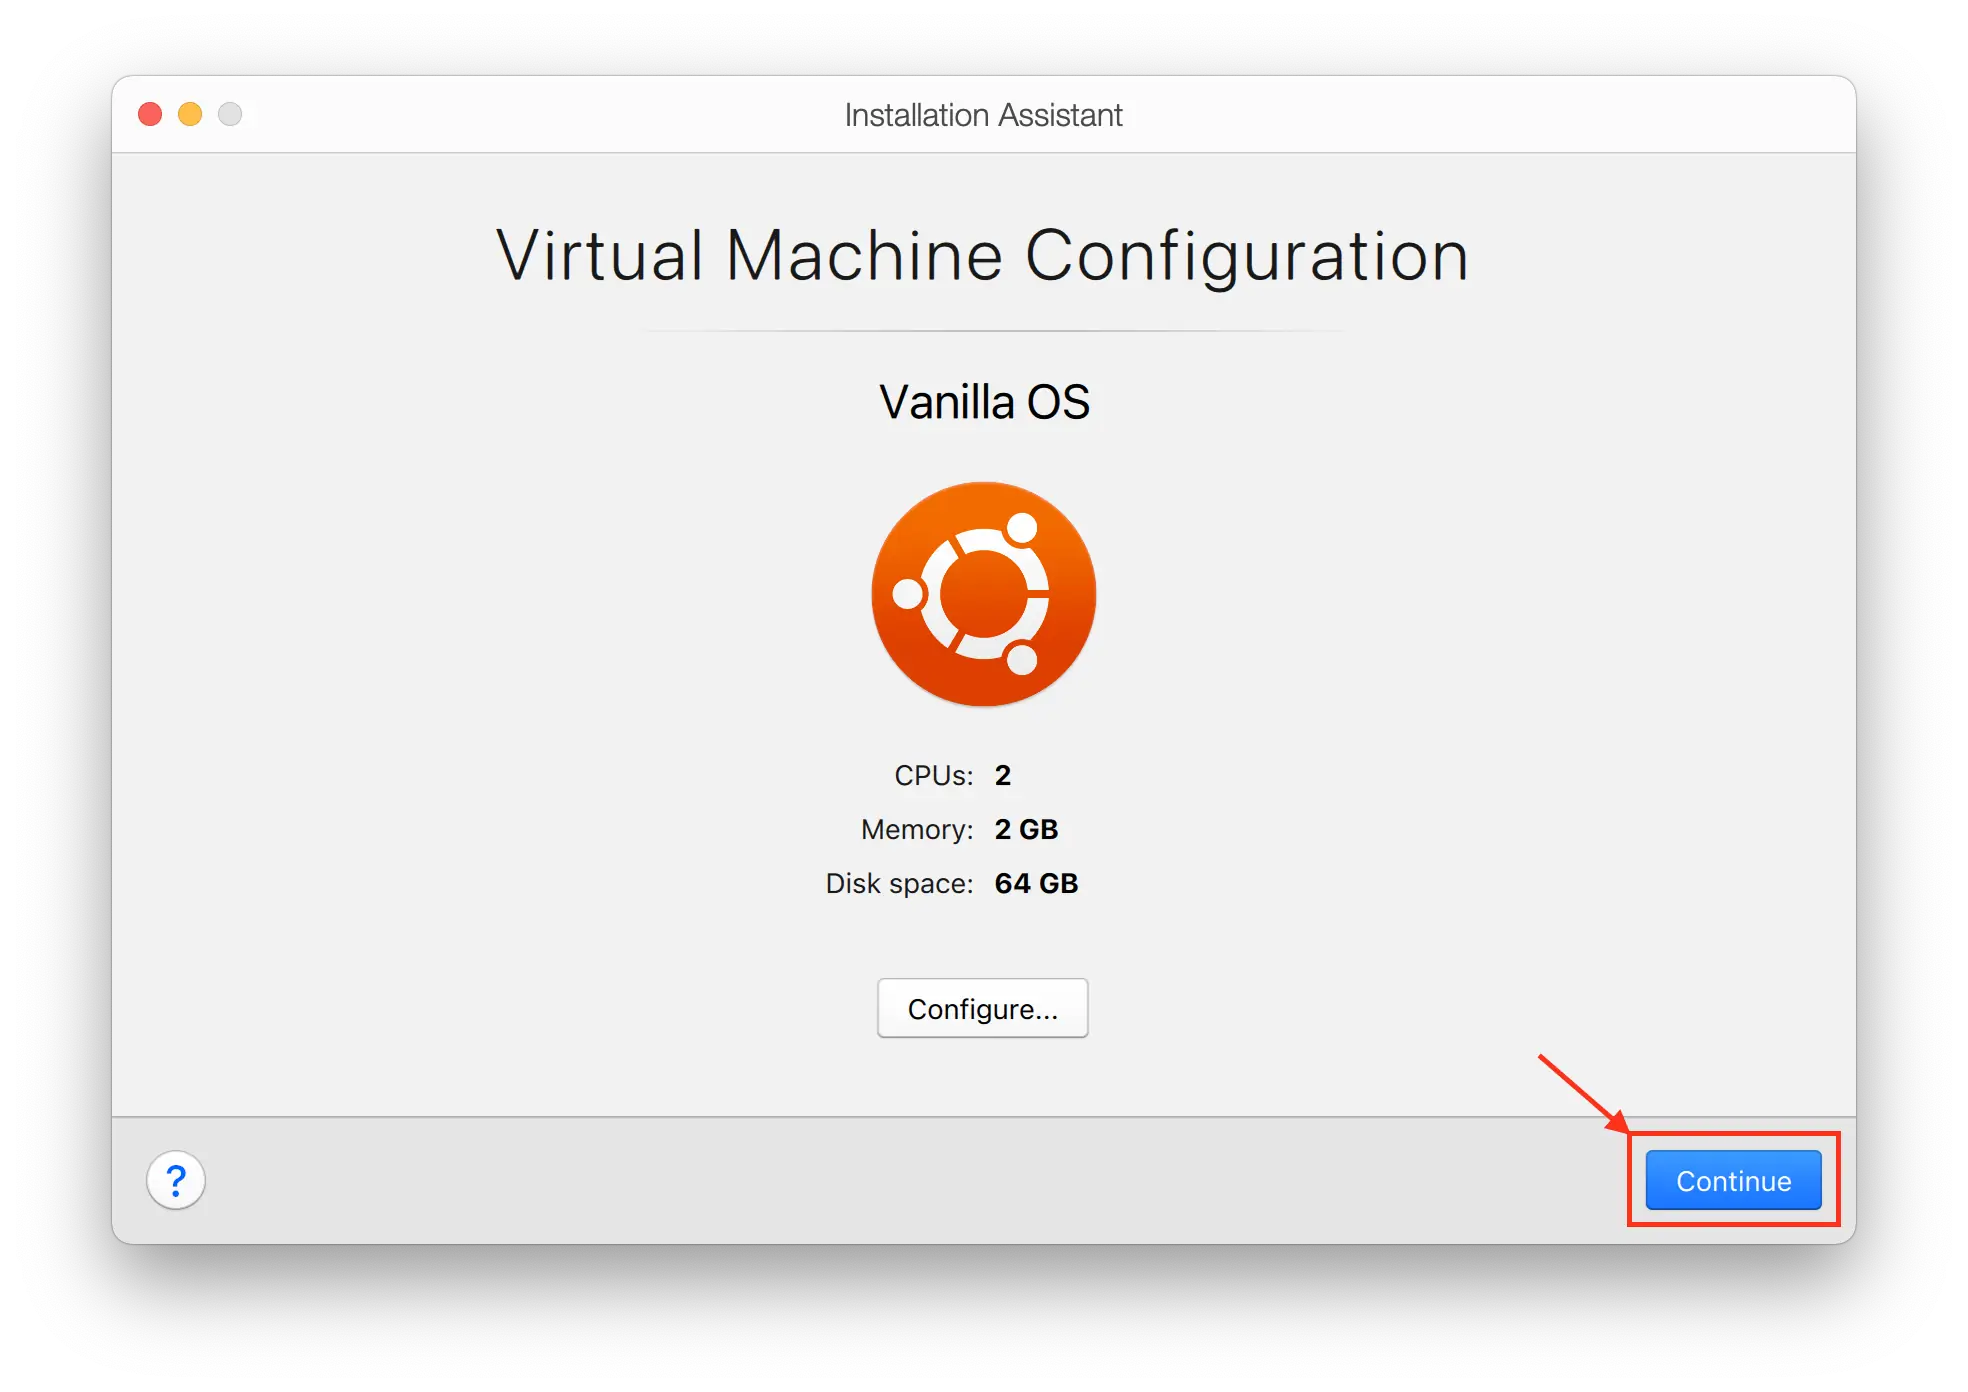
Leave the Template on “Unknown OS” and click on “Next”.
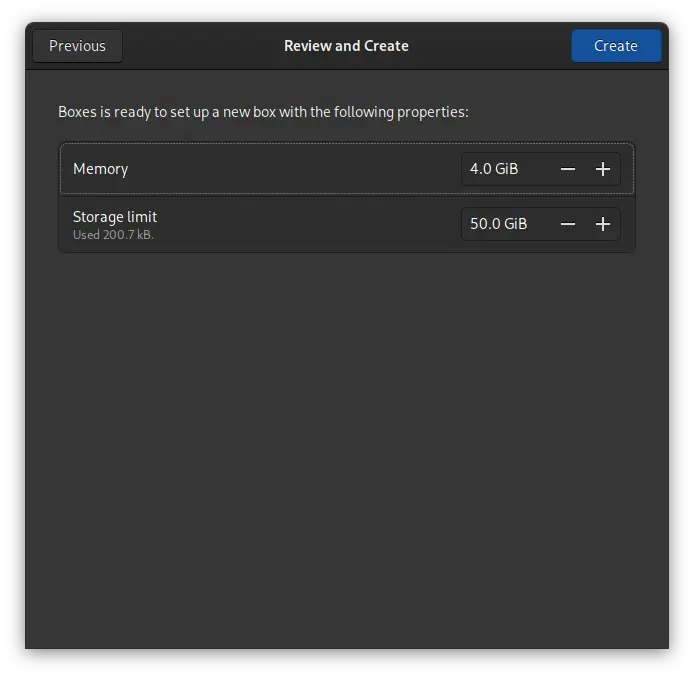
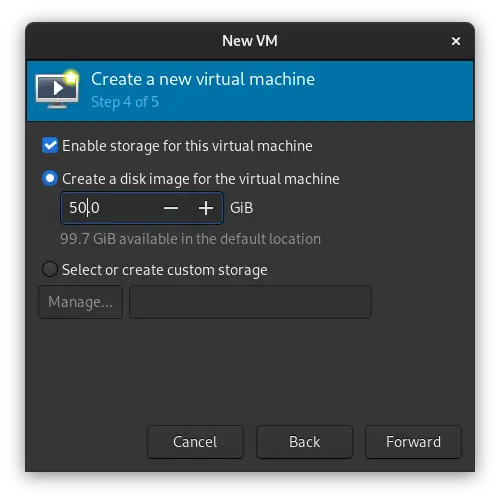
We recommend you use a minimum of 4GB Memory to ensure good performance. You’re also required to use a minimum of 50GB Storage for ABRoot. Now click on “Create”.
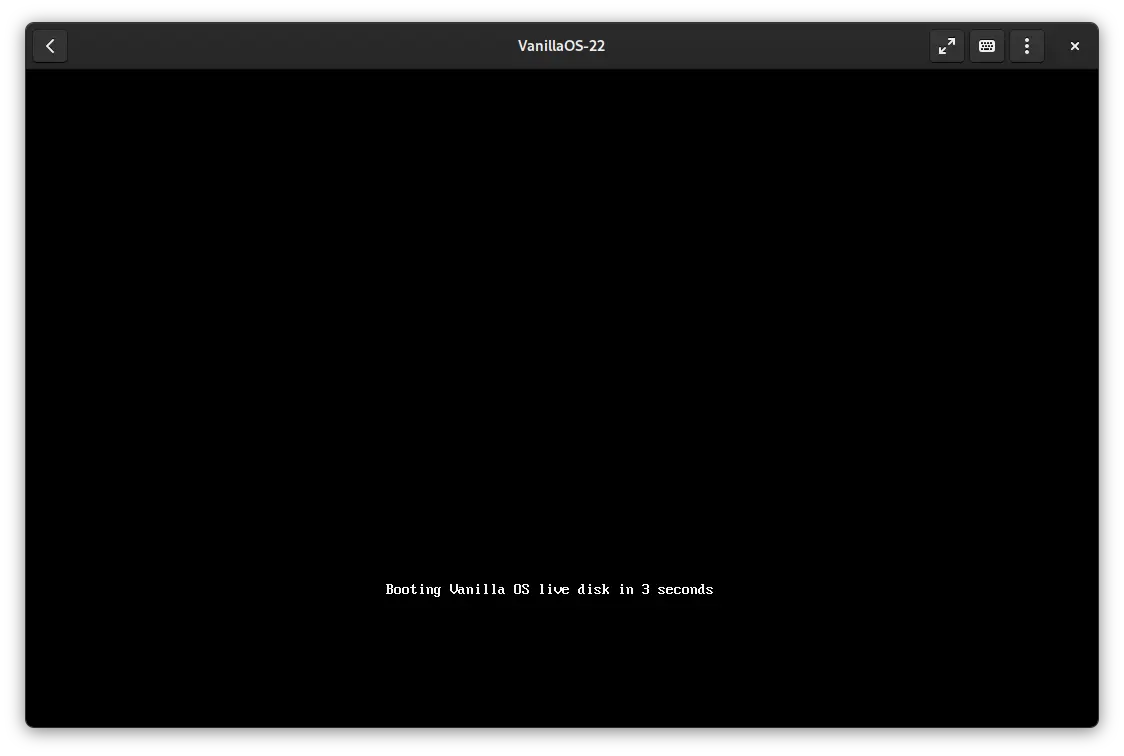
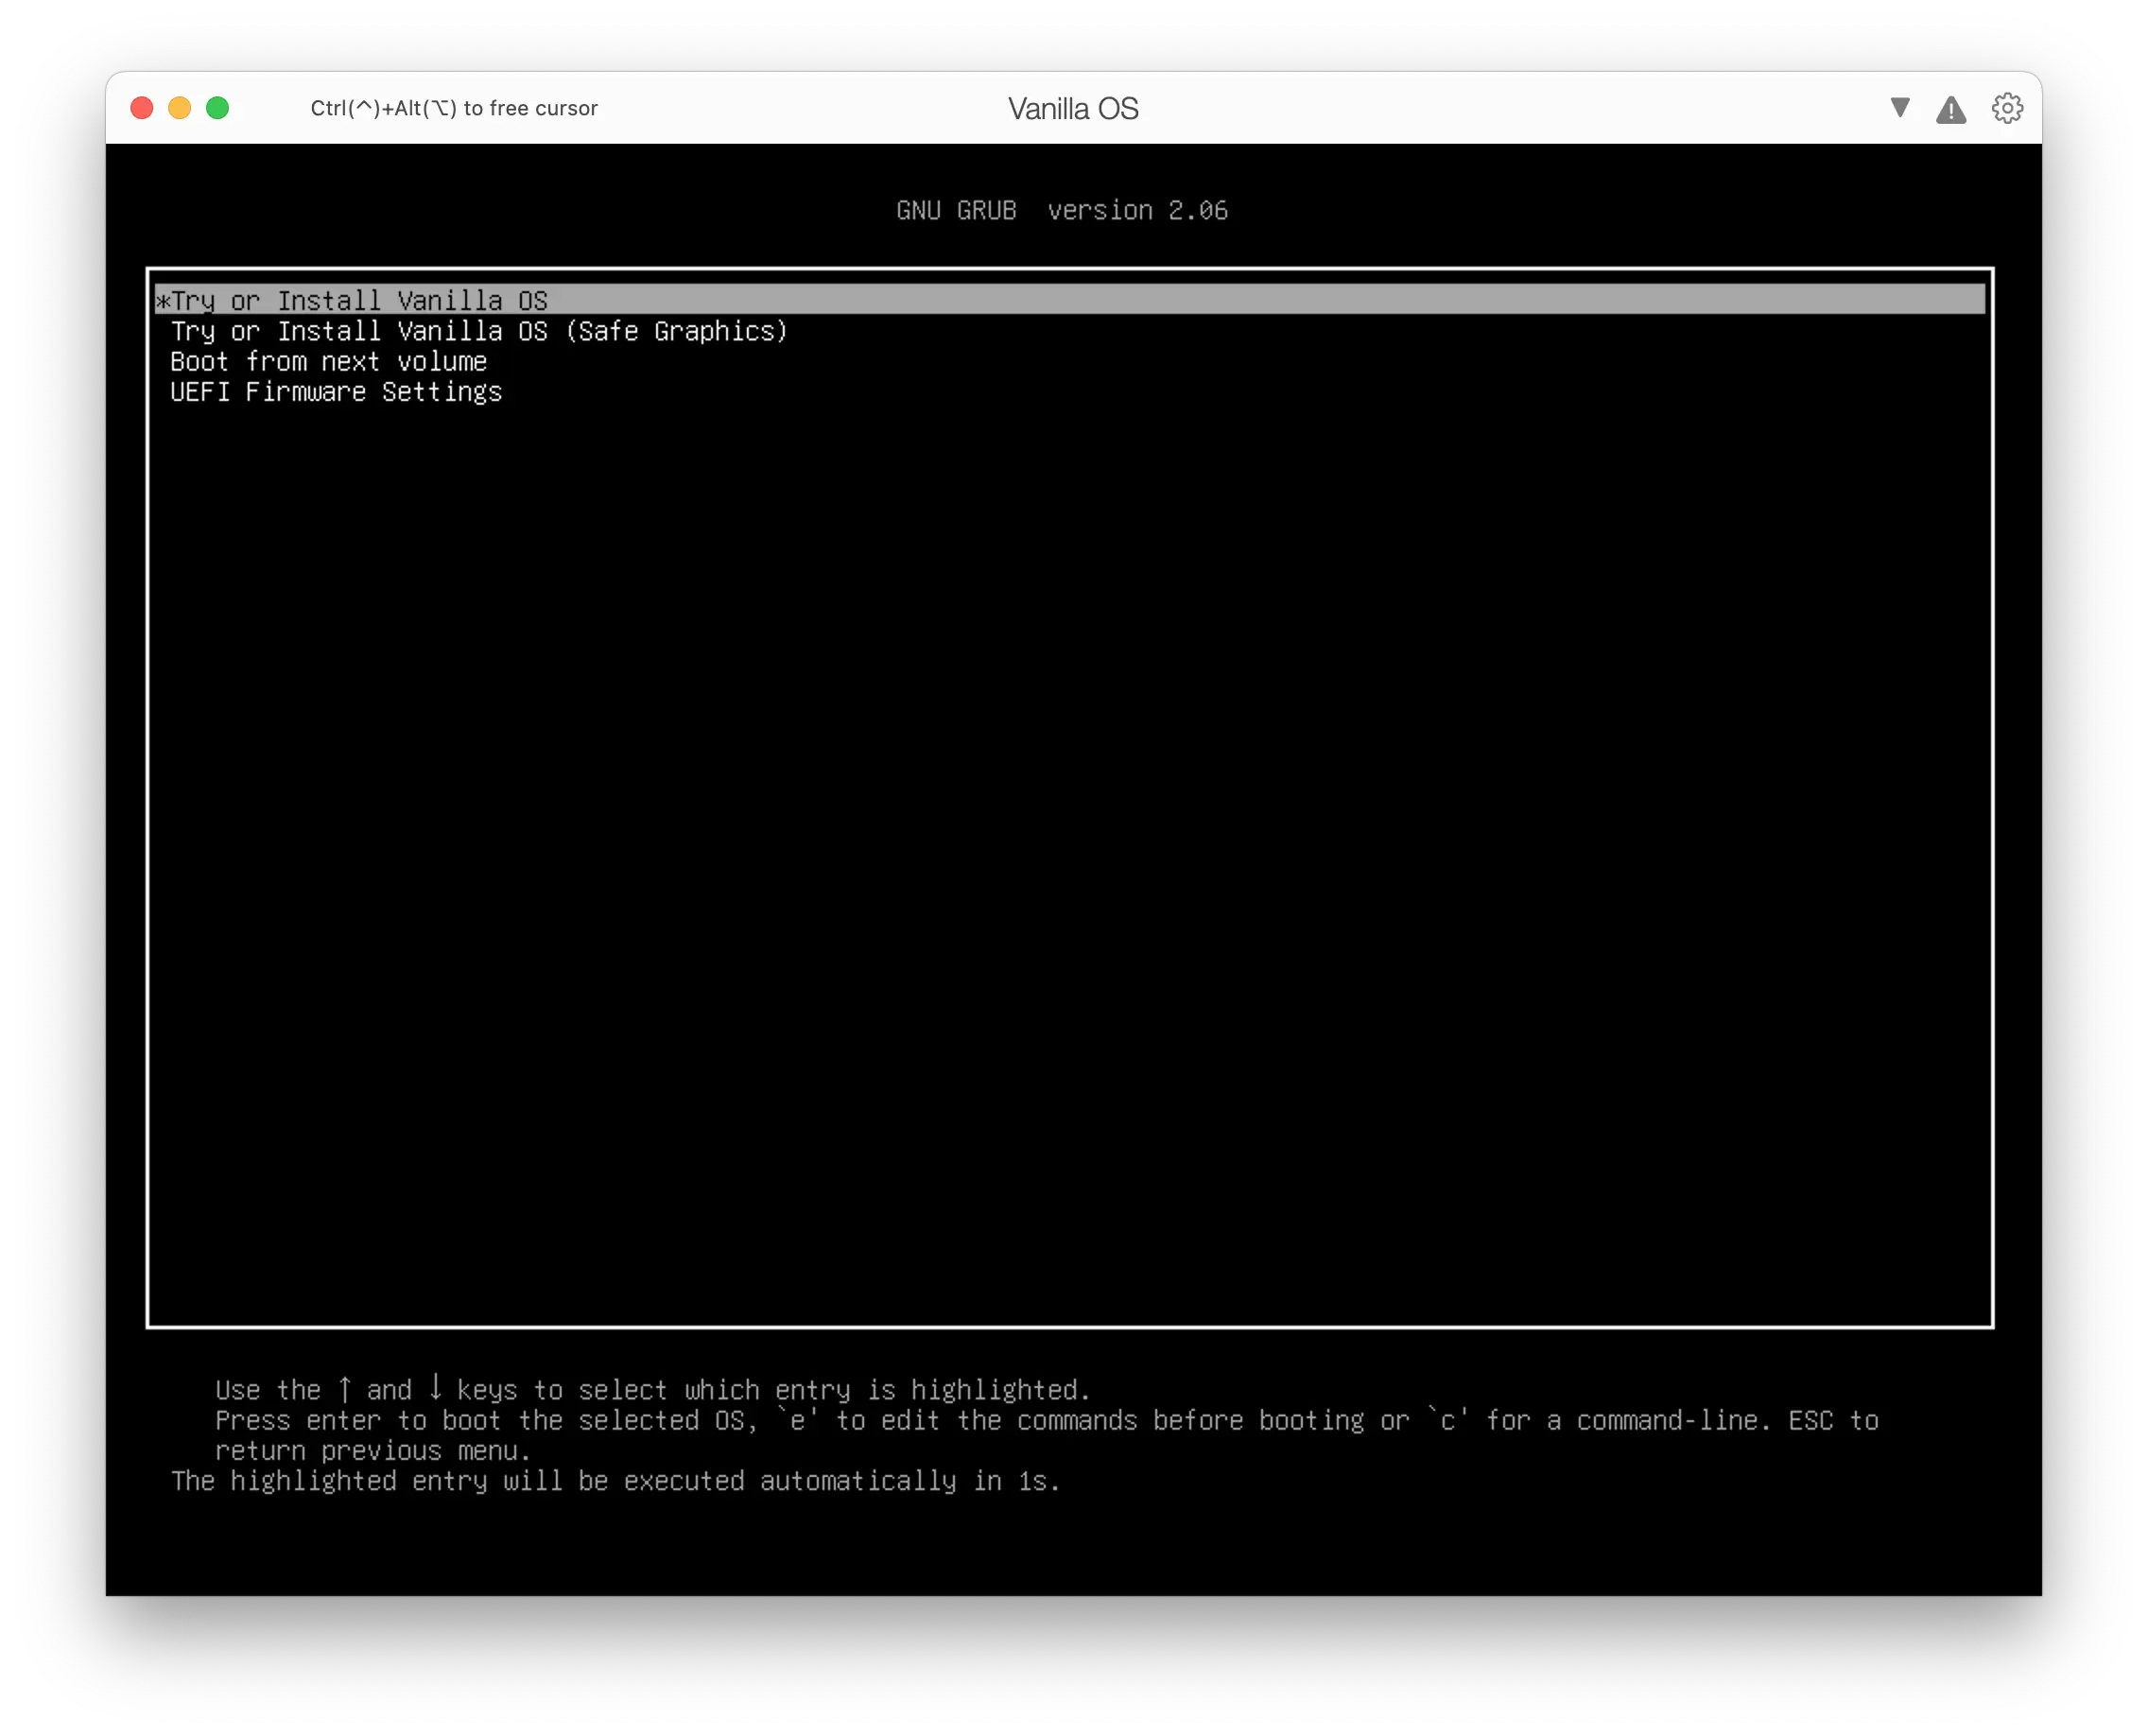
Vanilla OS will now boot.
For the installation steps, refer to this guide.
Install Vanilla OS in VMWare Workstation Player
Installation
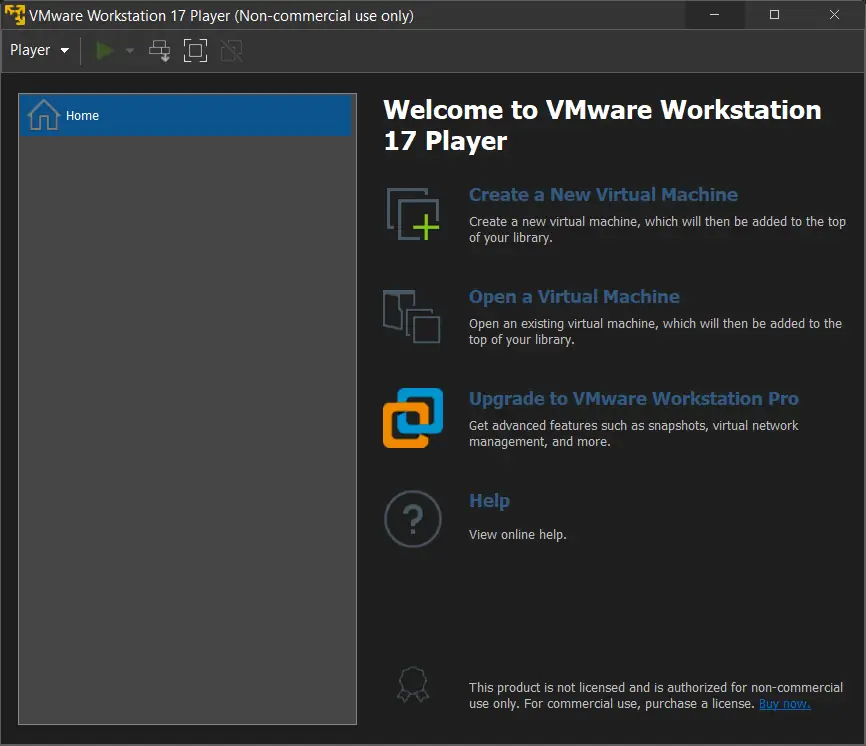
Open VMWare Workstation Player.
Click on “Create a New Virtual Machine”.
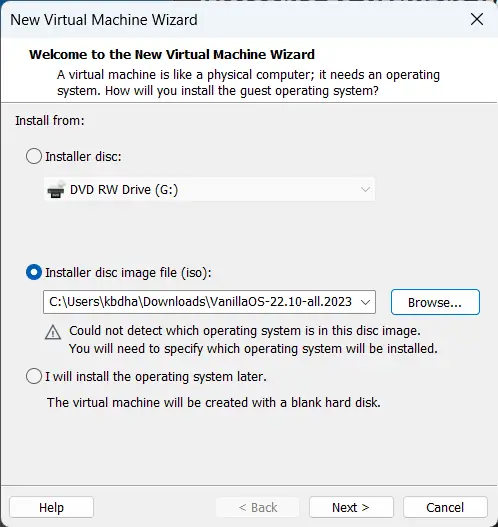
Select the ISO and click “Next”.
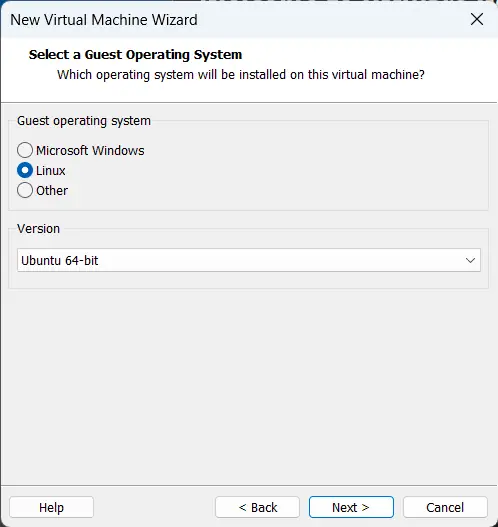
Select the Guest operating system as “Linux” with Version “Ubuntu 64-bit” and click on “Next”.
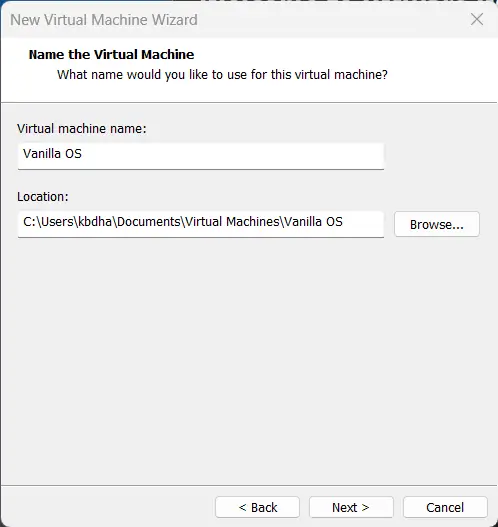
Specify the name of your virtual machine and the location to store its files. Then click on “Next”.
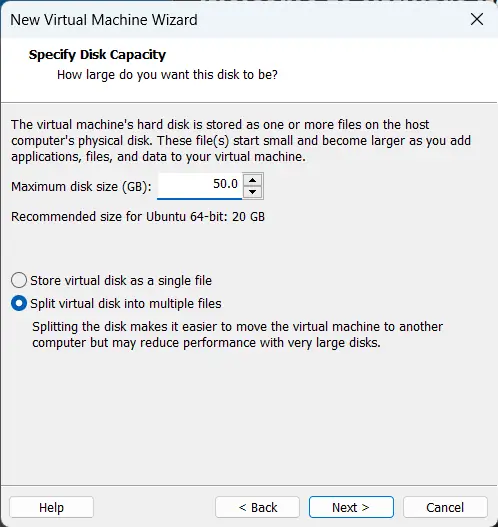
Select a minimum of 50GB for Vanilla OS, this is required for ABRoot.
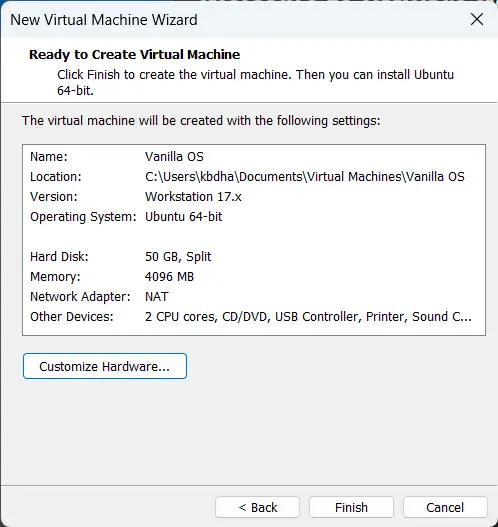
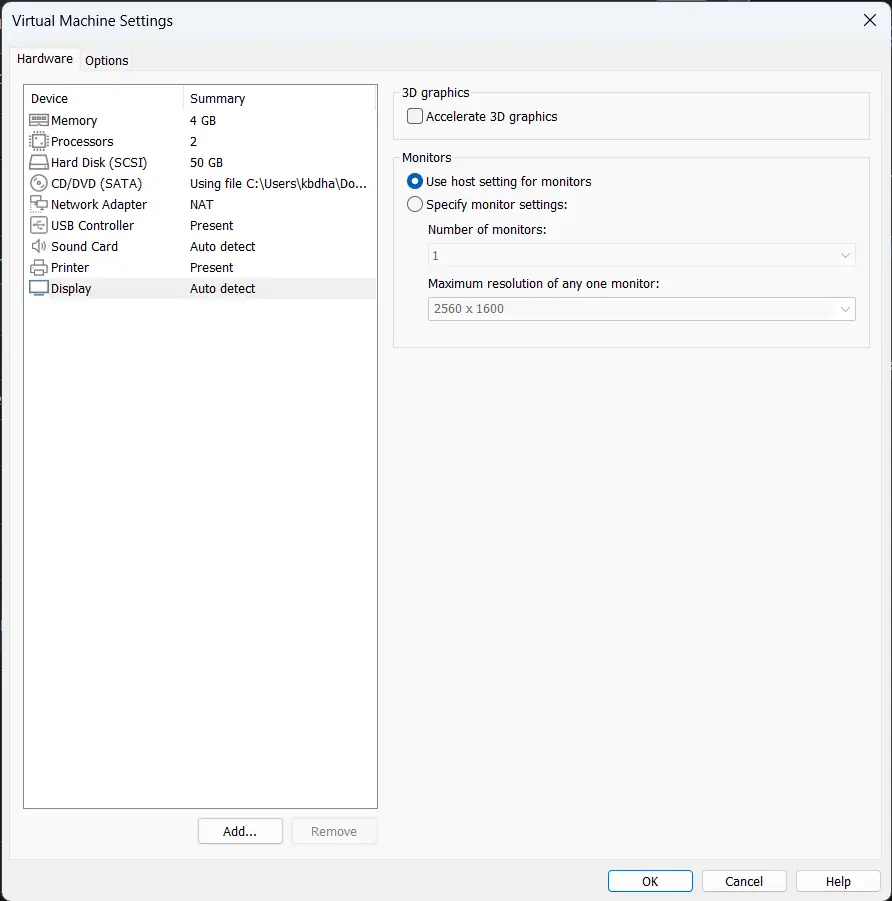
Confirm your configuration, then click on “Finish”. If required, select “Customize Hardware…” then go to “Display” and disable/untick “Accelerate 3D graphics”.
Now, click on the “Start” (Play) button.
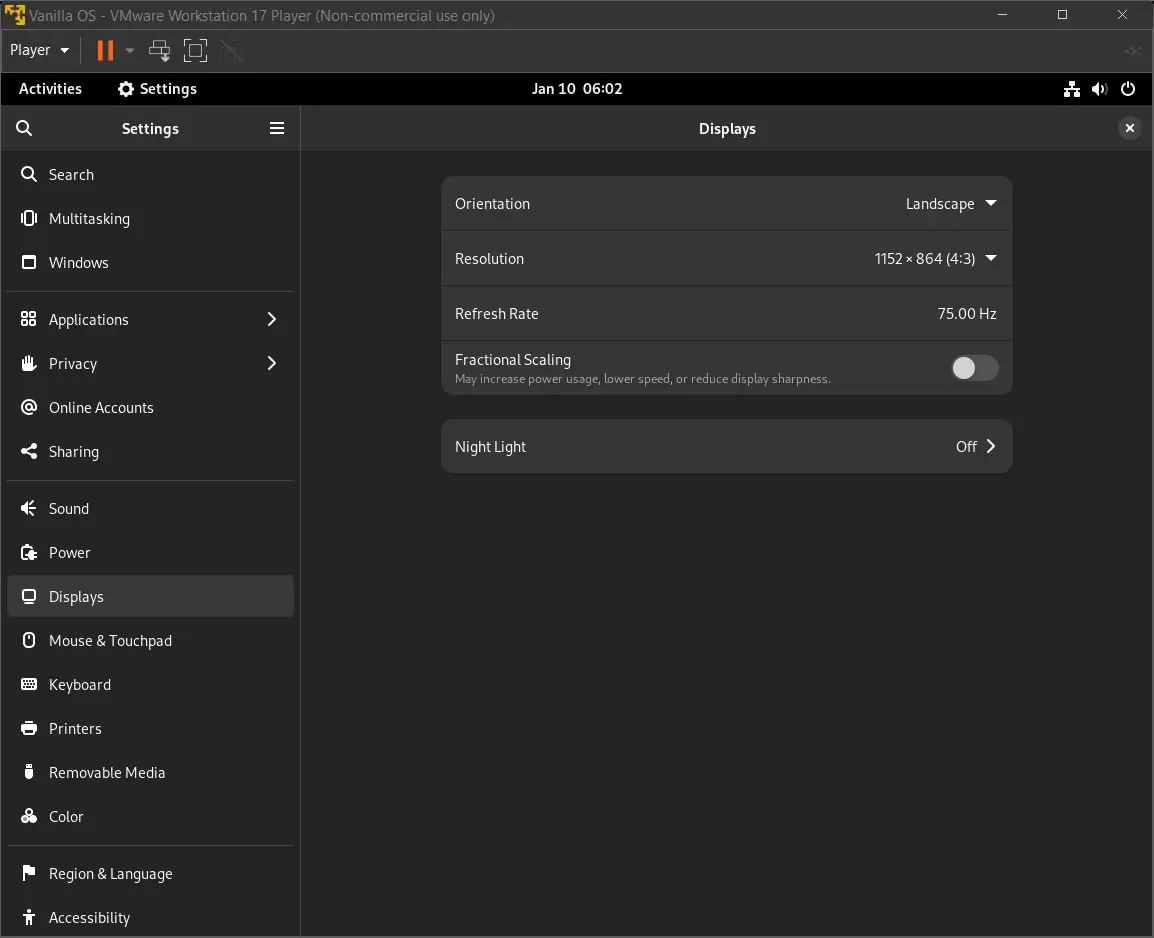
Inside the live session, click on the top right corner and click on the “Settings” icon. Alternatively, you can press on the windows/super key to open the “Activities overview” and then type “Settings” to access it. Now, Navigate to “Displays”, under “Resolution” select a different resolution to adjust the window size initially.
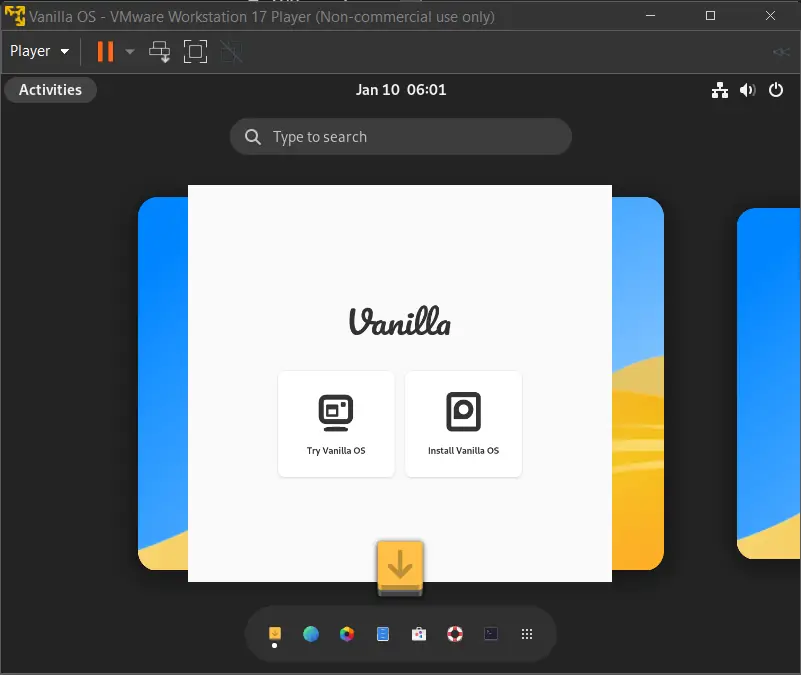
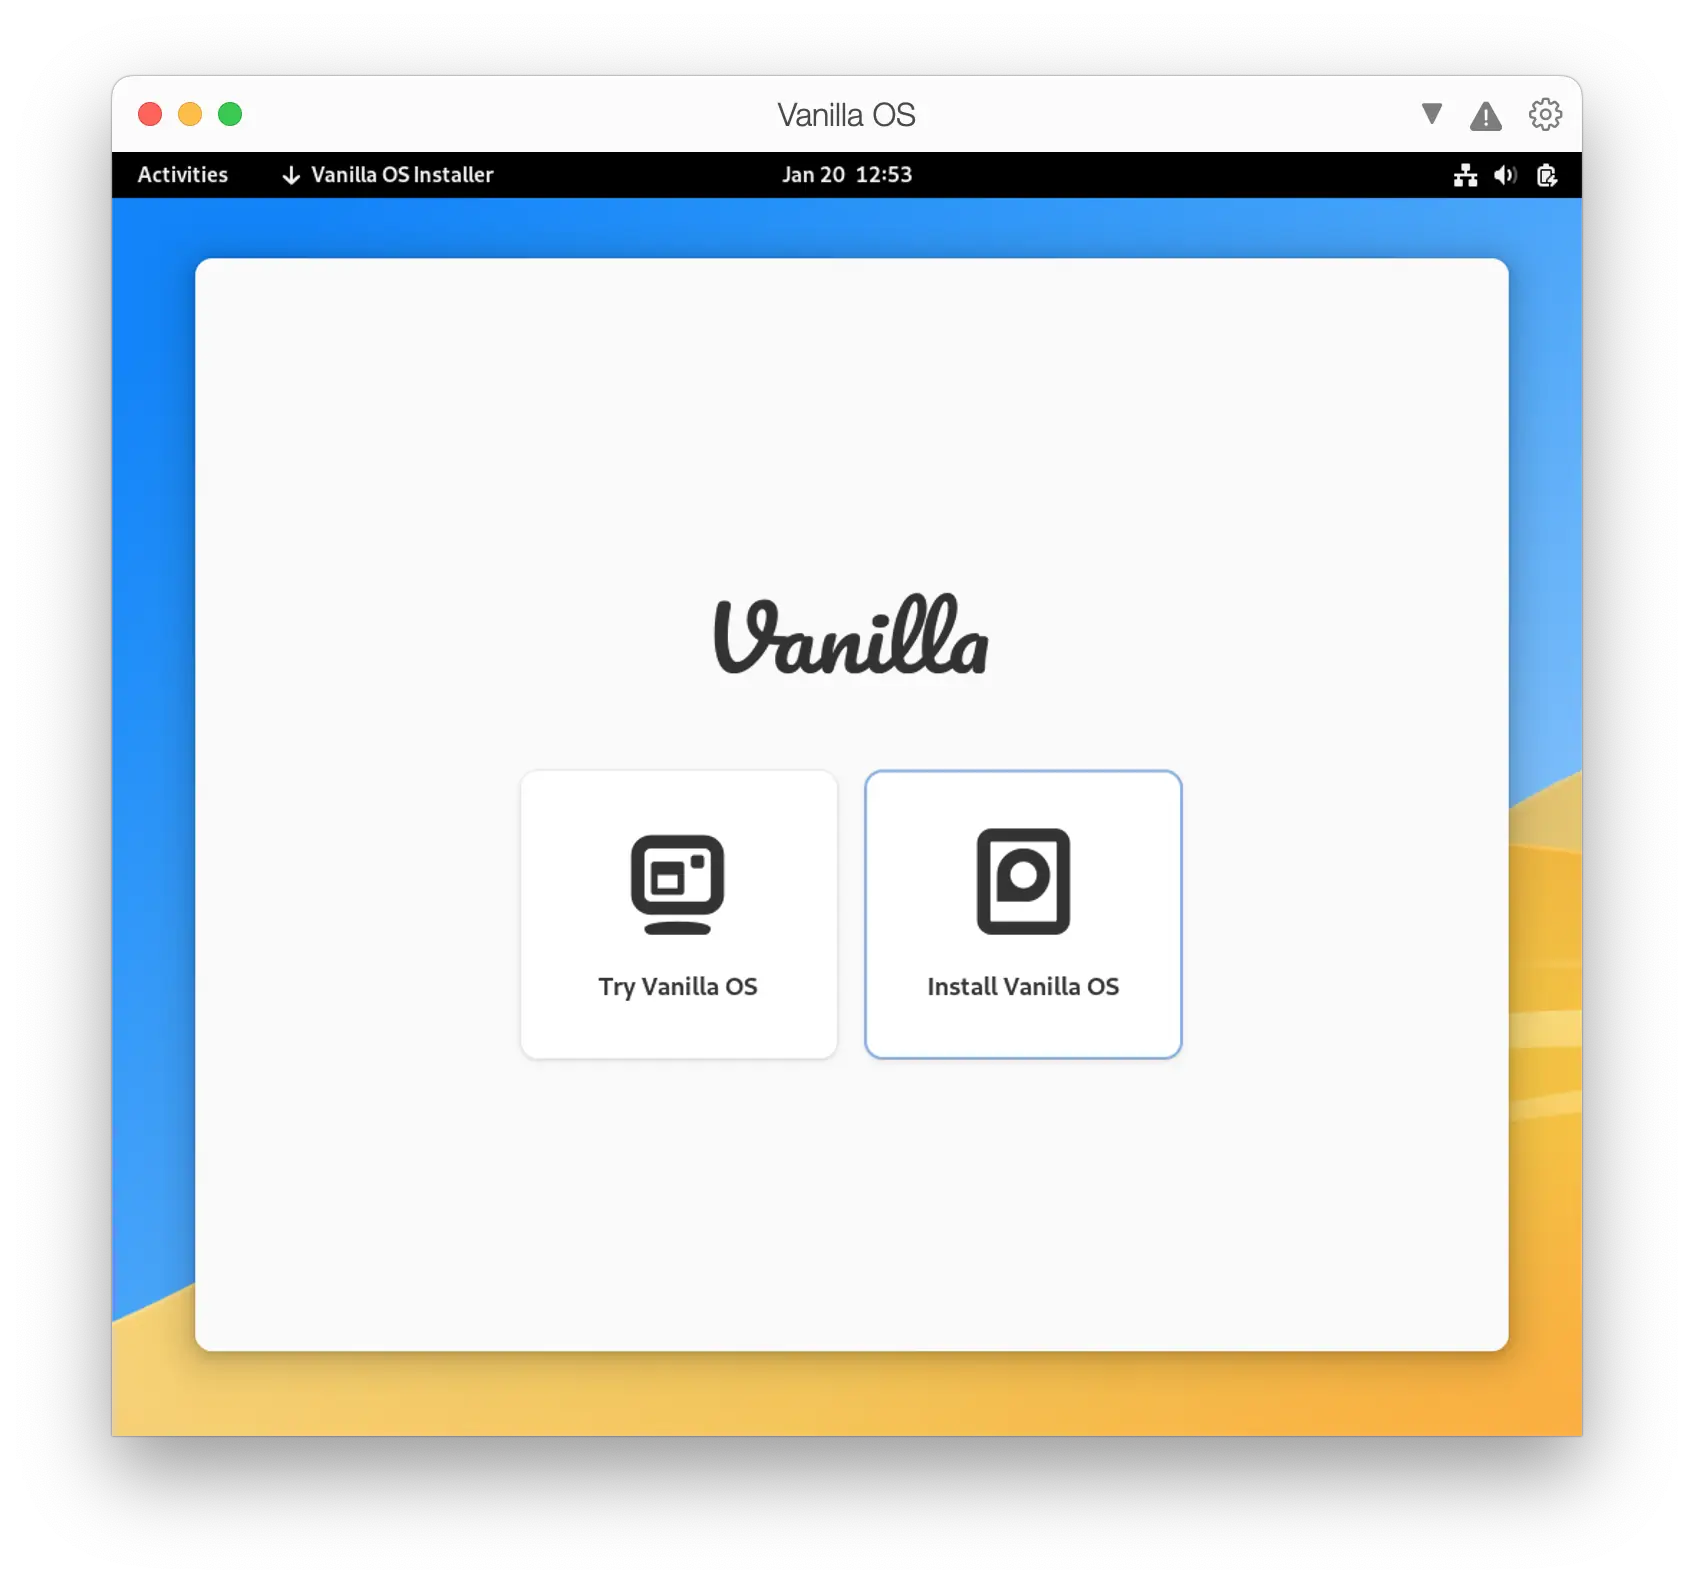
Now, proceed with the Vanilla OS Installation.
For additional installation steps, refer to this guide.
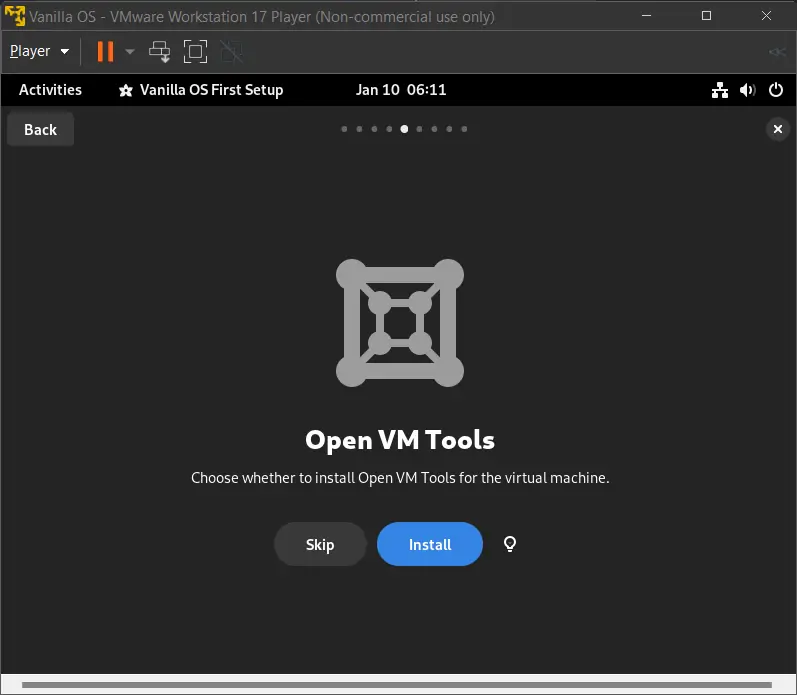
In the first setup, click “Install” on the Open VM Tools page to install the necessary packages for clipboard sharing, custom resolution, etc.
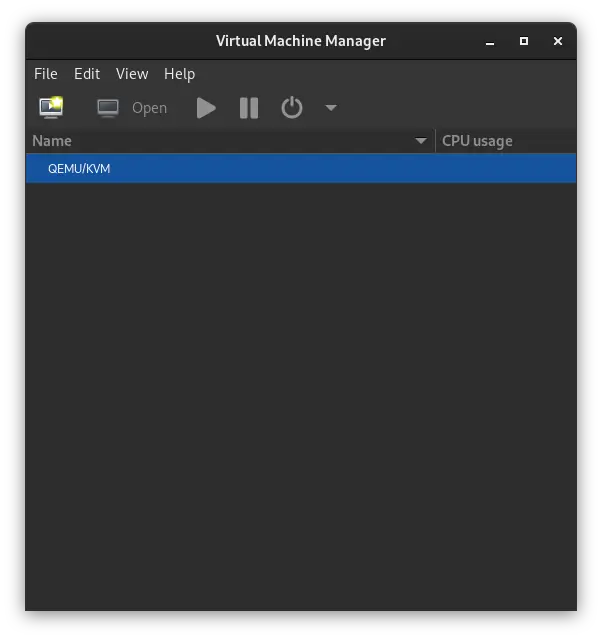
Install Vanilla OS in Virtual Machine Manager
Prerequisites
-
A Virtual Machine Manager Installation from here.
-
The necessary QEMU dependencies installed.
-
Install the Vanilla OS ISO from here.
Installation
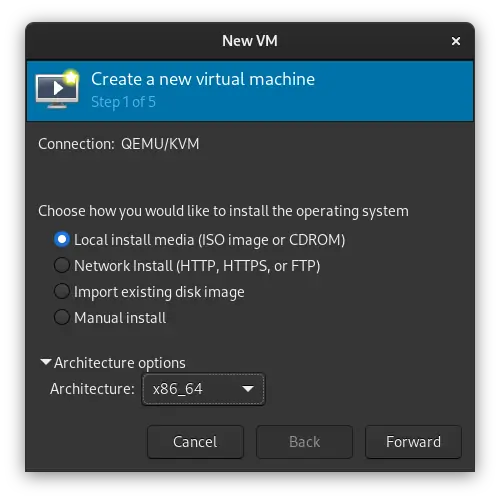
Launch Virtual Machine Manager from the App Grid. Alternatively, you can run it with the following command from the terminal:-
virt-manager
Click on the “Create a new virtual machine” button in the left corner below the top bar.
Click “Local install media” and confirm the architecture as x86_64. Then, click on “Forward”.
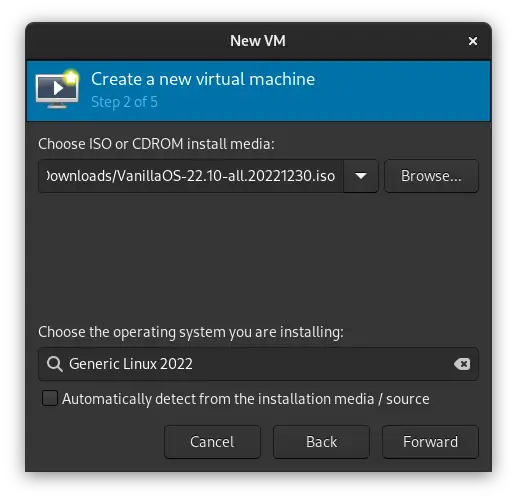
Select the ISO location of Vanilla OS and choose “Generic Linux
Note:- <year> is a placeholder meaning select the most recent year.
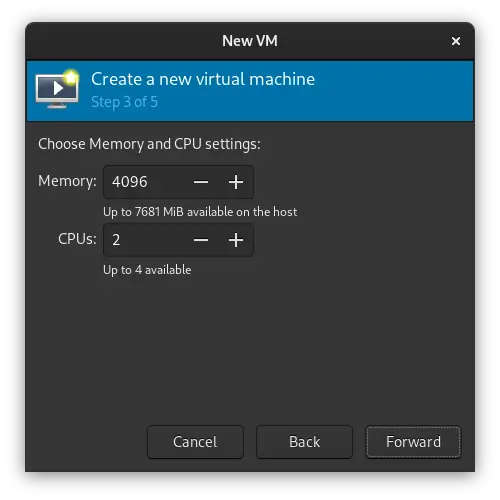
Allocate the required Memory and CPUs and click on “Forward”.
Create a disk image for a minimum of 50 GB and then click “Forward”.
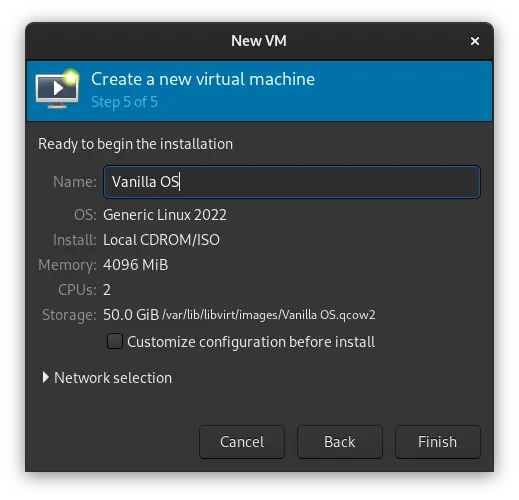
Specify the name of your virtual machine and confirm other options and click on “Finish”.
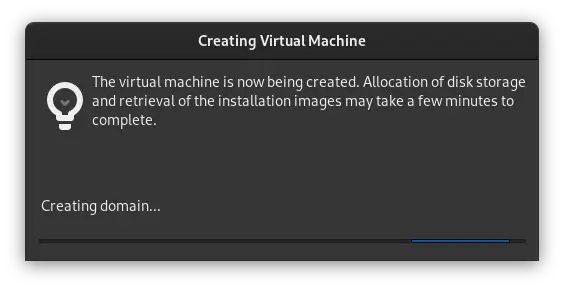
Now, wait for the virtual machine to get created.
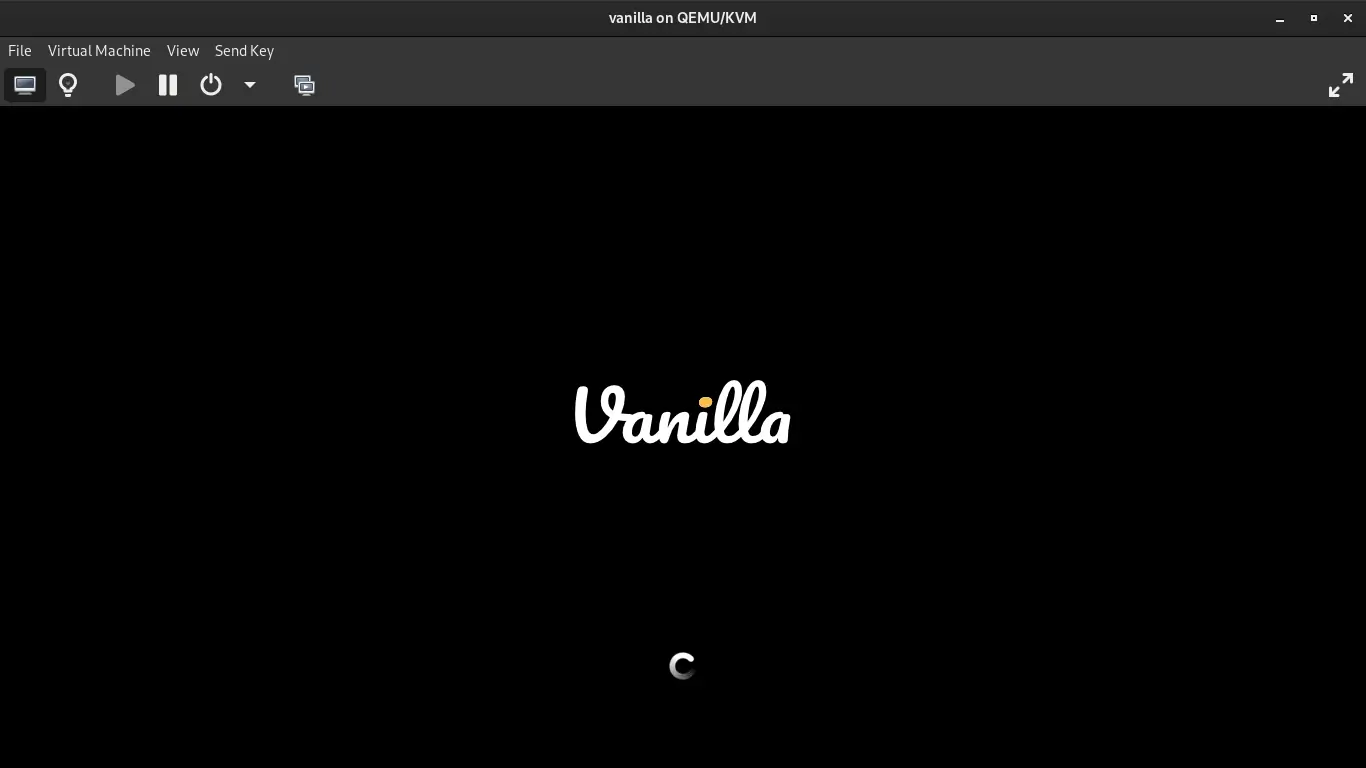
Now, “Open” the virtual machine in the Graphical console.
When the VM is opened, proceed with the Vanilla OS Installation.
For additional installation steps, refer to this guide.
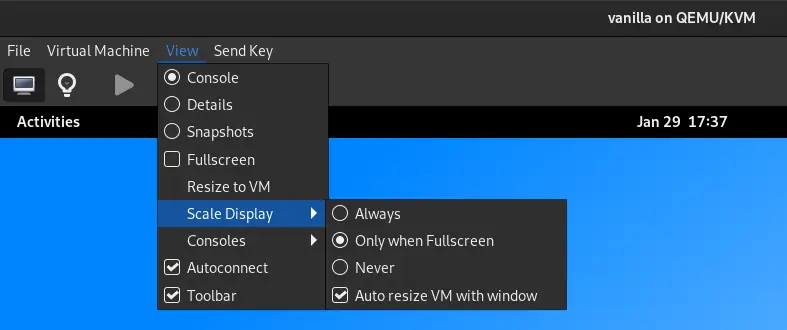
Optionally:- You can enable “Auto resize VM with window” under the “Scale Display” menu in the “View” tab.
Install Vanilla OS in Parallels Desktop
Prerequisites
-
A licensed copy of Parallels Desktop.
-
Install the Vanilla OS ISO from here.
Installation
Open Parallels Desktop and follow the on-screen prompts. Skip installing Windows 11 (for now) if this is your first time using Parallels software.
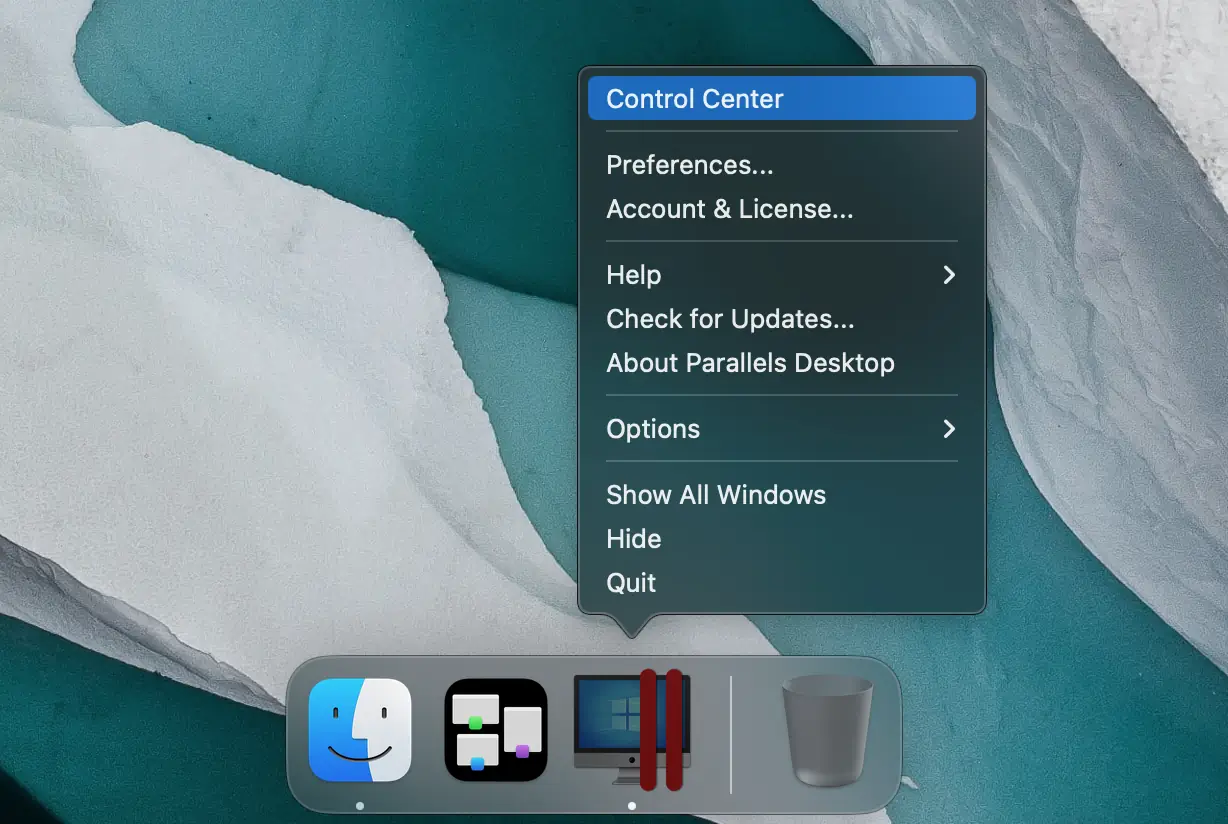
Navigate to the Parallels Desktop Control Center, and select the “+” button to add a new virtual machine.
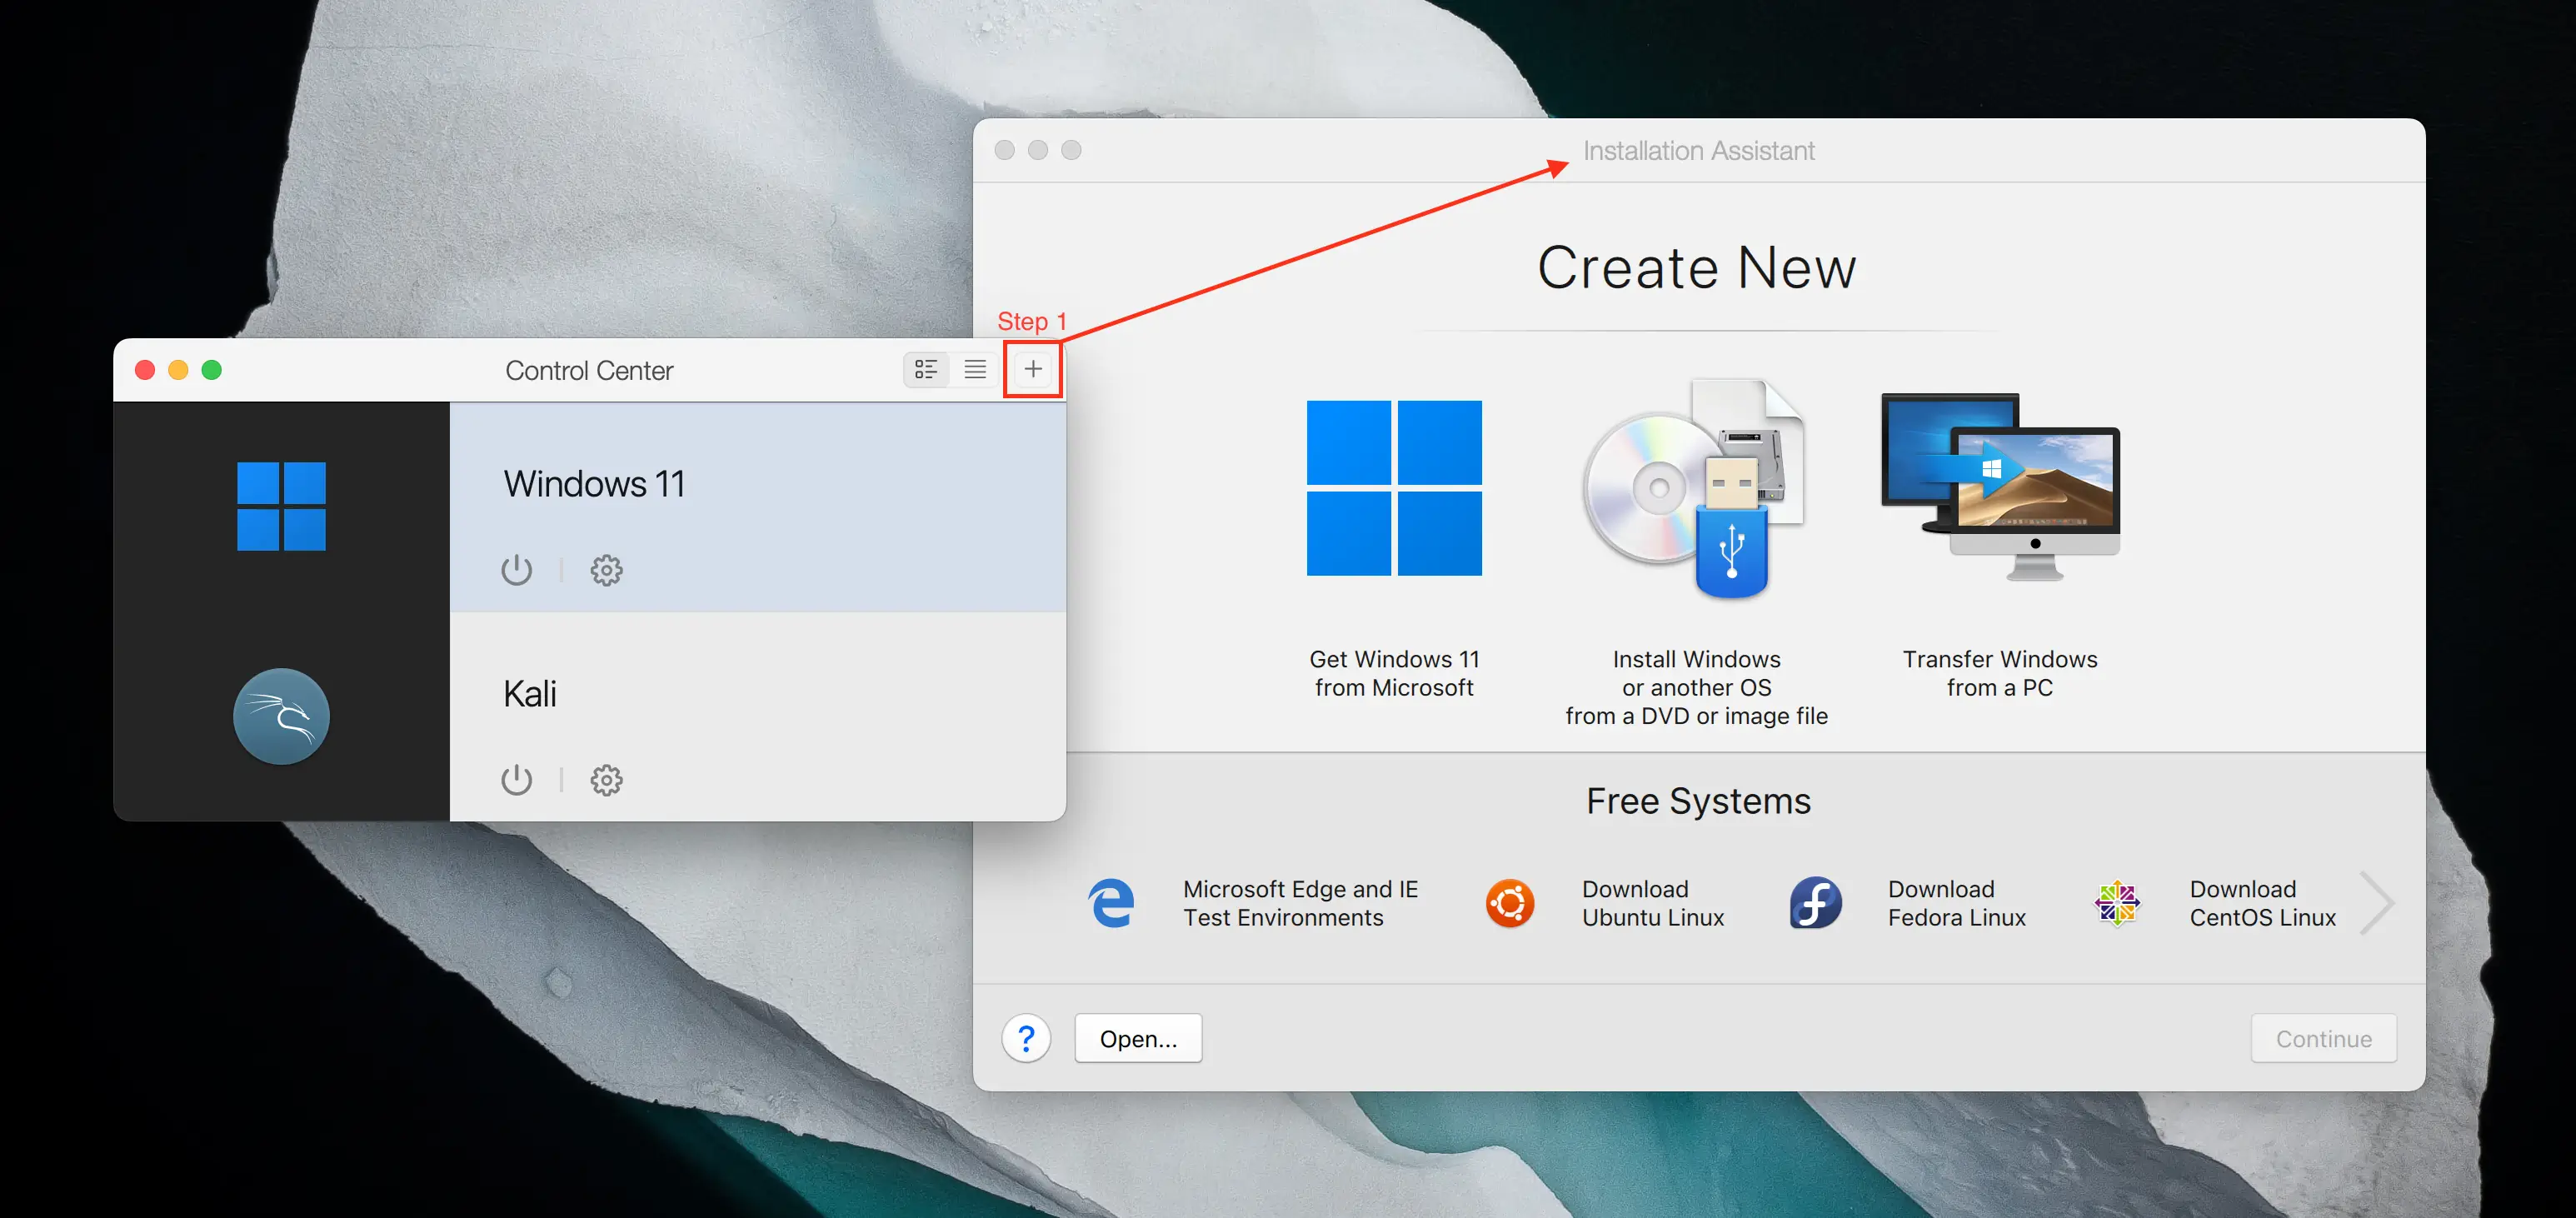
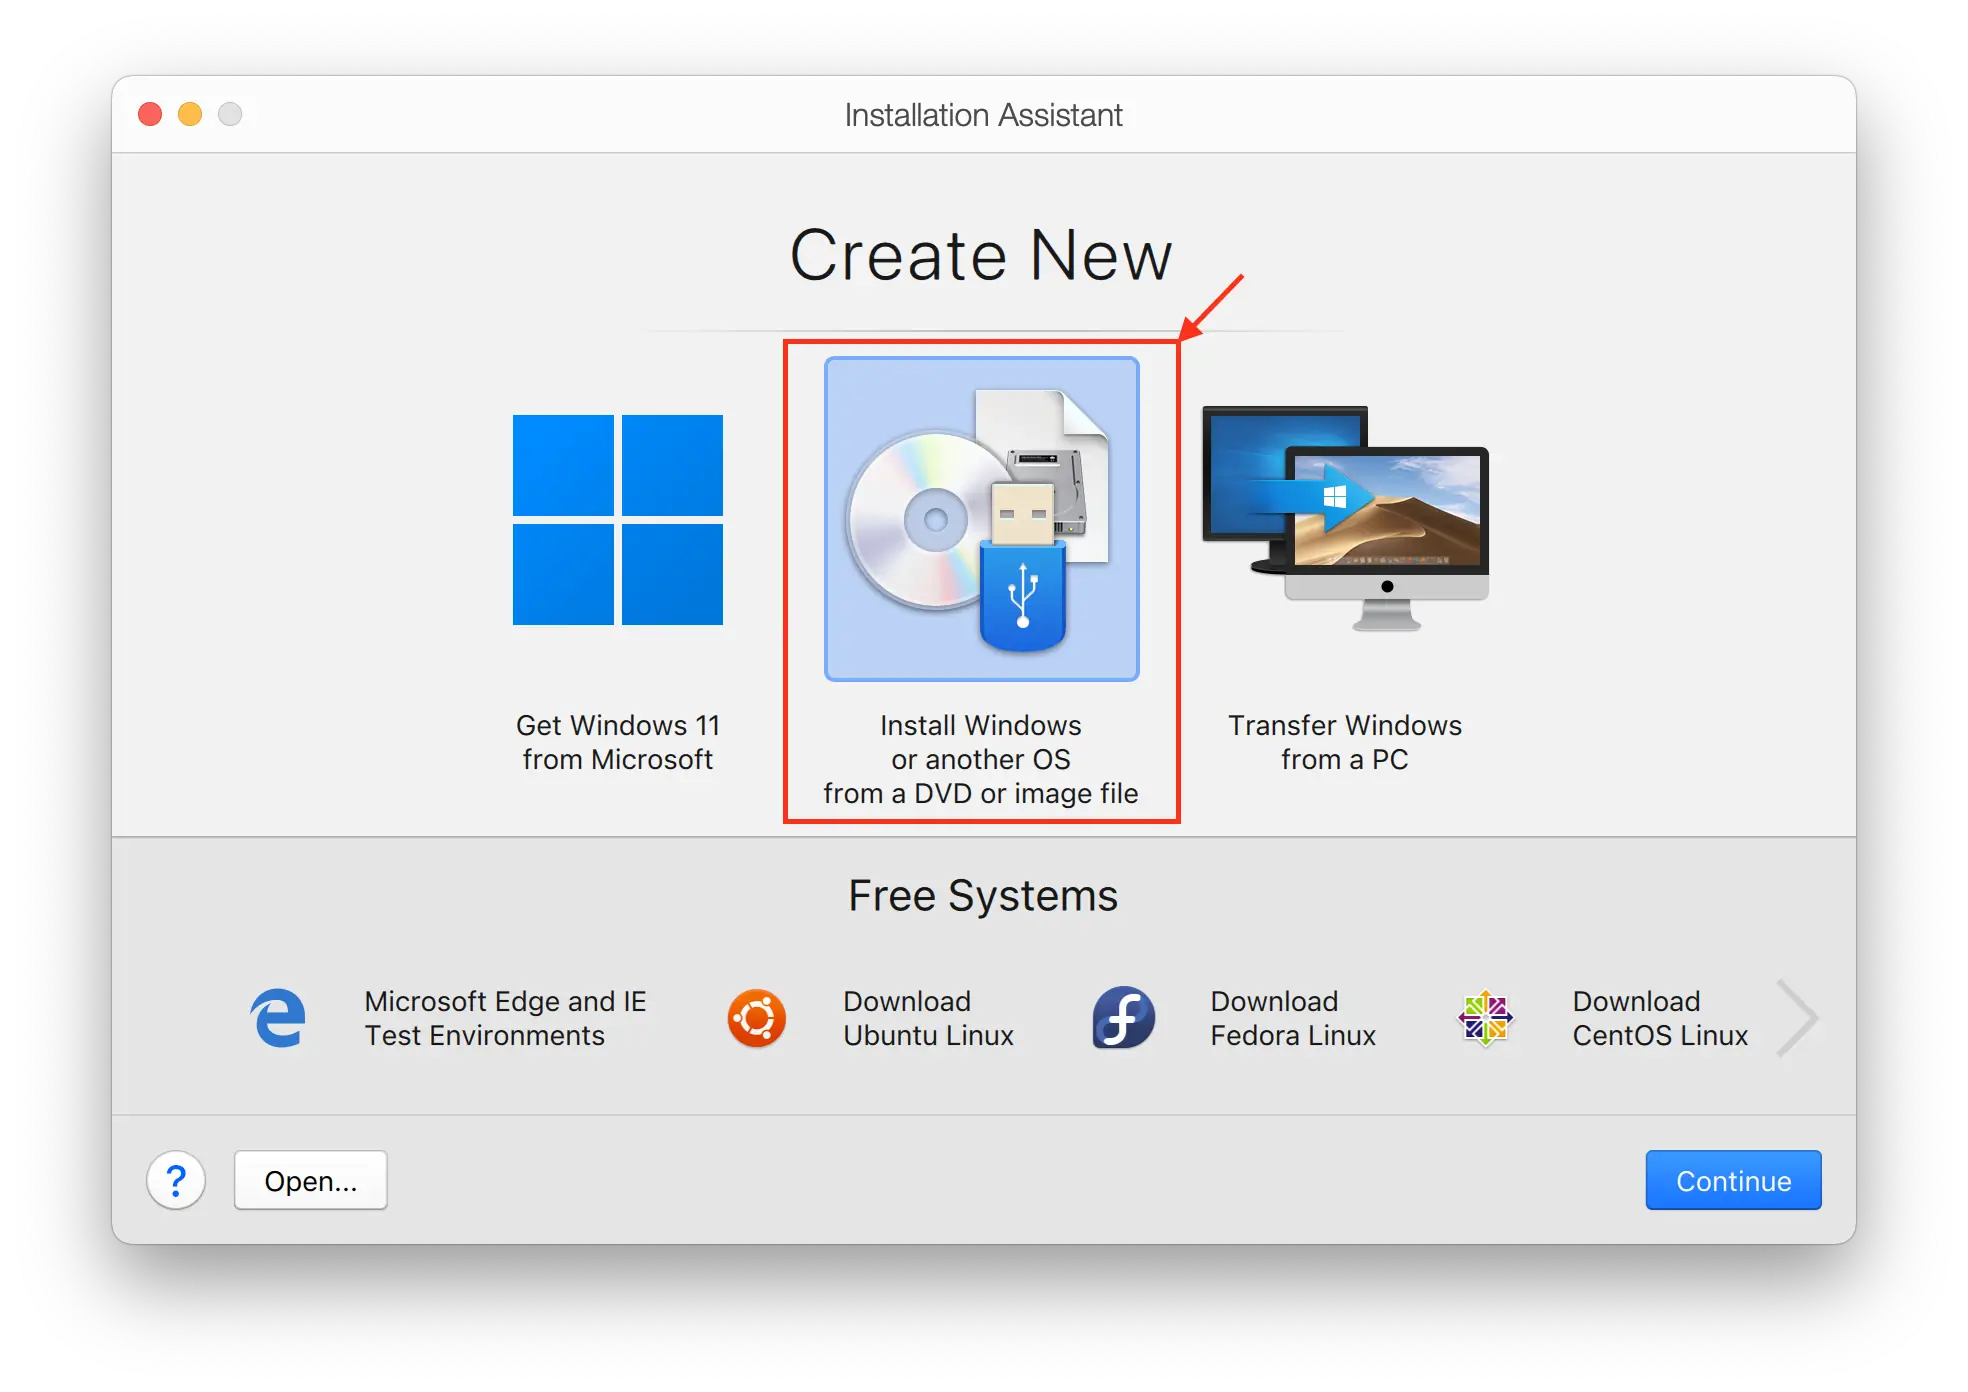
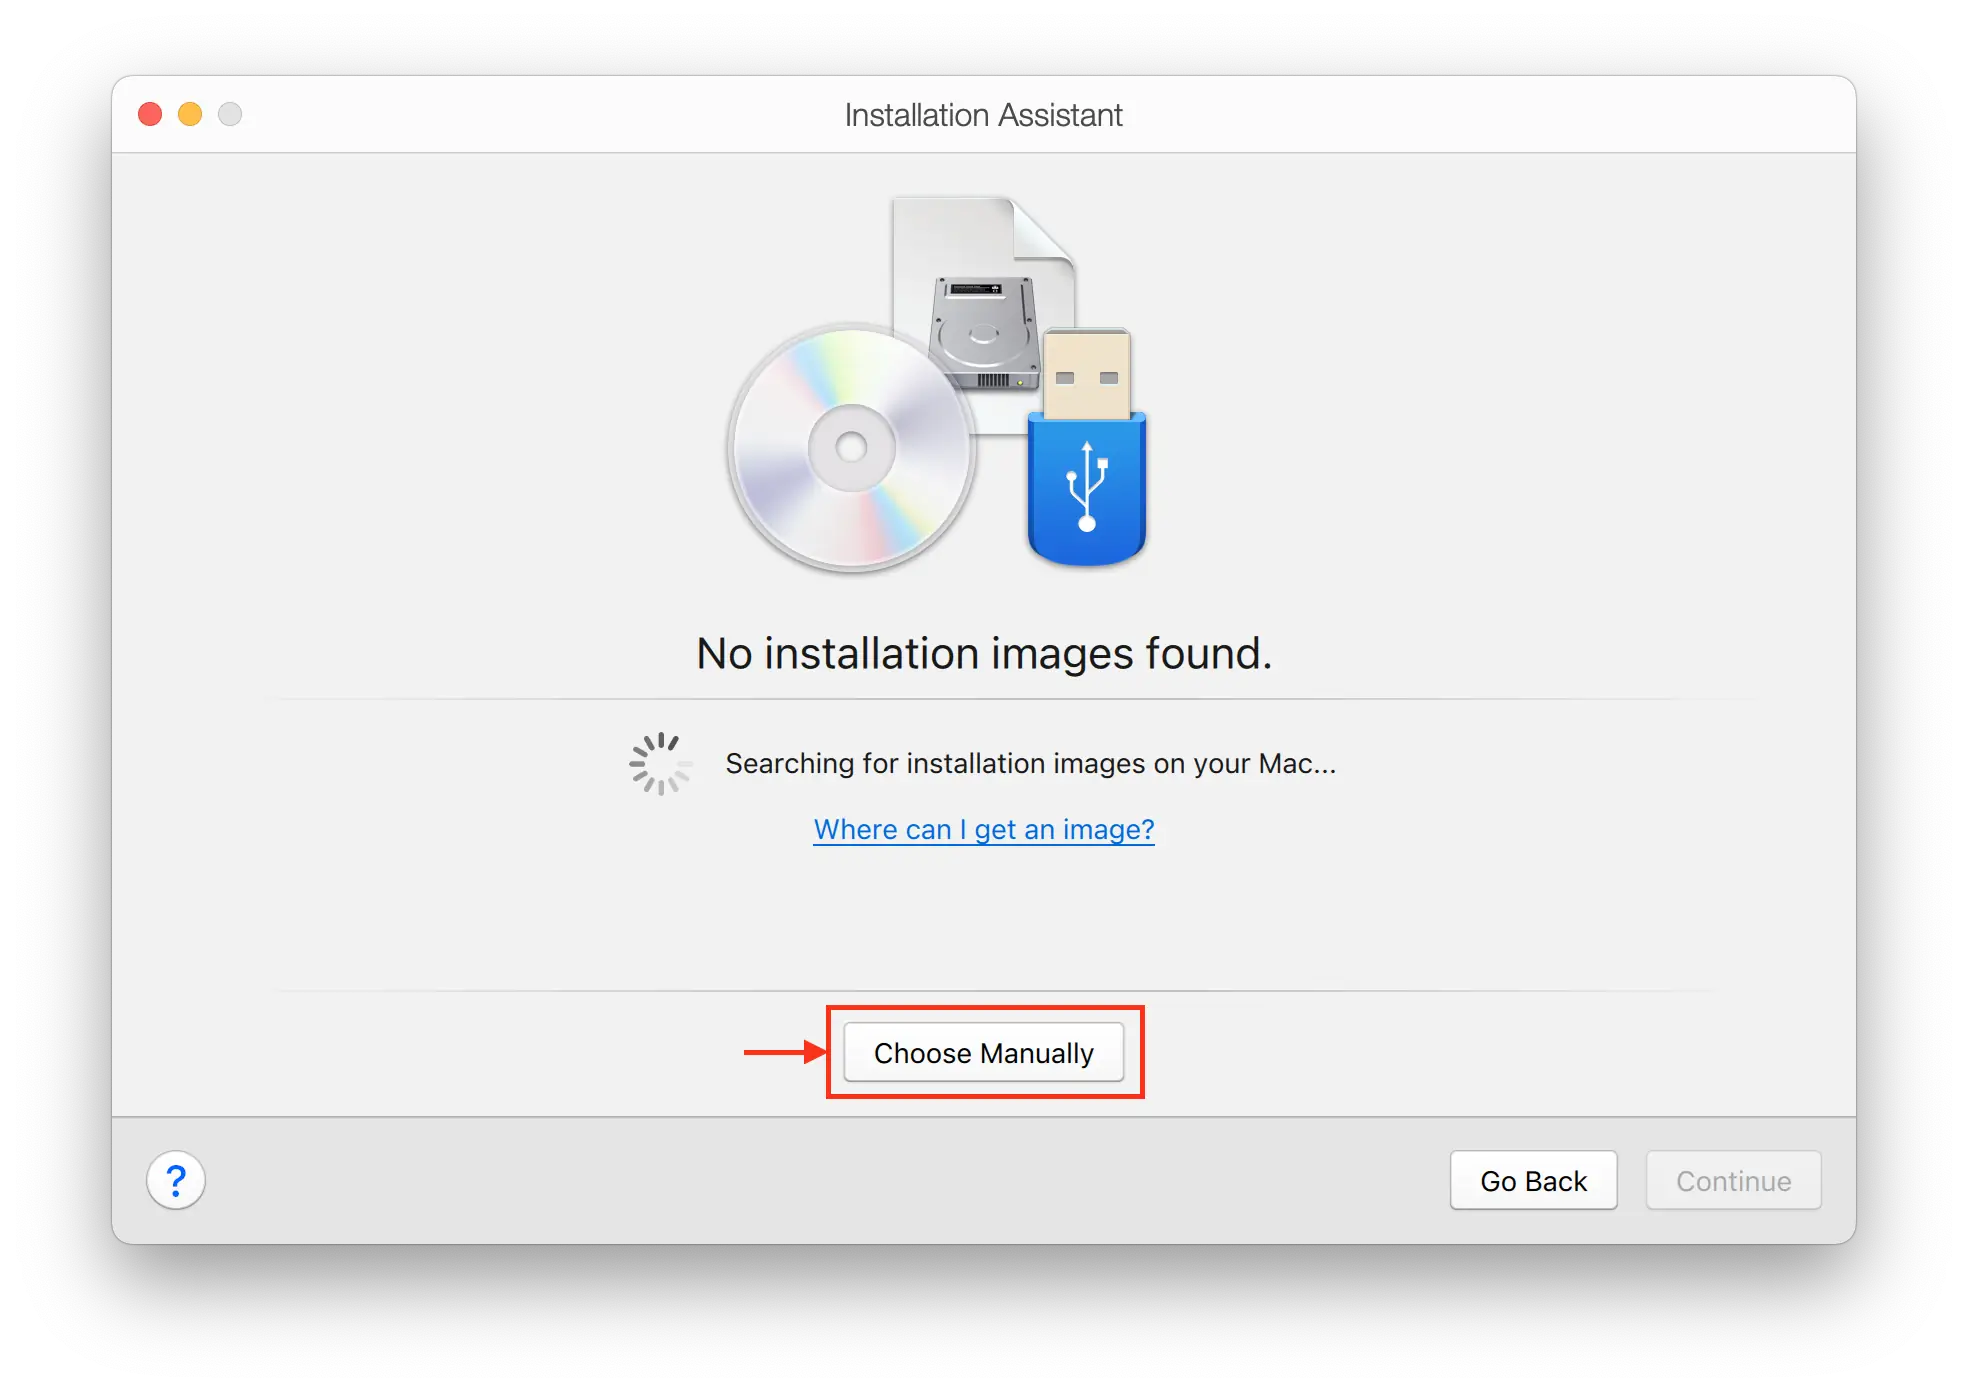
From the Installation Assistant, select “Install Windows or another OS from a DVD or image file”.
Select “Choose Manually”.
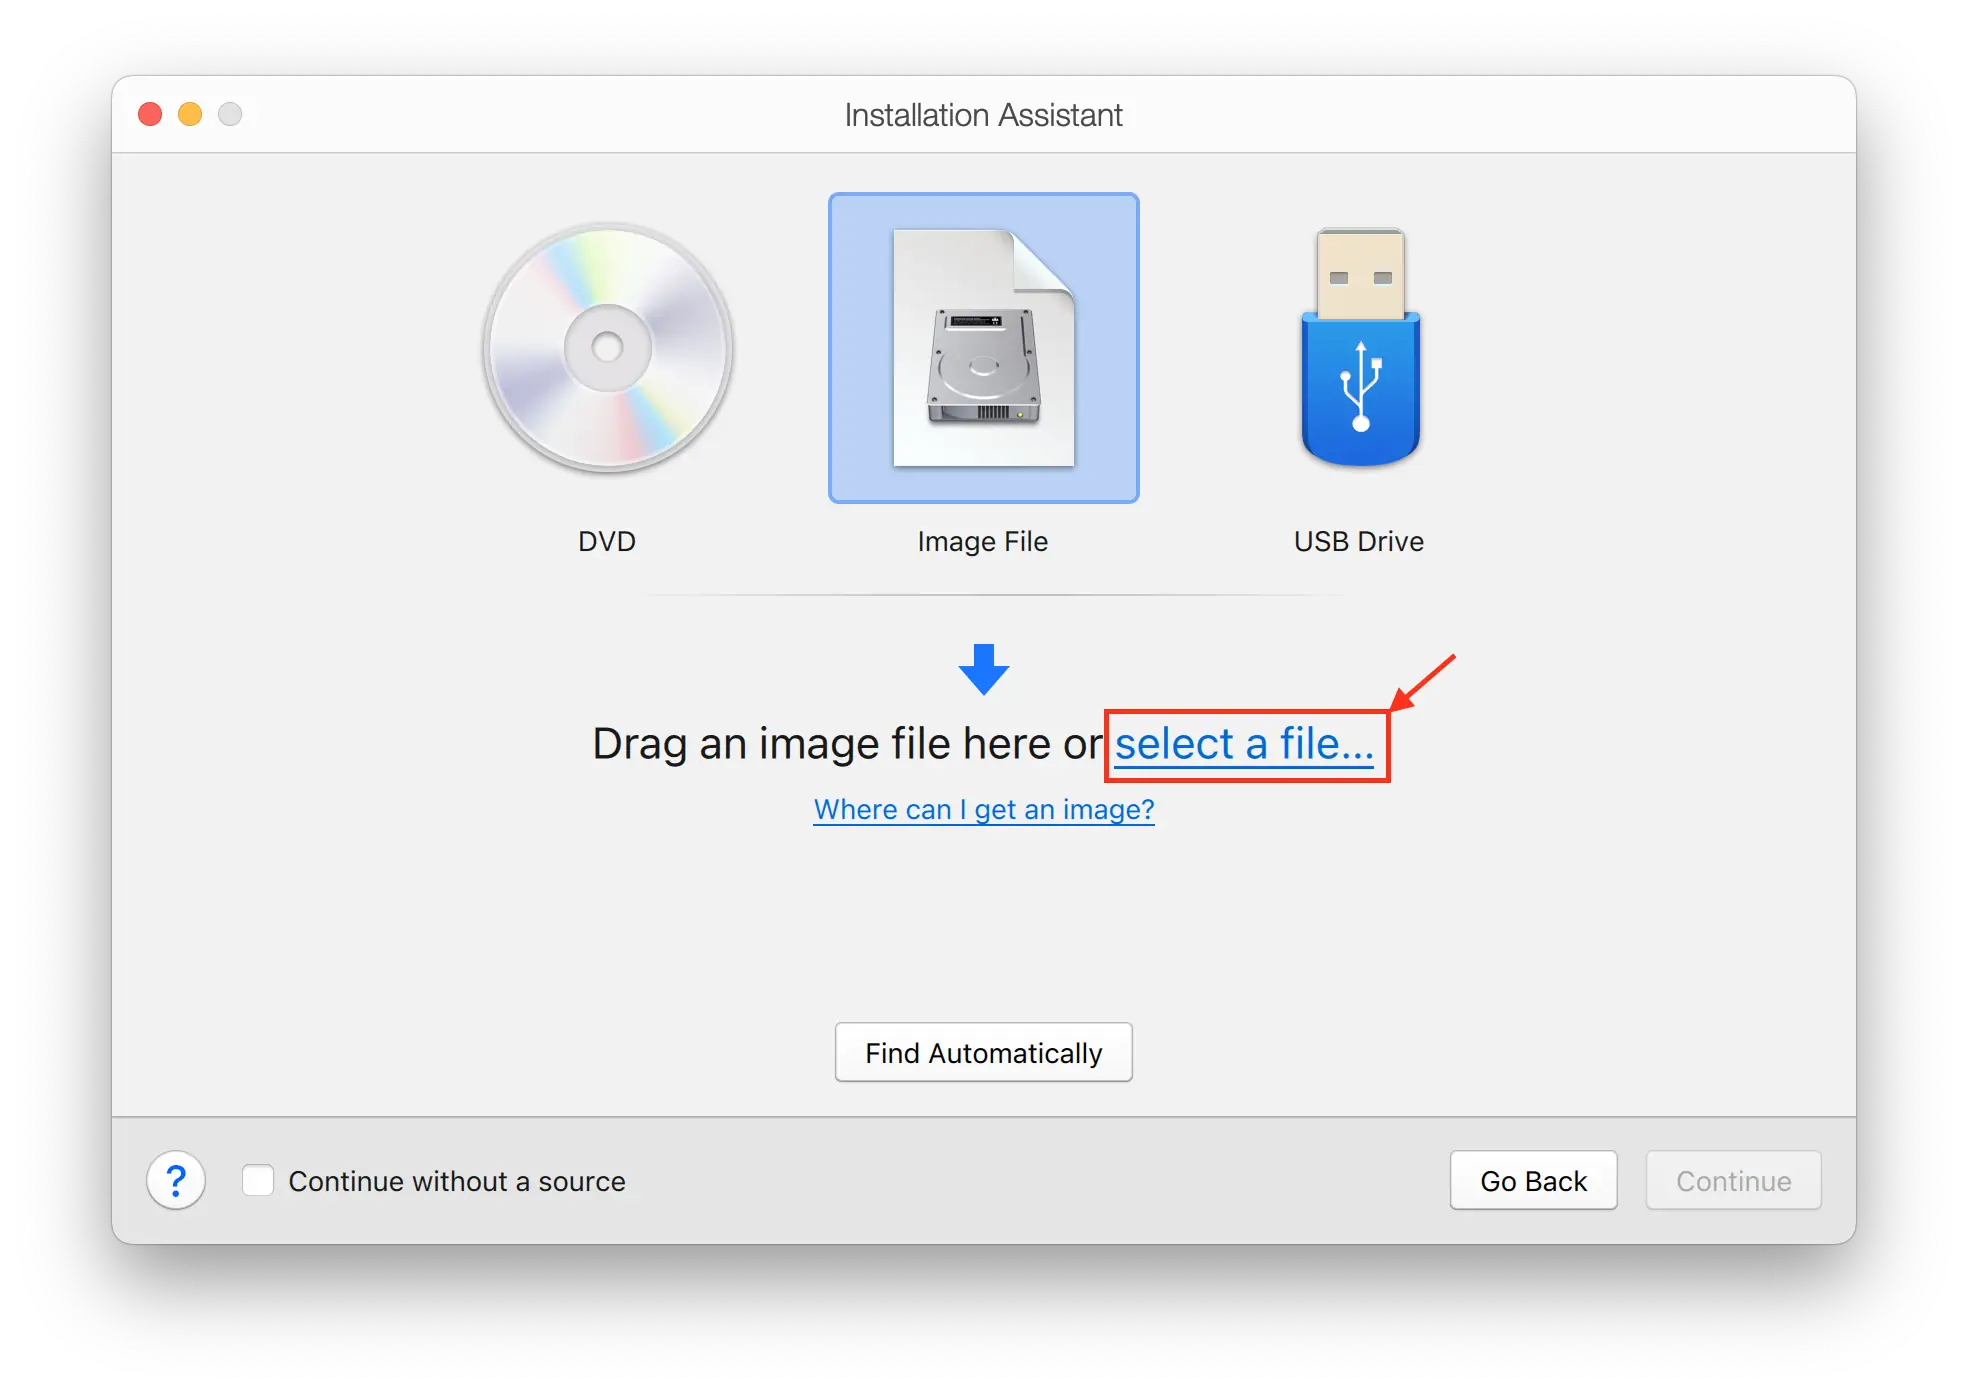
Click the “select a file…” hyperlink, or drag the VanillaOS-<release>.iso file to the Installation Assistant window.
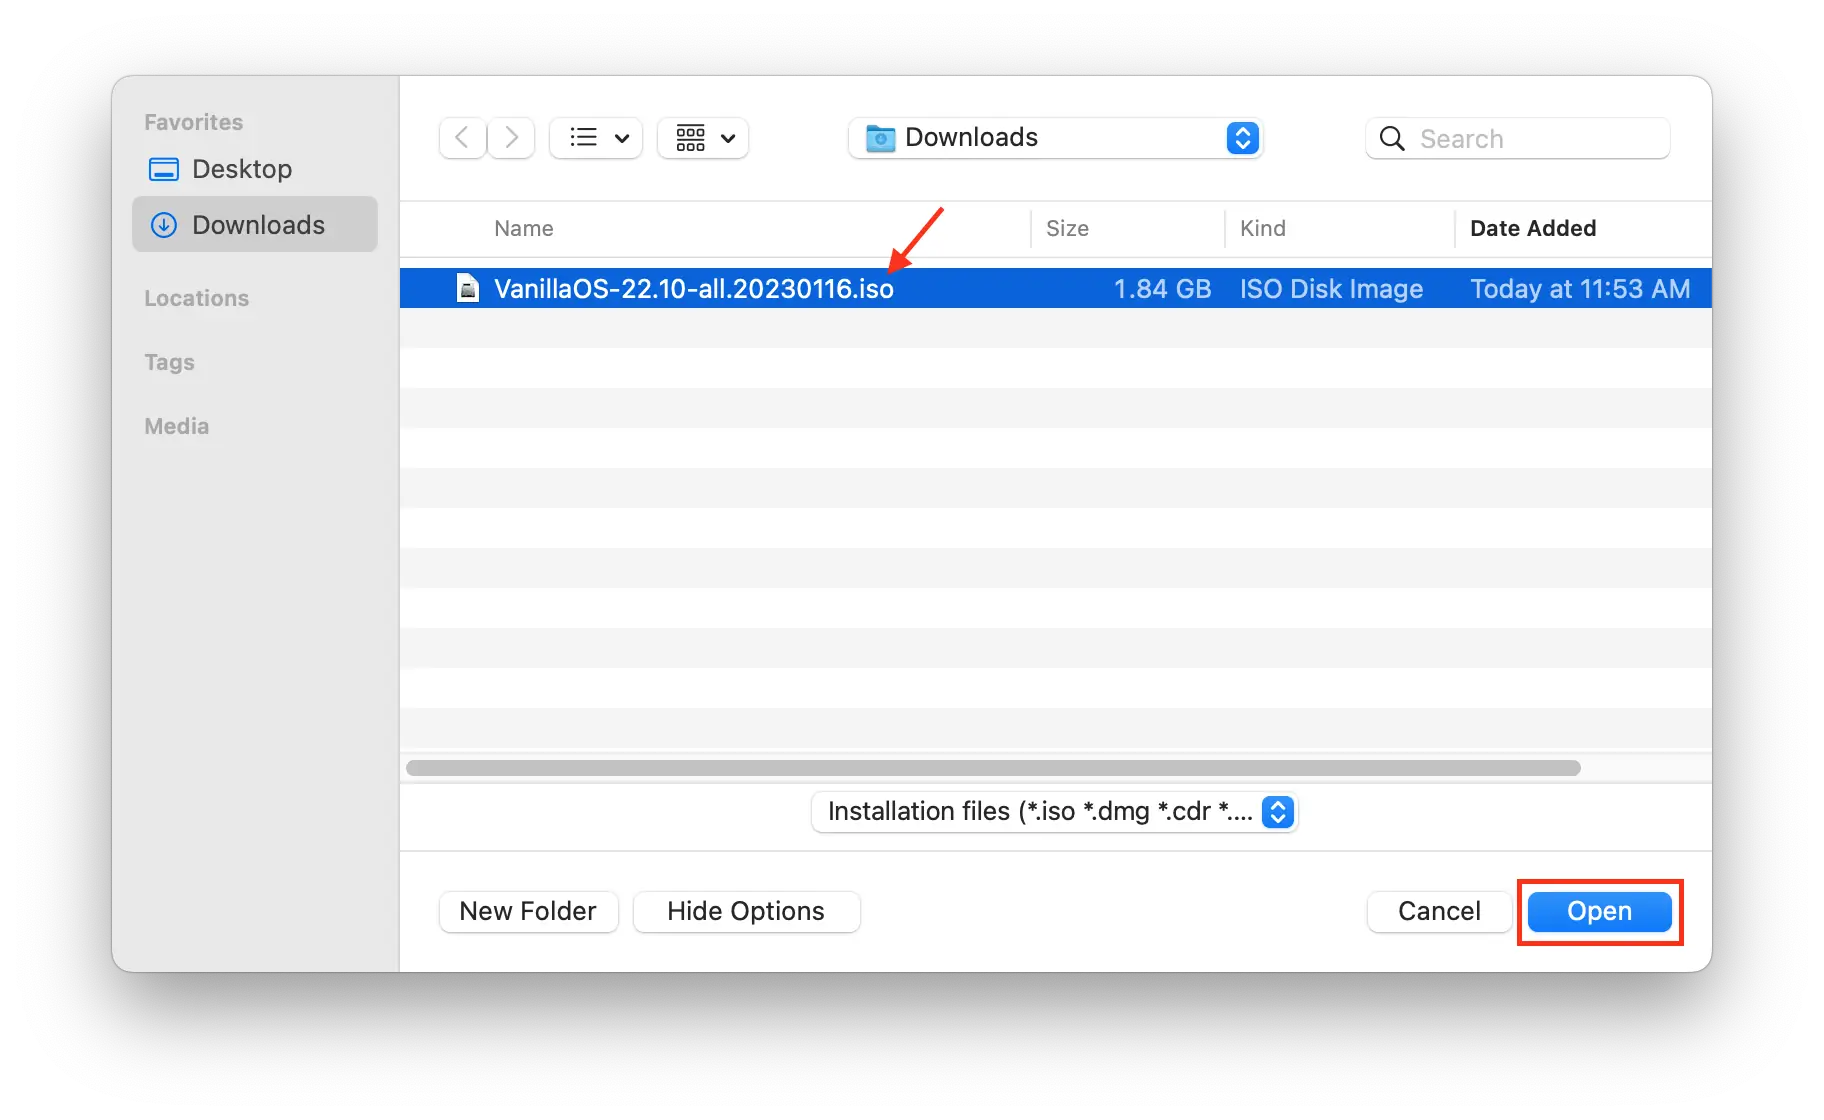
Select the VanillaOS-<release>.iso file.
Note:- The content inside <> is a placeholder.
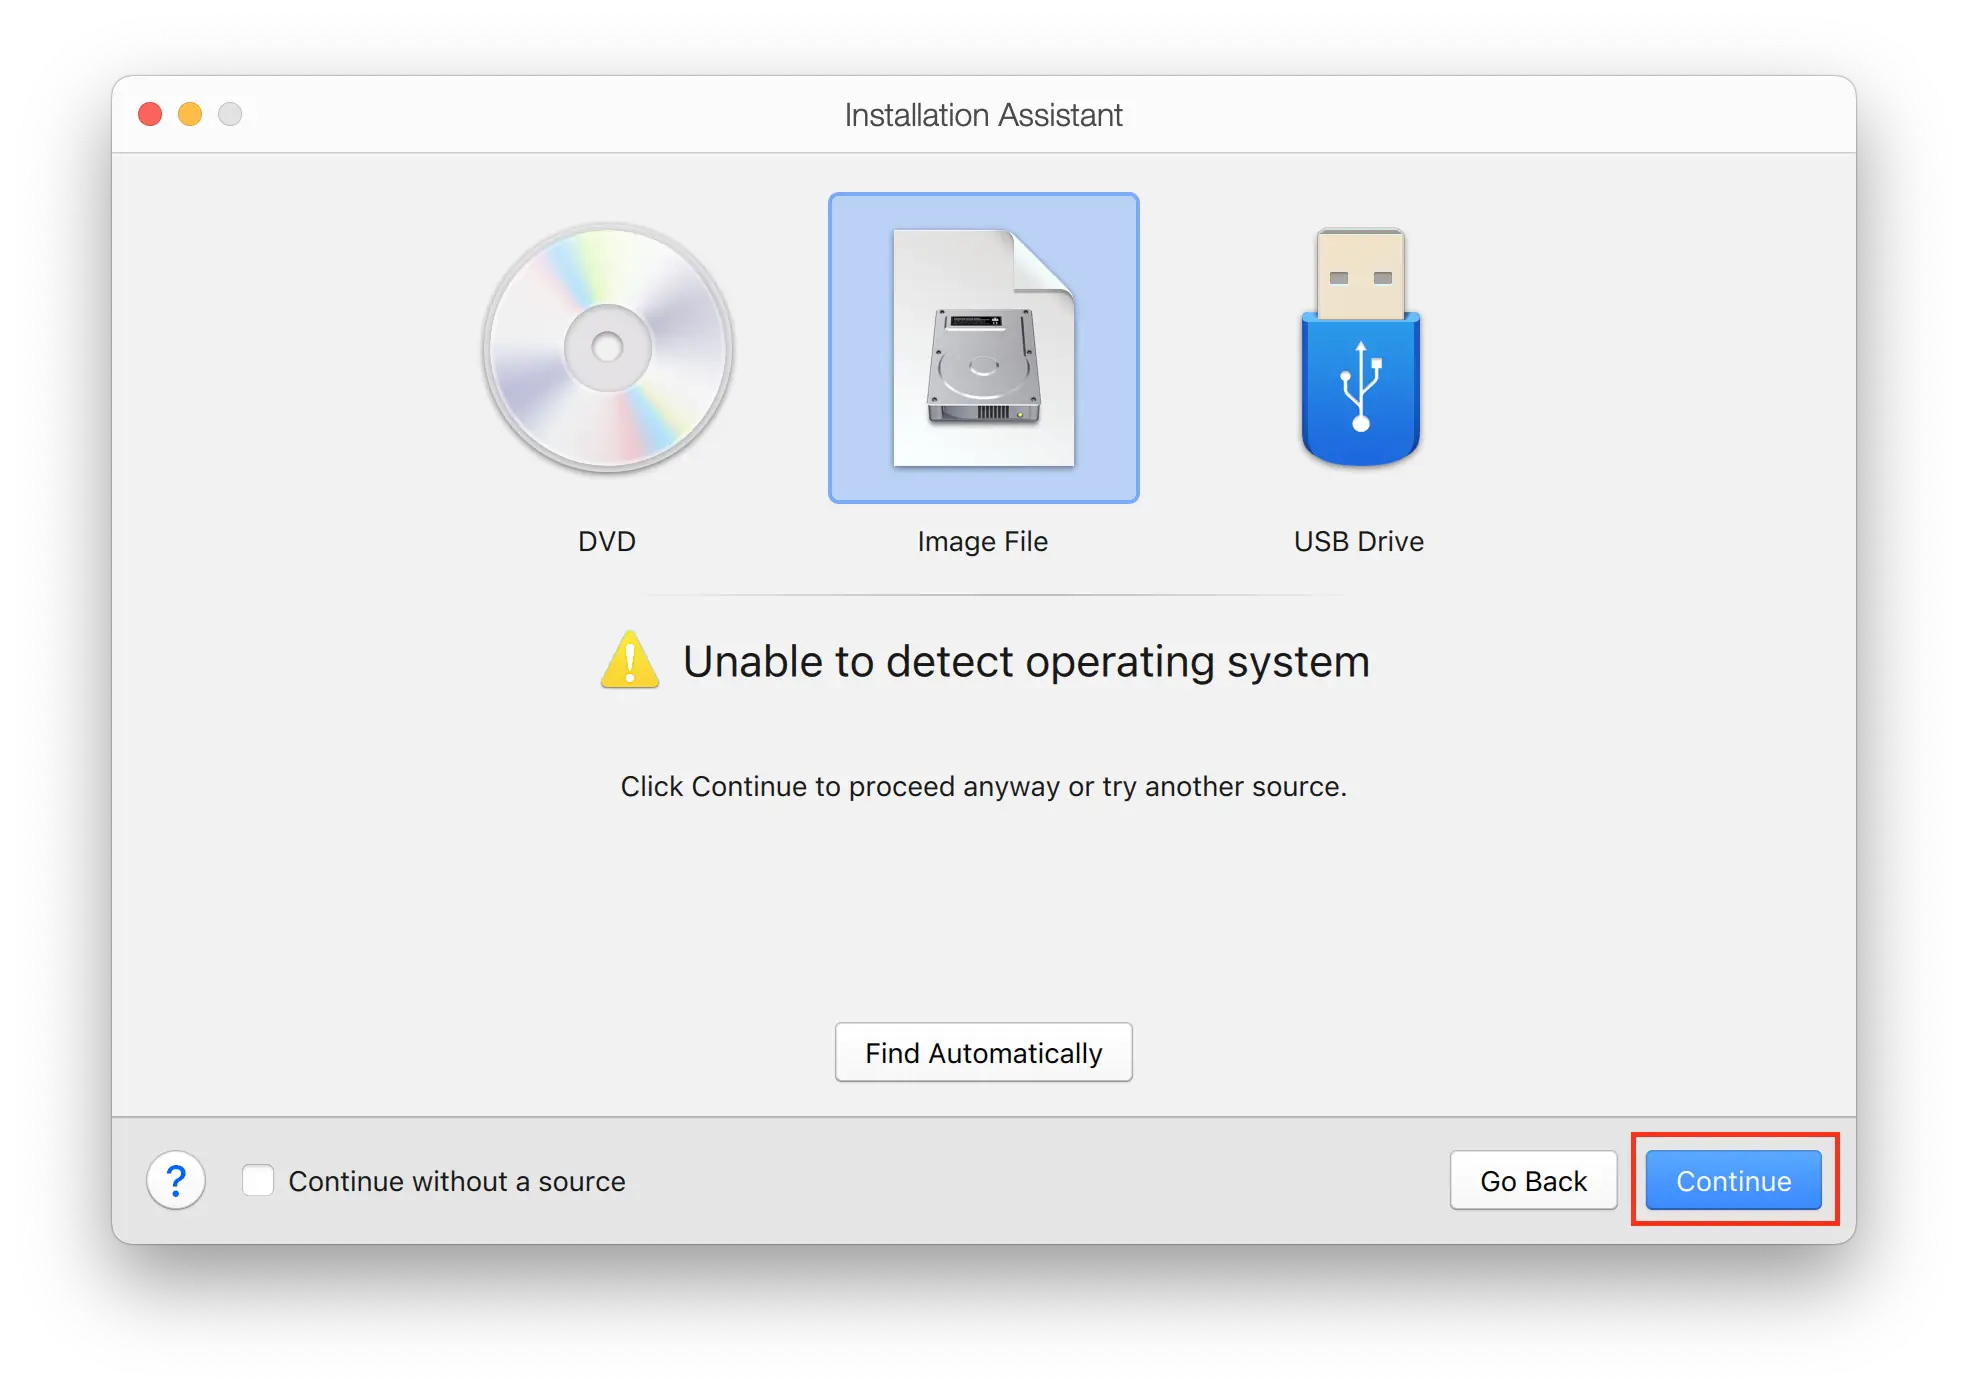
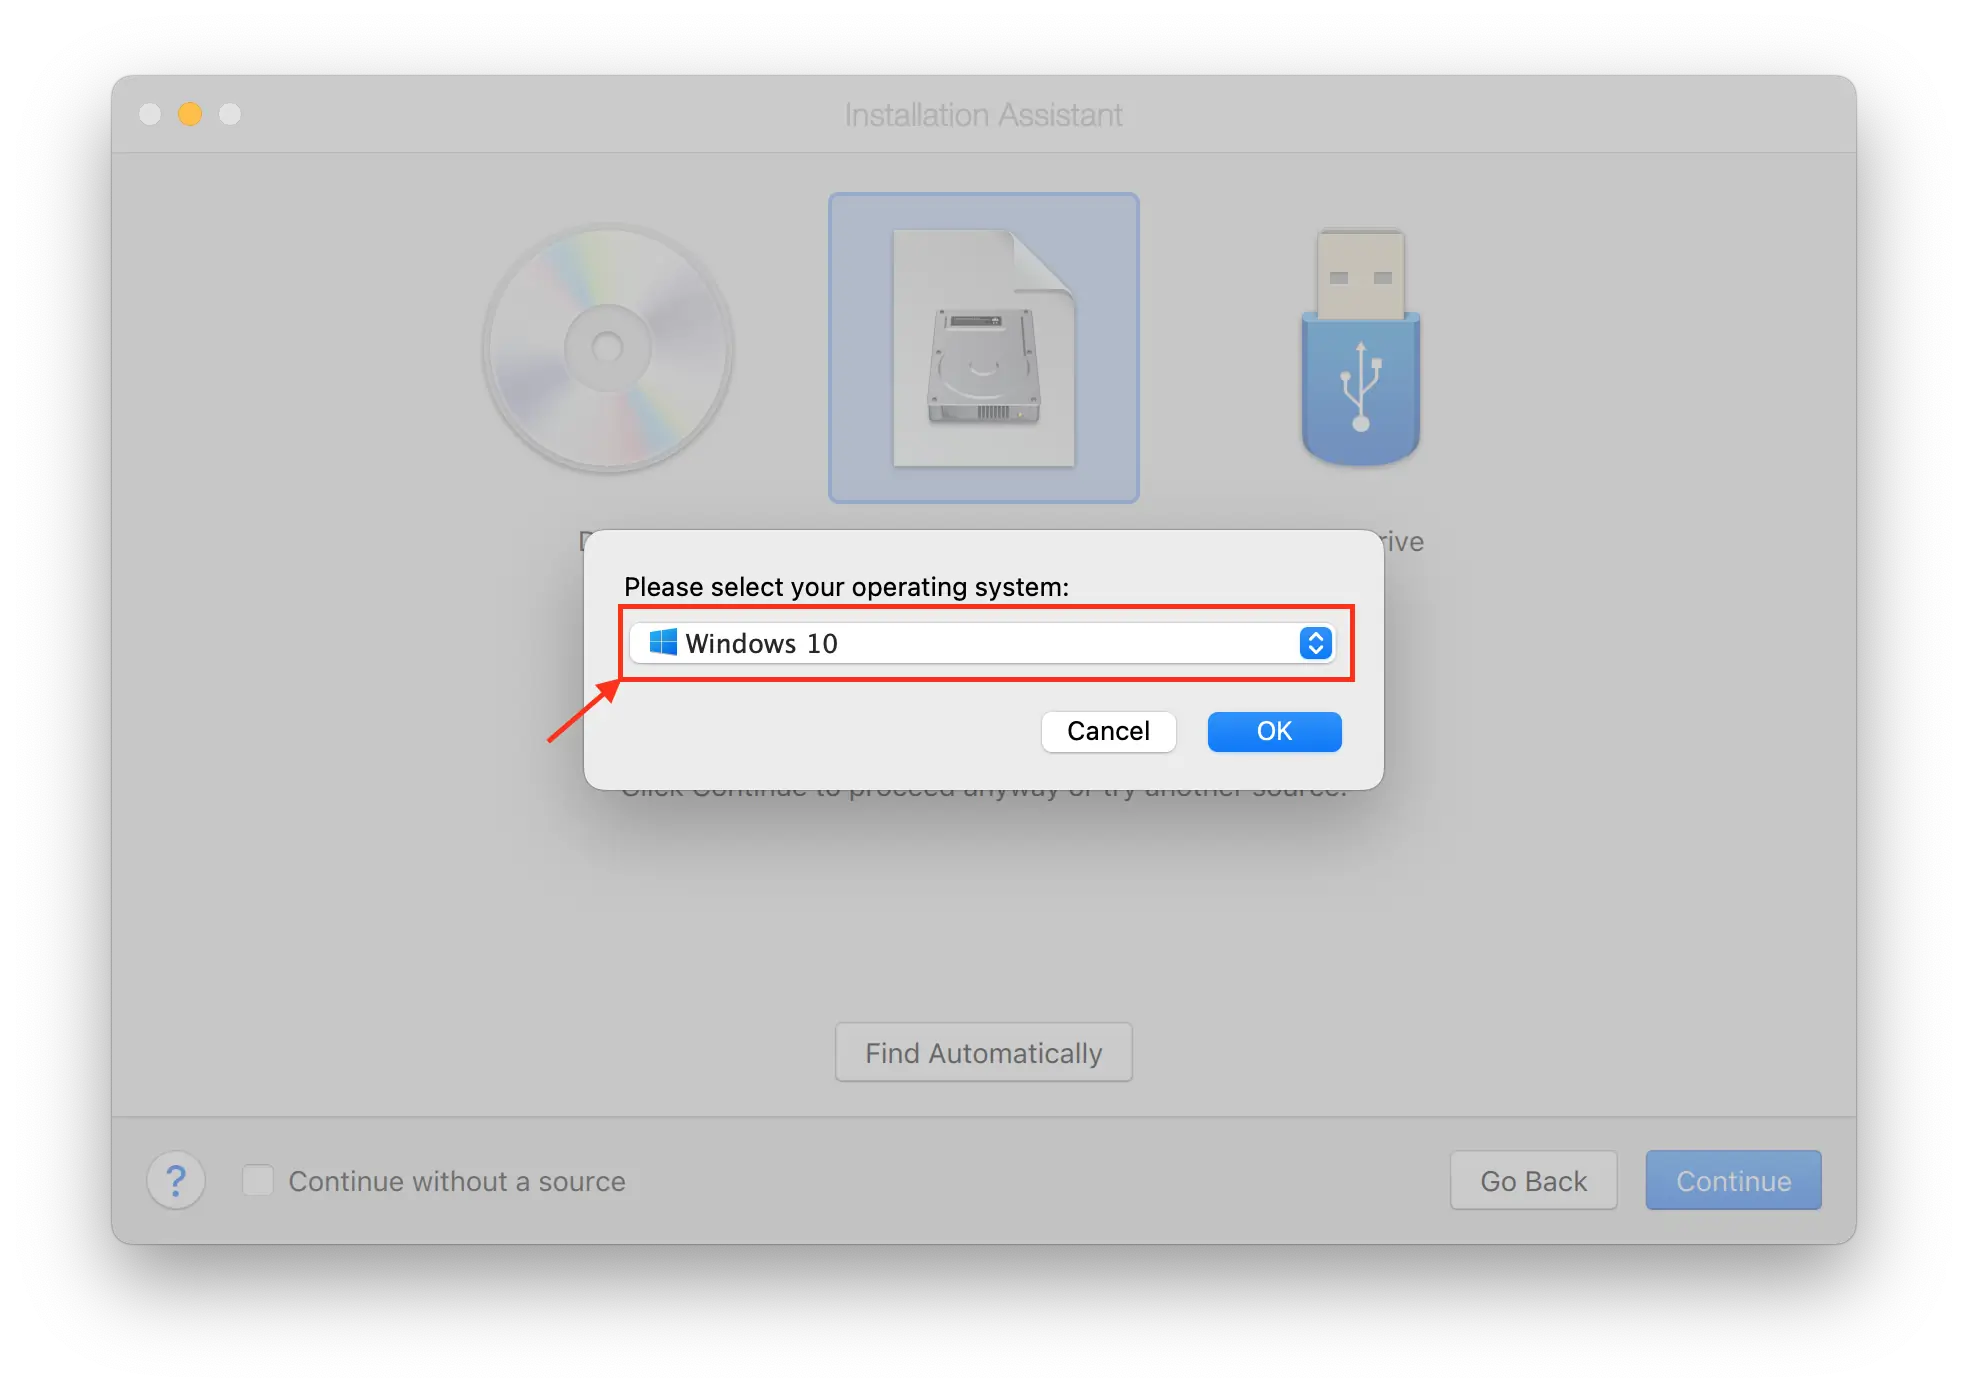
Parallels is unable to automatically detect the operating system inside of our VanillaOS-<release>.iso. This is normal, click “Continue”.
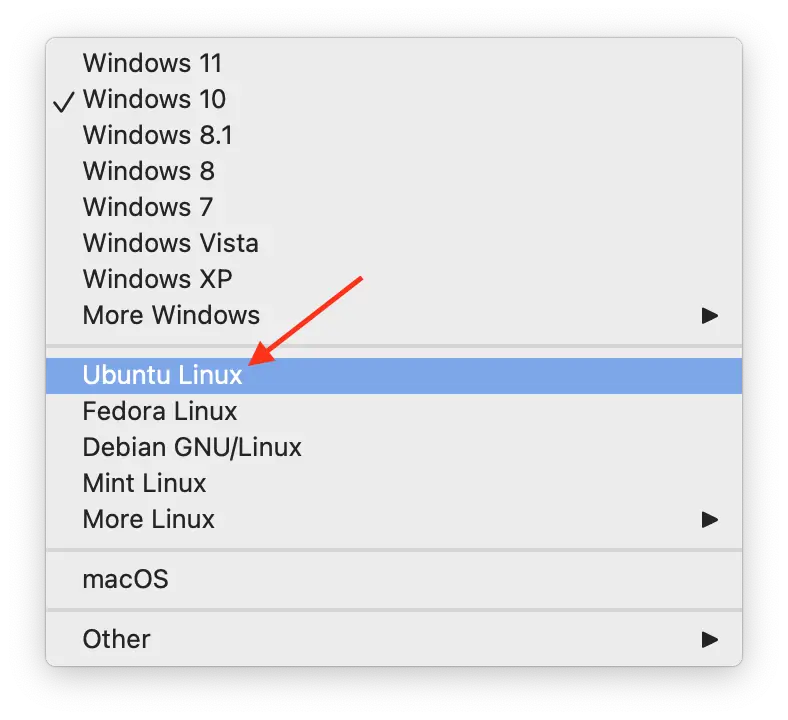
Change “Windows” to “Ubuntu Linux” from the drop-down menu that appears (Vanilla OS benefits from Ubuntu-centric Parallels features).
Rename your virtual machine to Vanilla OS (or whatever you like!).
Select the “Customize settings before installation” checkbox. This is important because we need to change one important system setting.
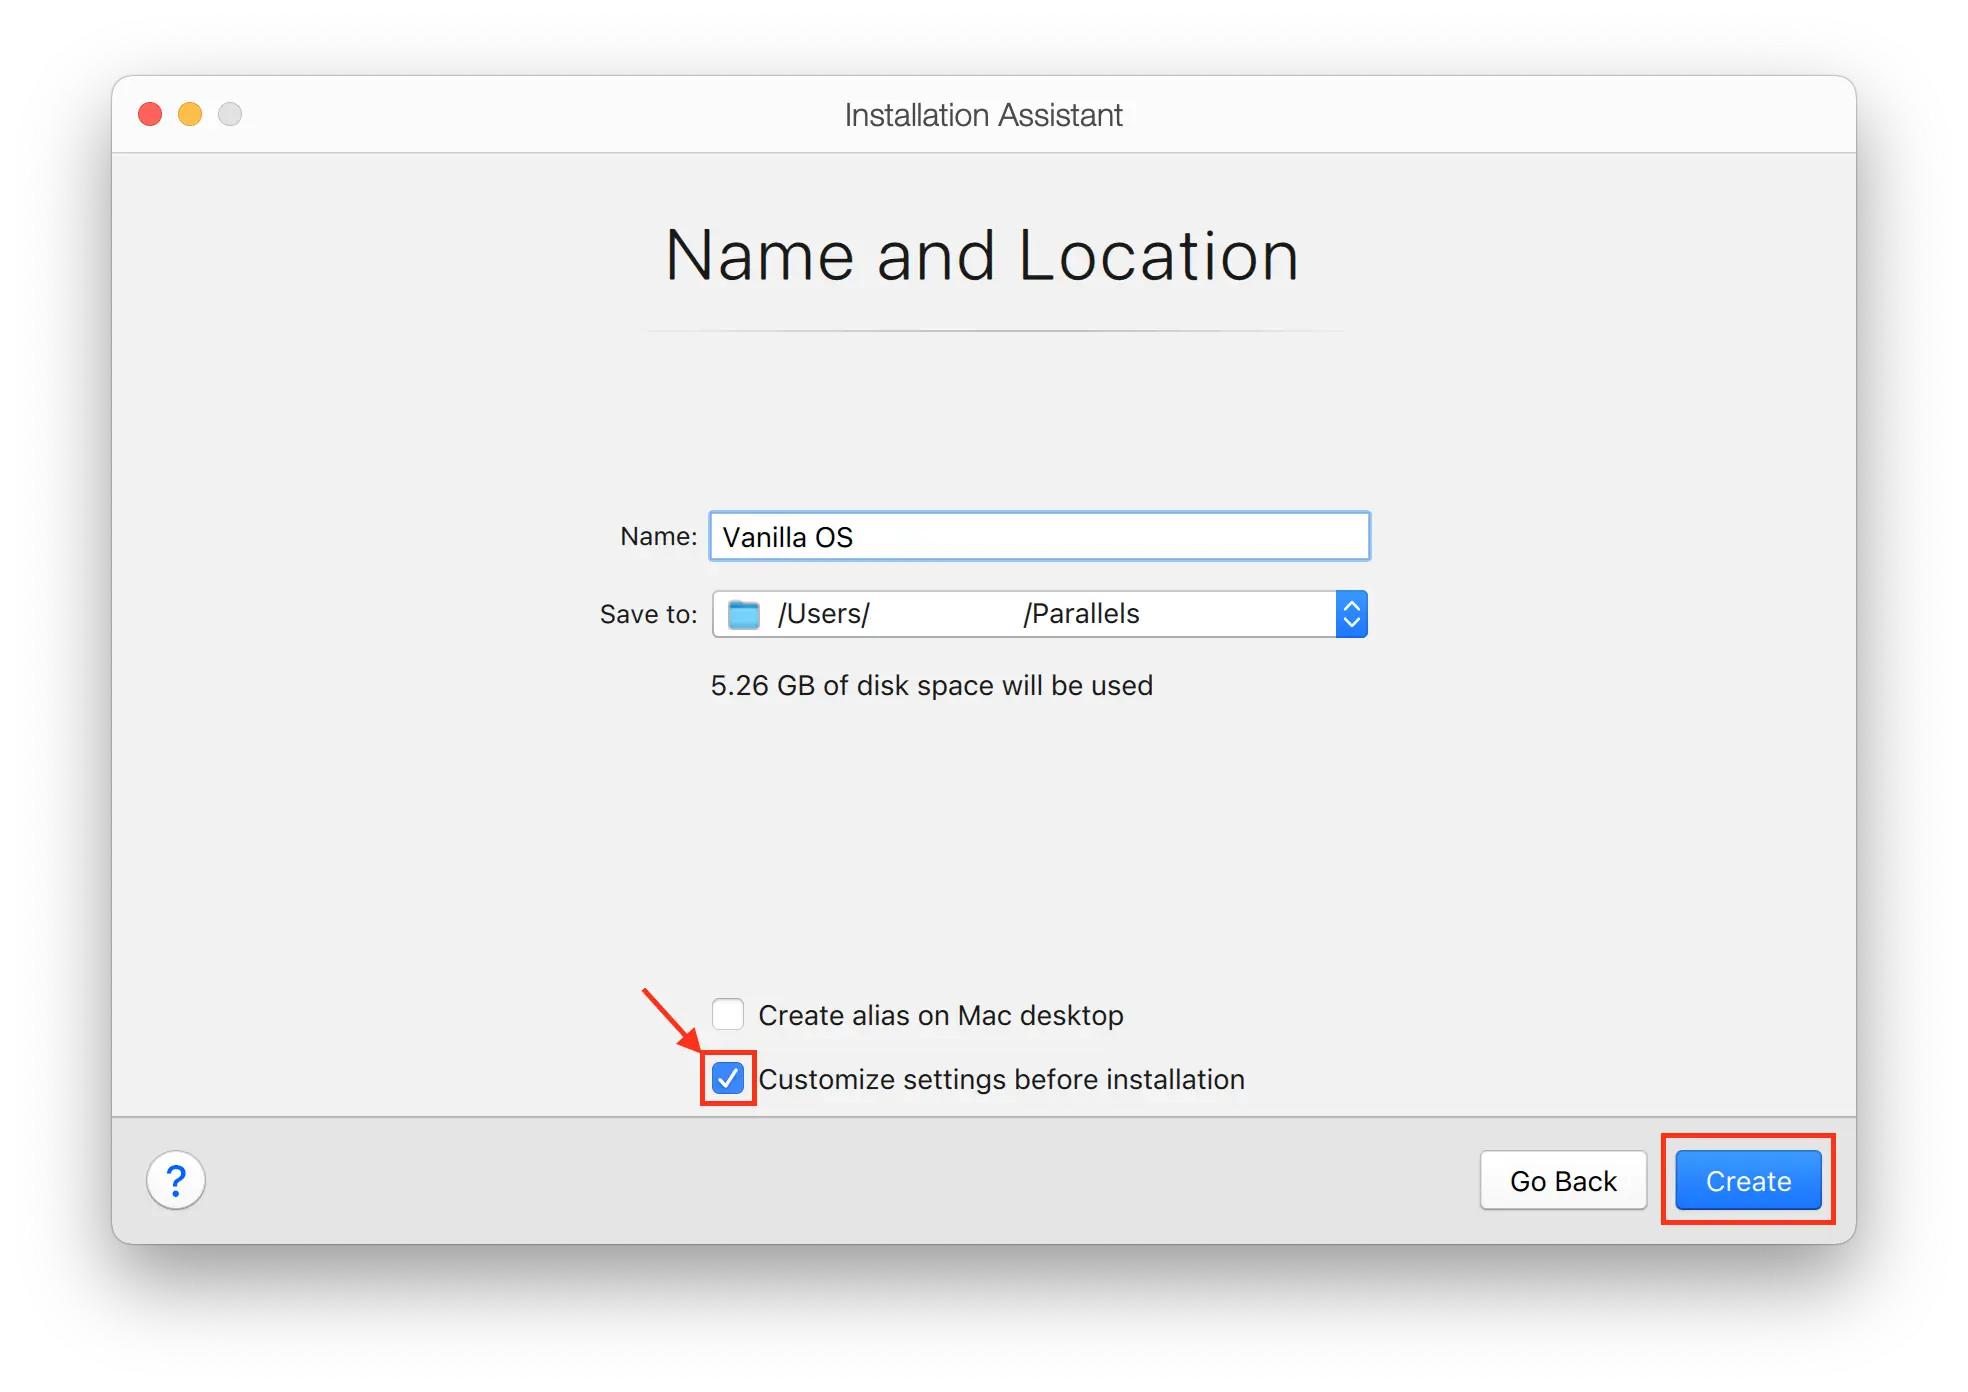
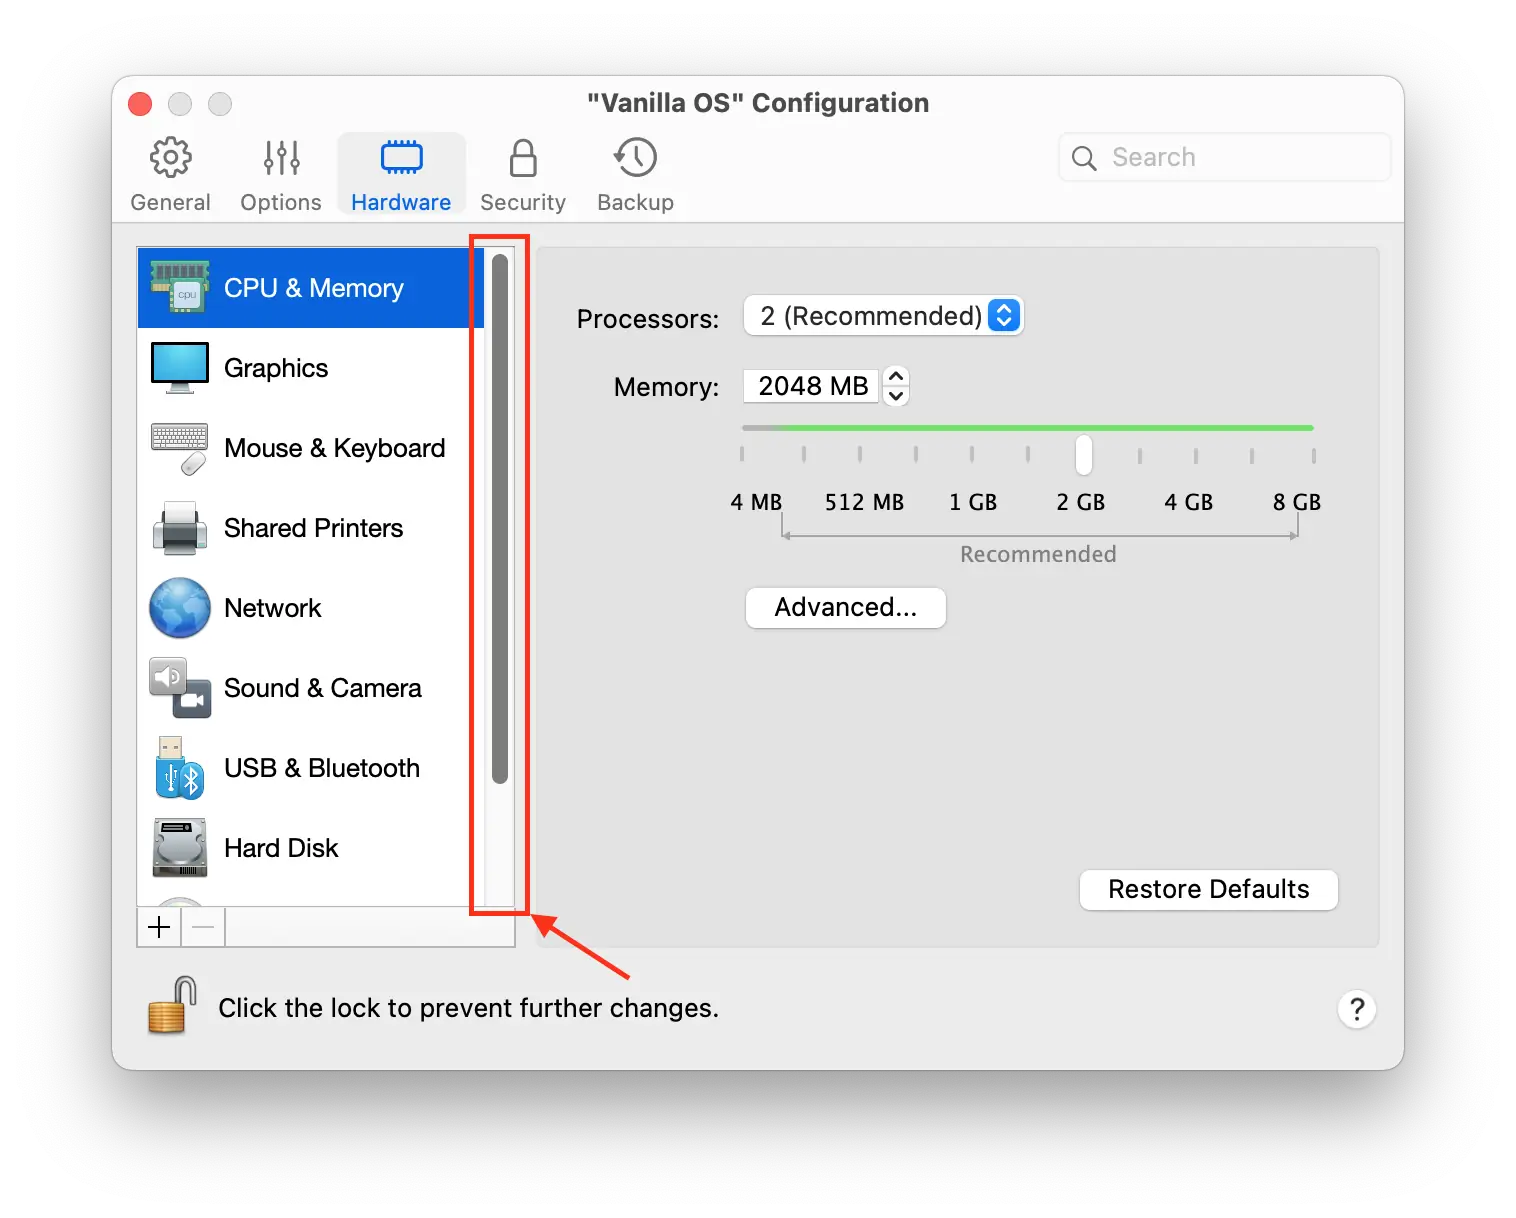
Selecting “Create” will open the “Vanilla OS” Configuration window. Select the “Hardware” tab.
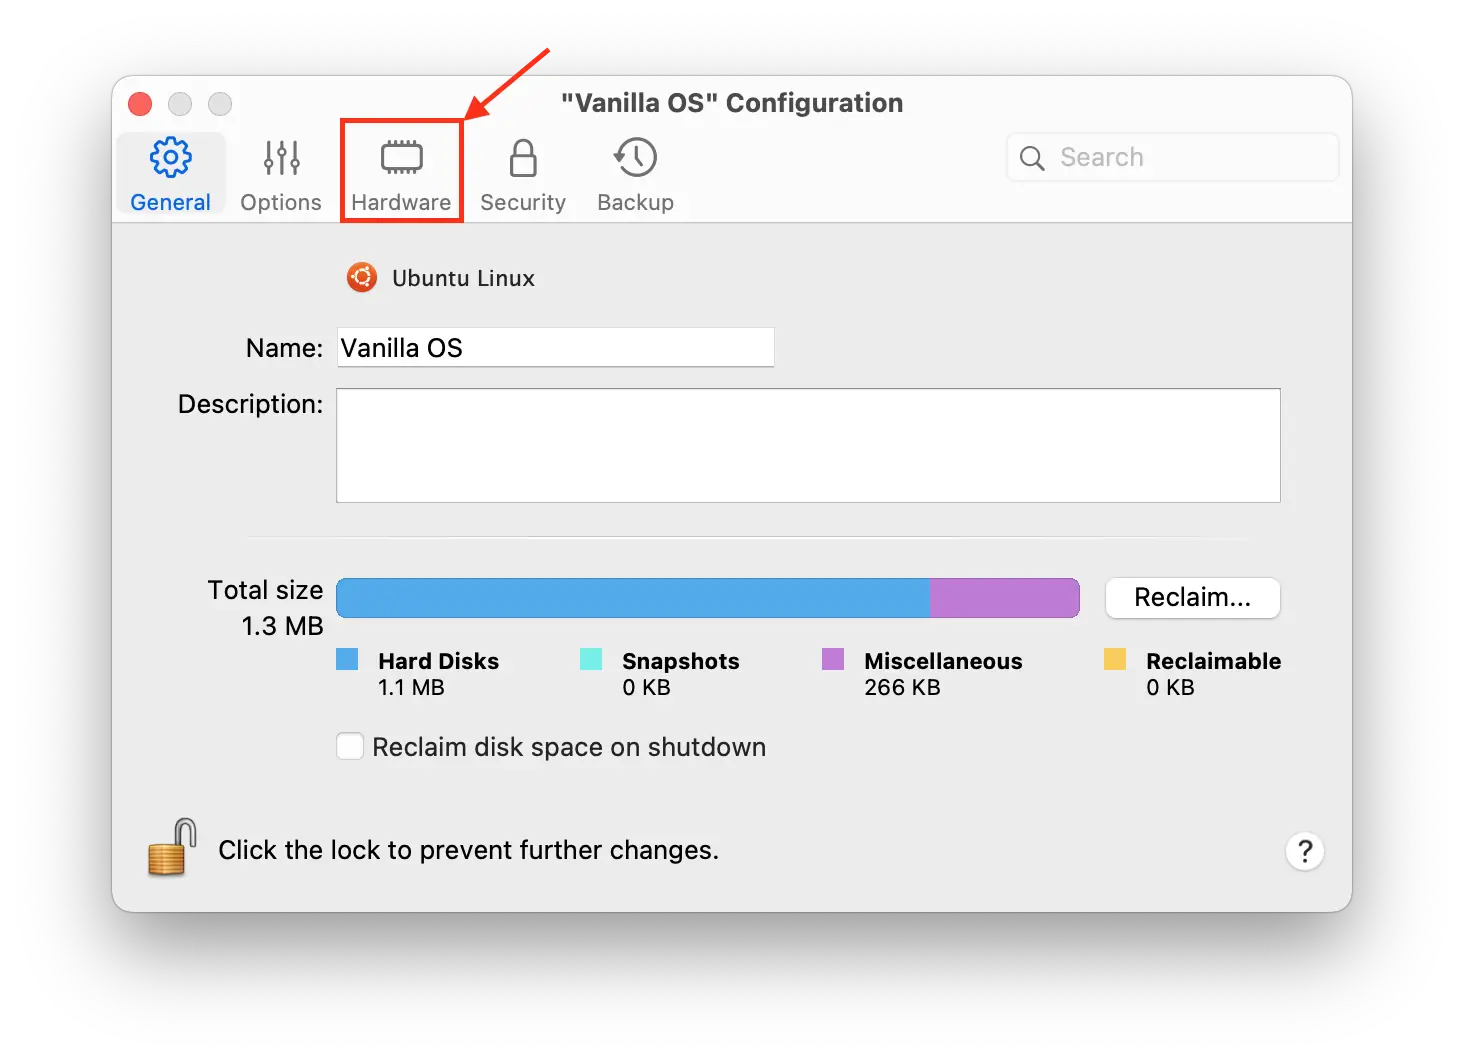
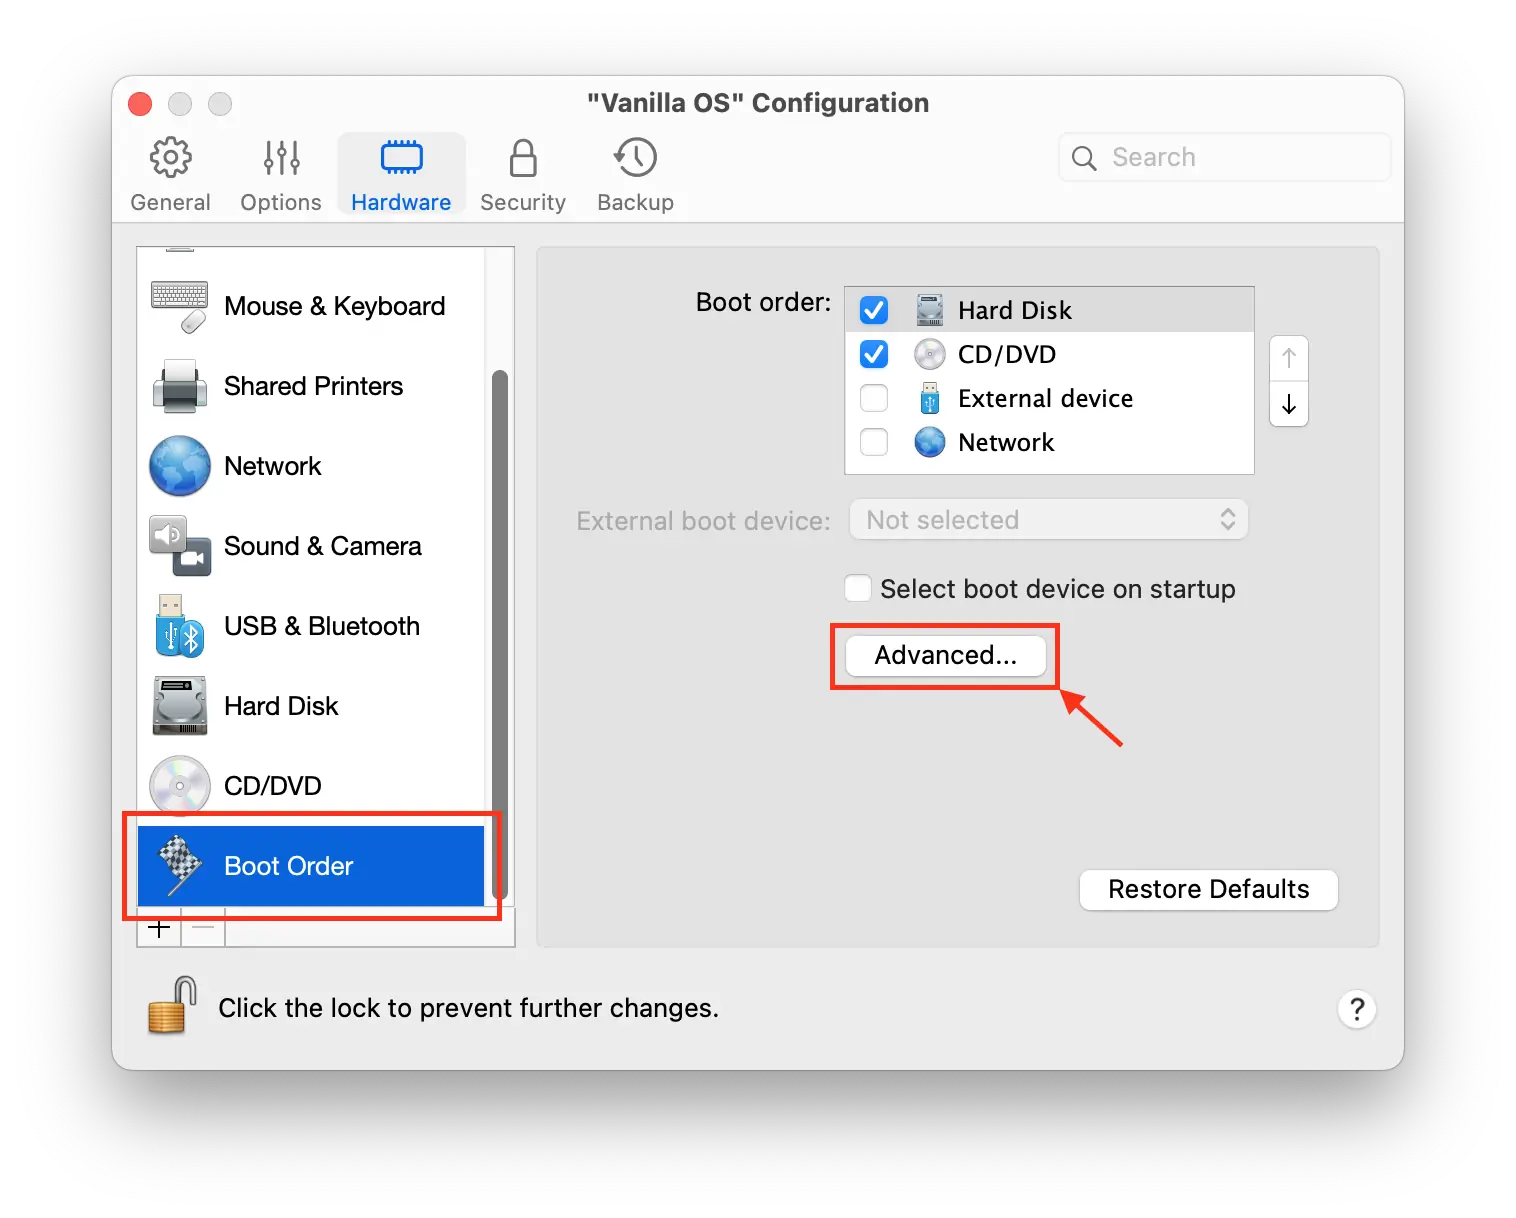
Scroll the left-side menu until you see “Boot Order”.
From the “Boot Order” tab, click the “Advanced…” button
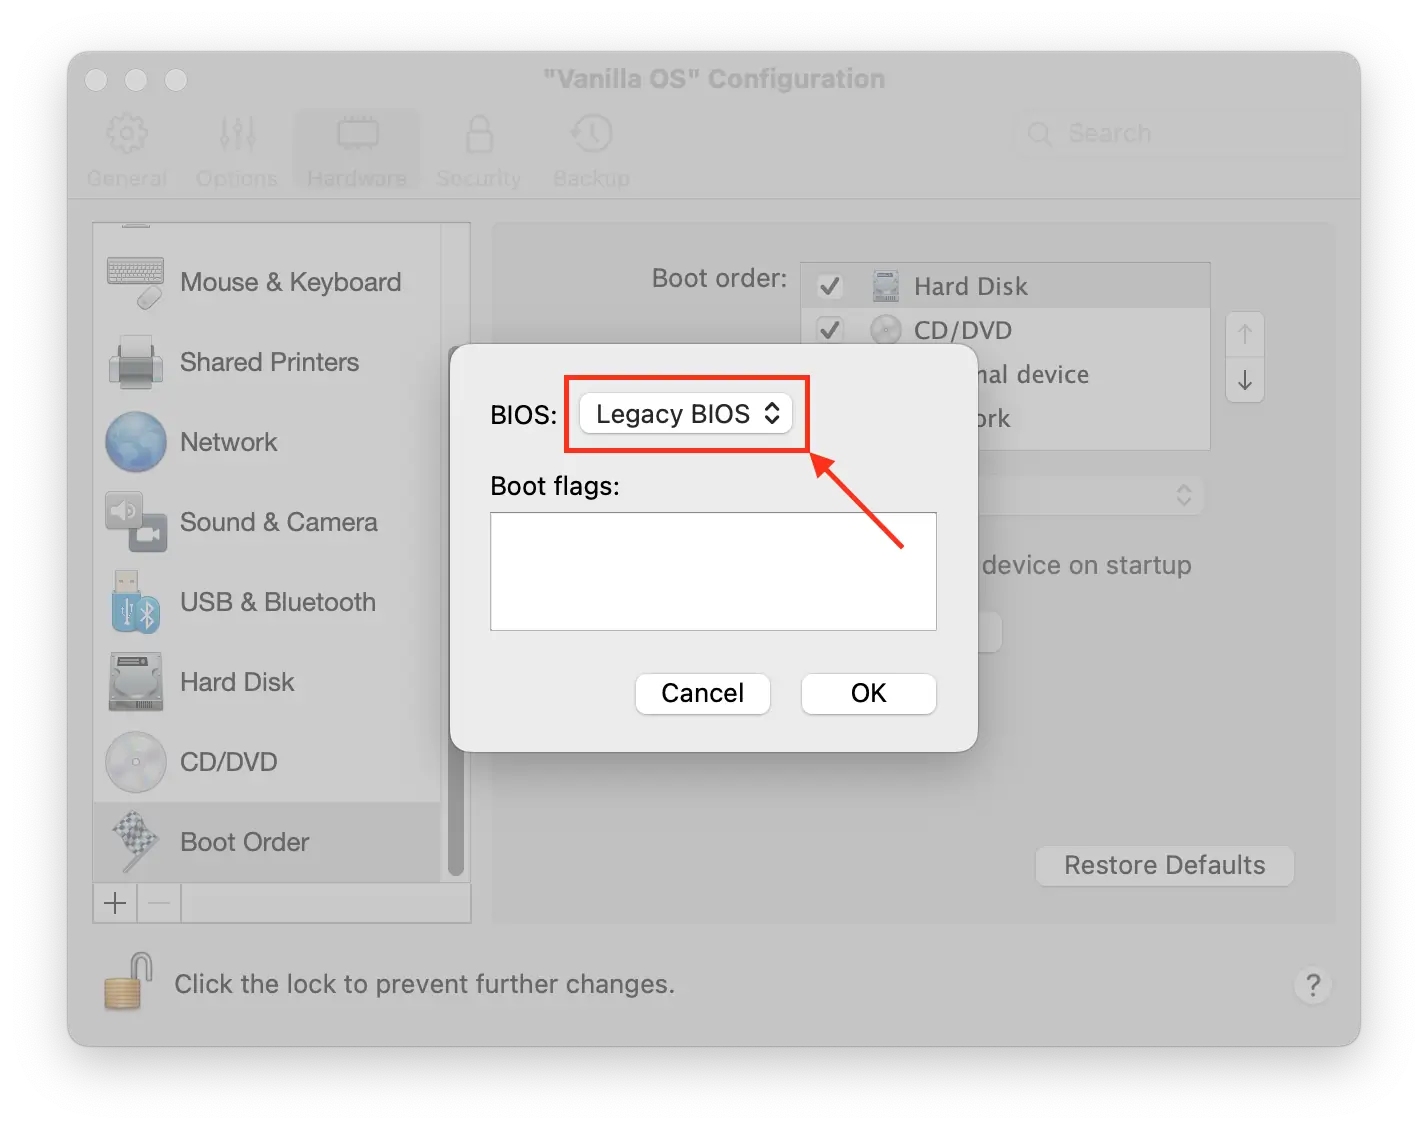
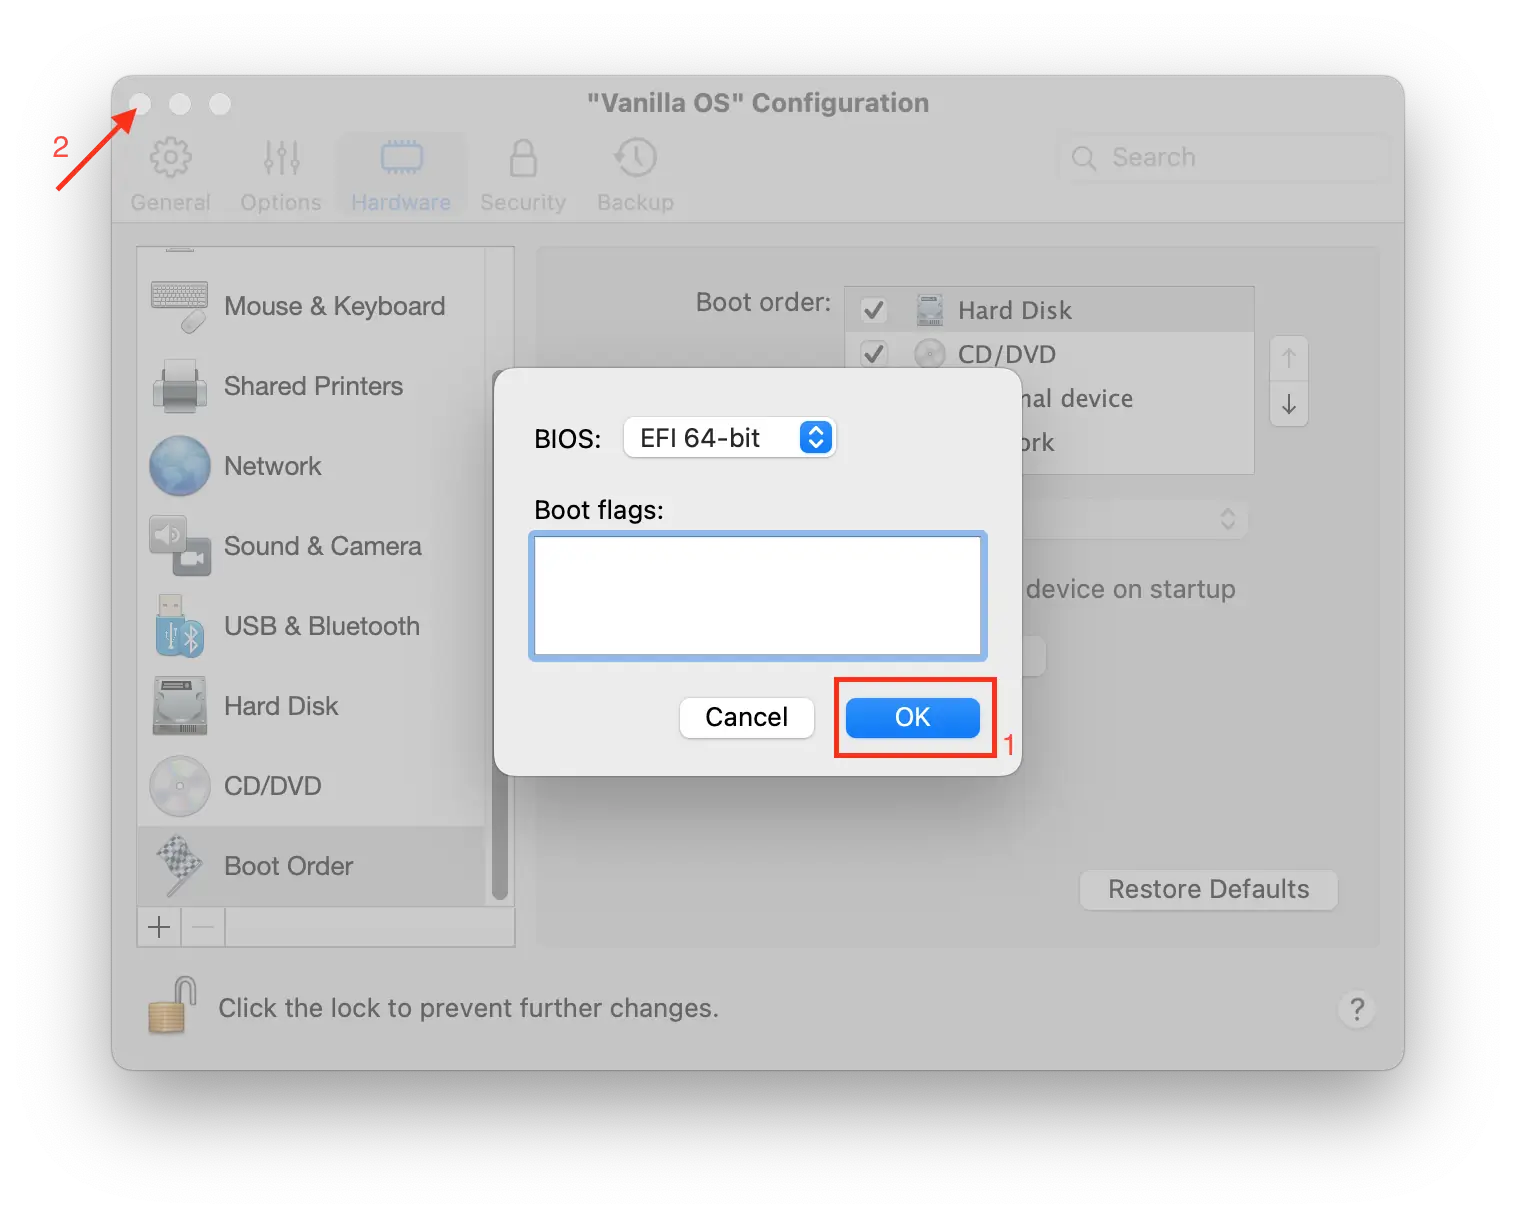
Change “BIOS: Legacy BIOS” to “EFI 64-bit”.
Confirm the changes and close the configuration window.
Finish virtual machine creation by selecting “Continue”.
Vanilla OS virtual machine will now boot successfully.
Follow the Vanilla OS on-screen prompts. (For additional details, refer to this guide.
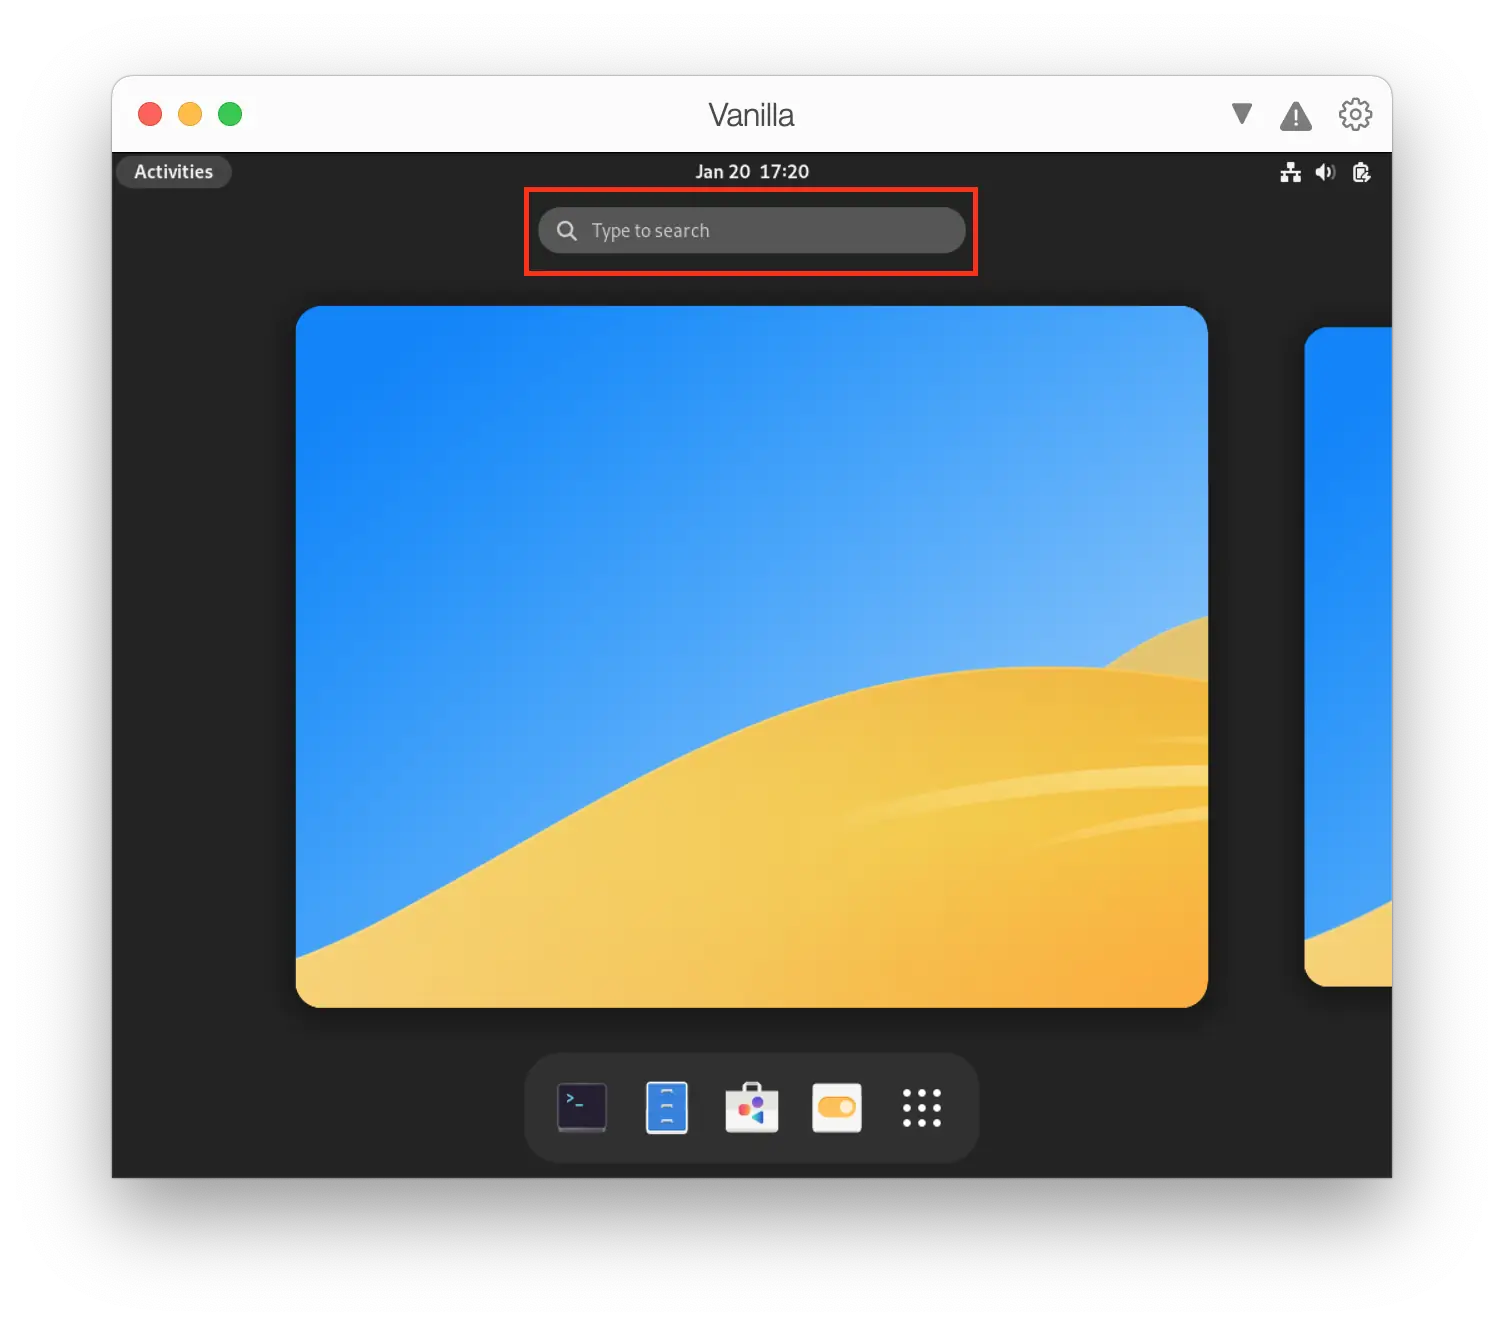
From the Vanilla OS GNOME desktop, select “Activities”
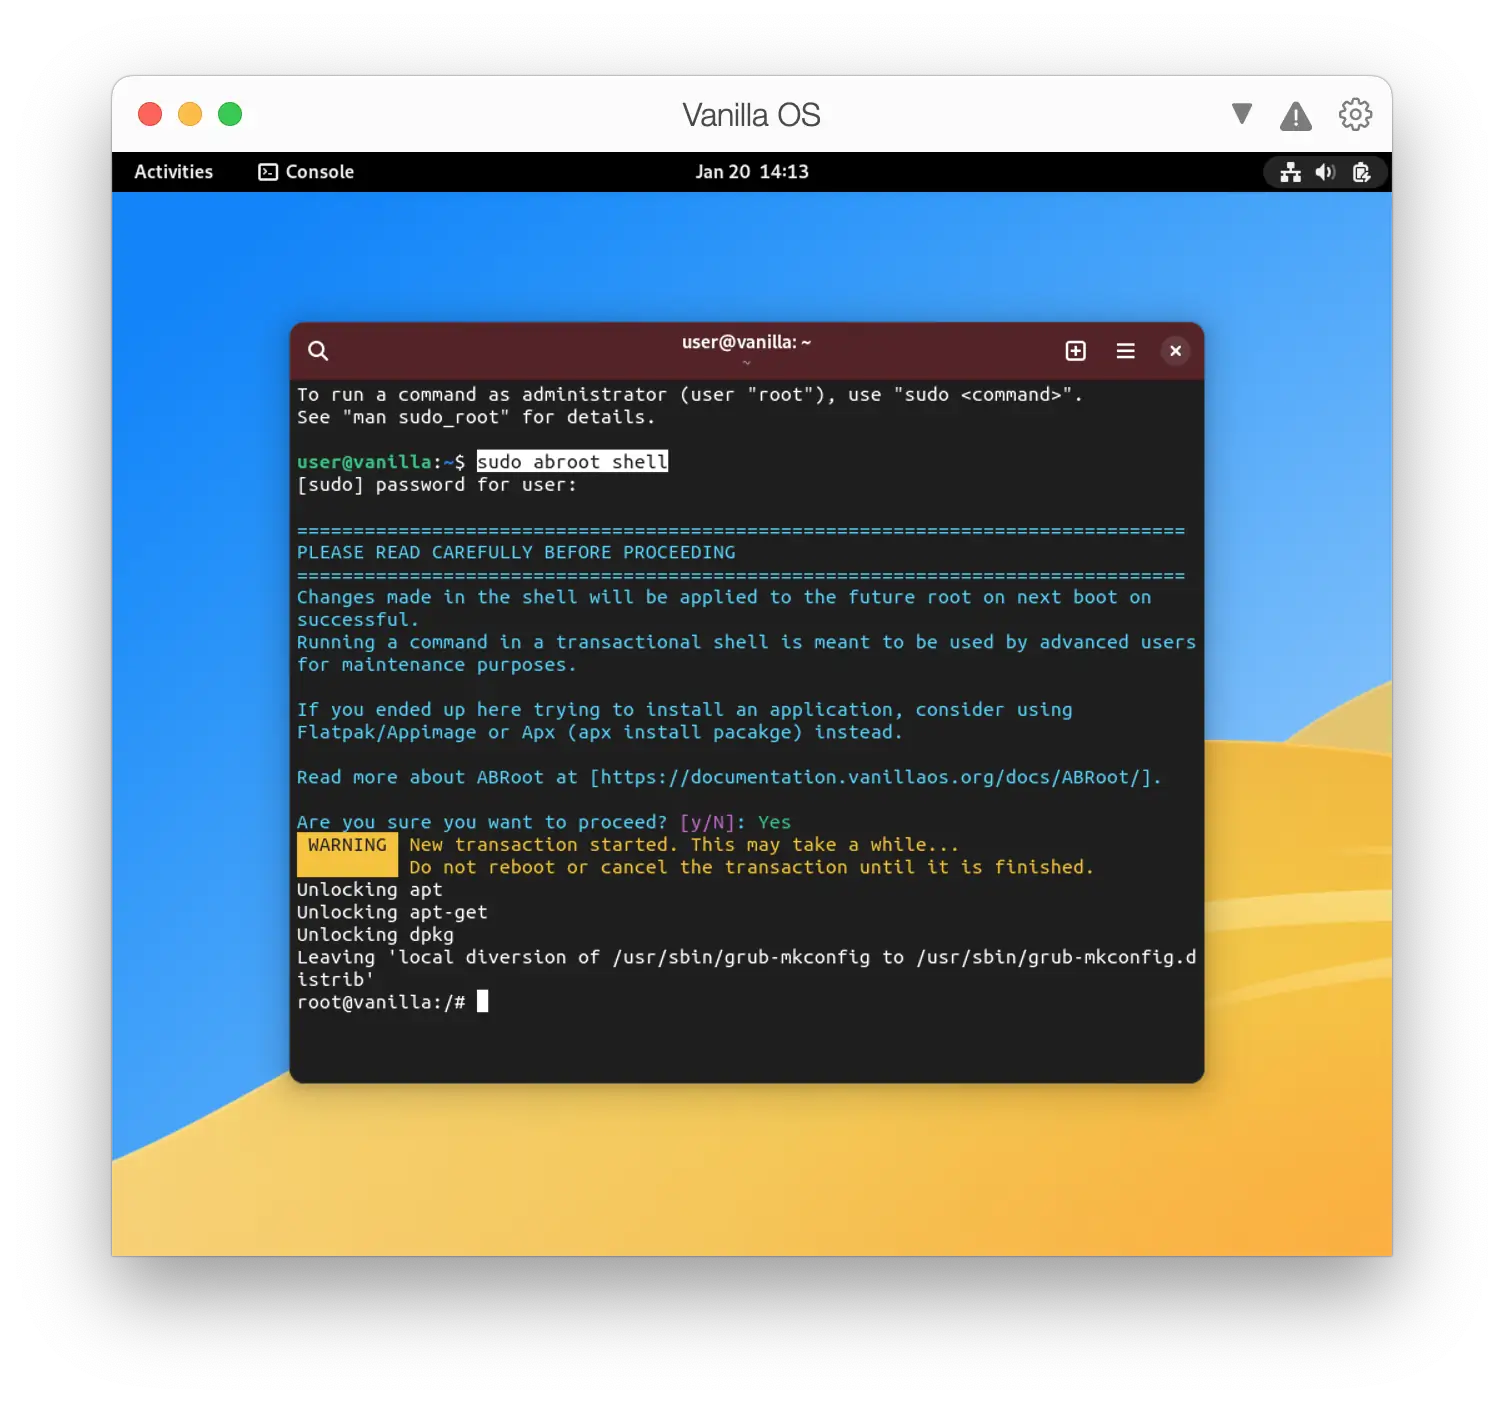
Search for “Console”. Open the Console application.
Type sudo abroot shell into the Console, and press enter to open up the transactional shell. The transactional shell allows you to install drivers and essential packages onto the immutable filesystem. Type y and press enter to proceed.
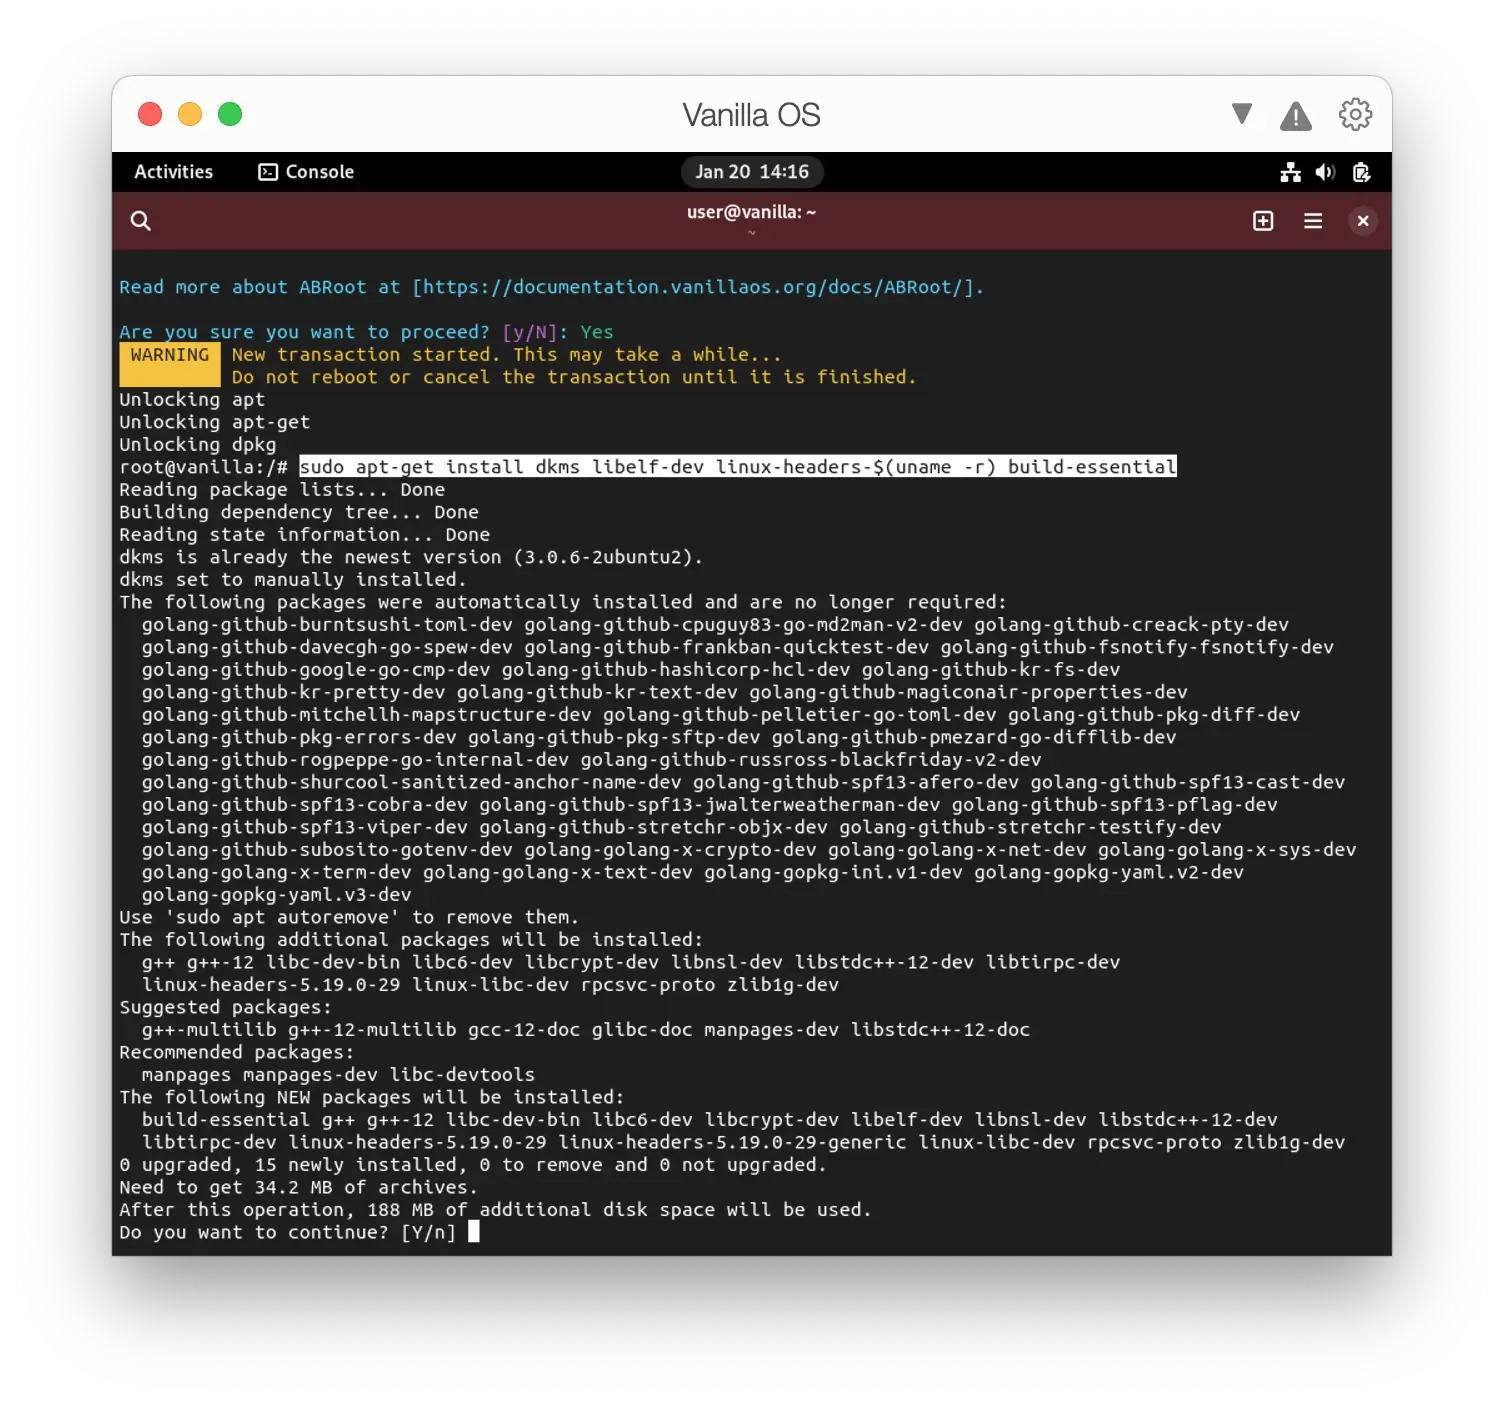
Type sudo apt-get install dkms libelf-dev linux-headers-$(uname -r) build-essential, press enter to install Parallels Tools system dependencies. Type Y and press enter to confirm the installation.
Once the system dependencies has been installed, type exit and press enter to leave the elevated transactional shell.

Type reboot and press enter to reboot your Vanilla OS virtual machine.

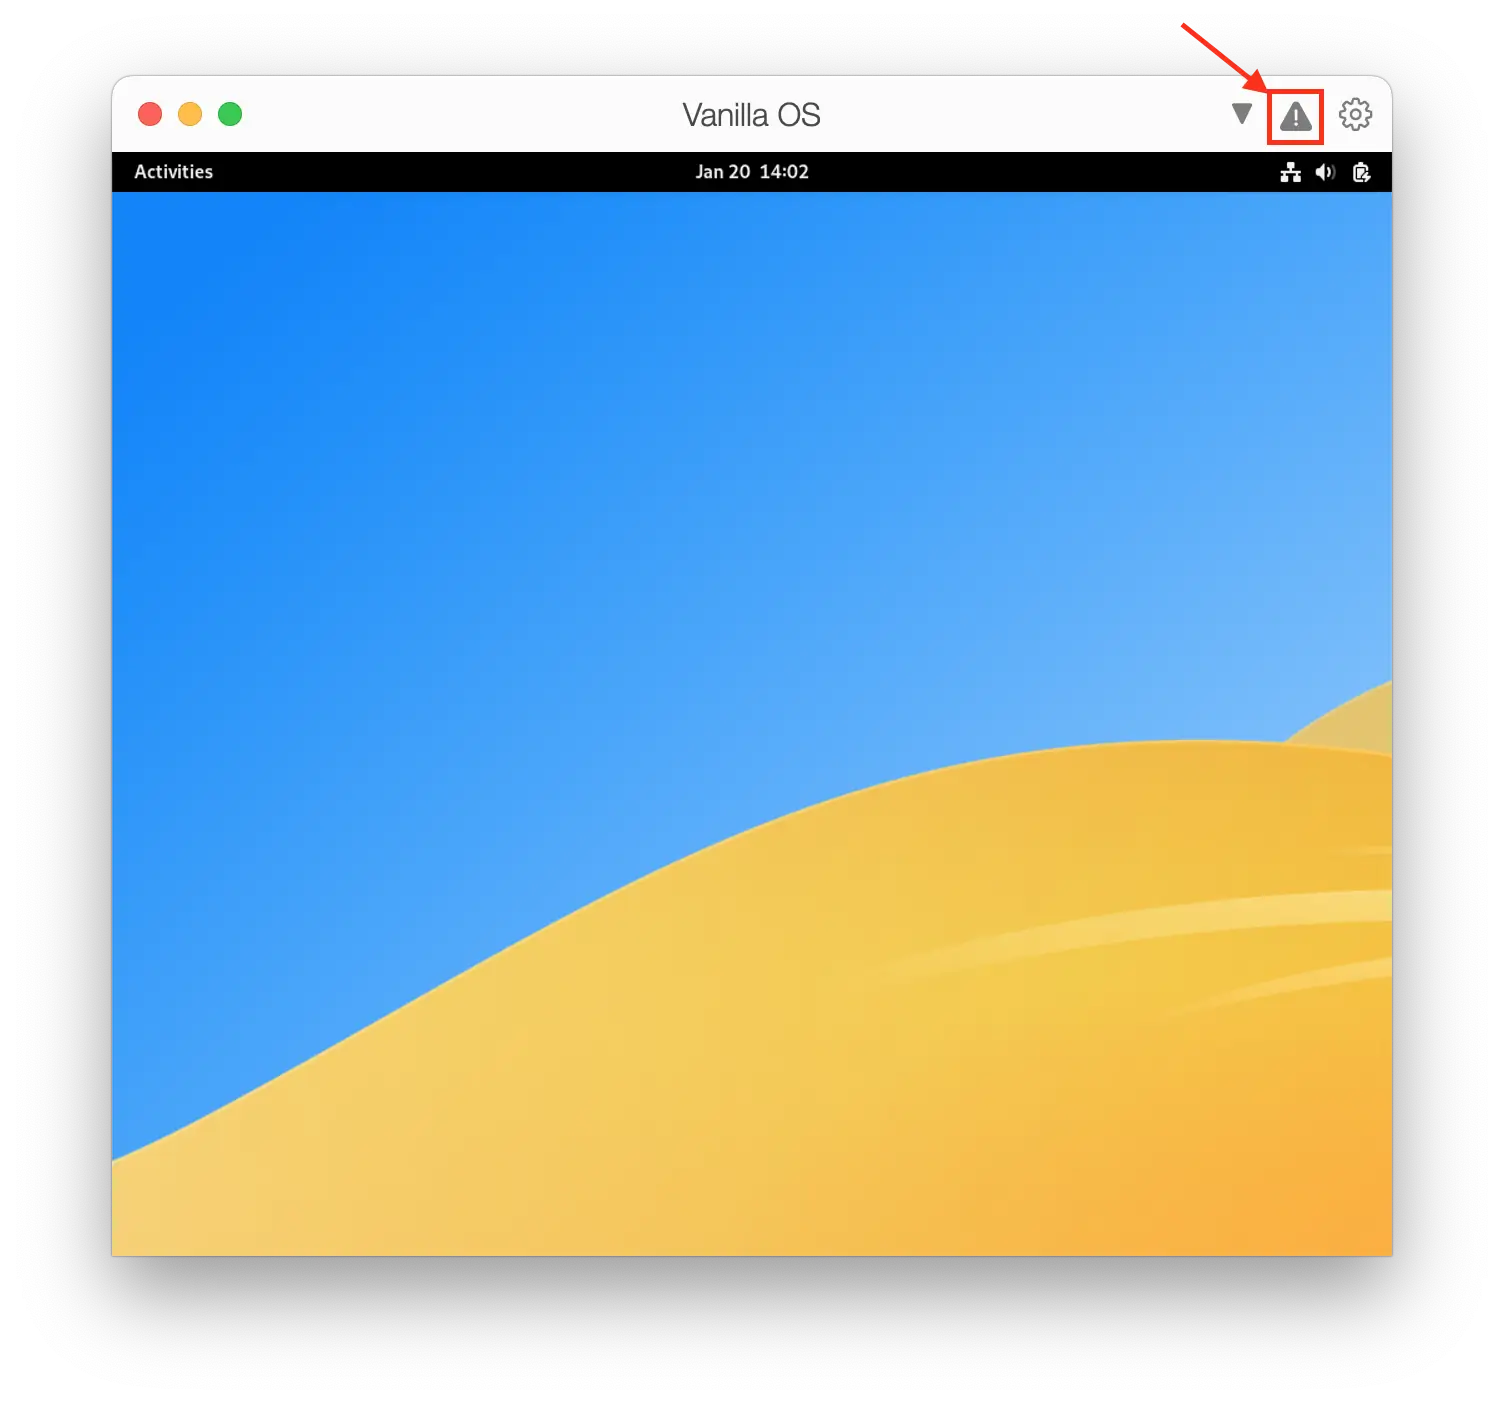
In the top-right corner of the Vanilla OS virtual machine window, there should be a triangle warning icon. Click it.
If you can’t see the warning icon, or you have installed Parallels Tools previously, navigate to the MacOS menu bar and select “Actions -> Install Parallels Tools…”.
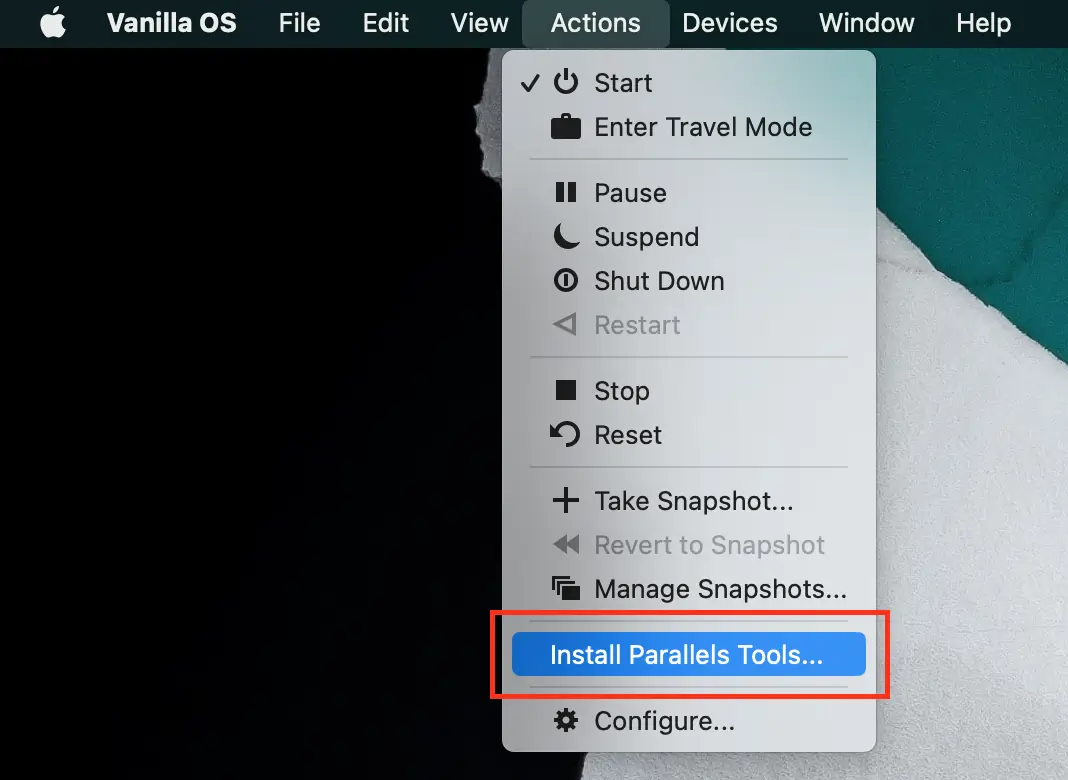
Read the Parallels Tools installation pop up window and click “Continue”.

Inside Vanilla OS, open the Files app and navigate to the Parallels Tools disc image folder in the left-side menu. Right-click inside the Parallels Tools folder and select “Open in Console”.
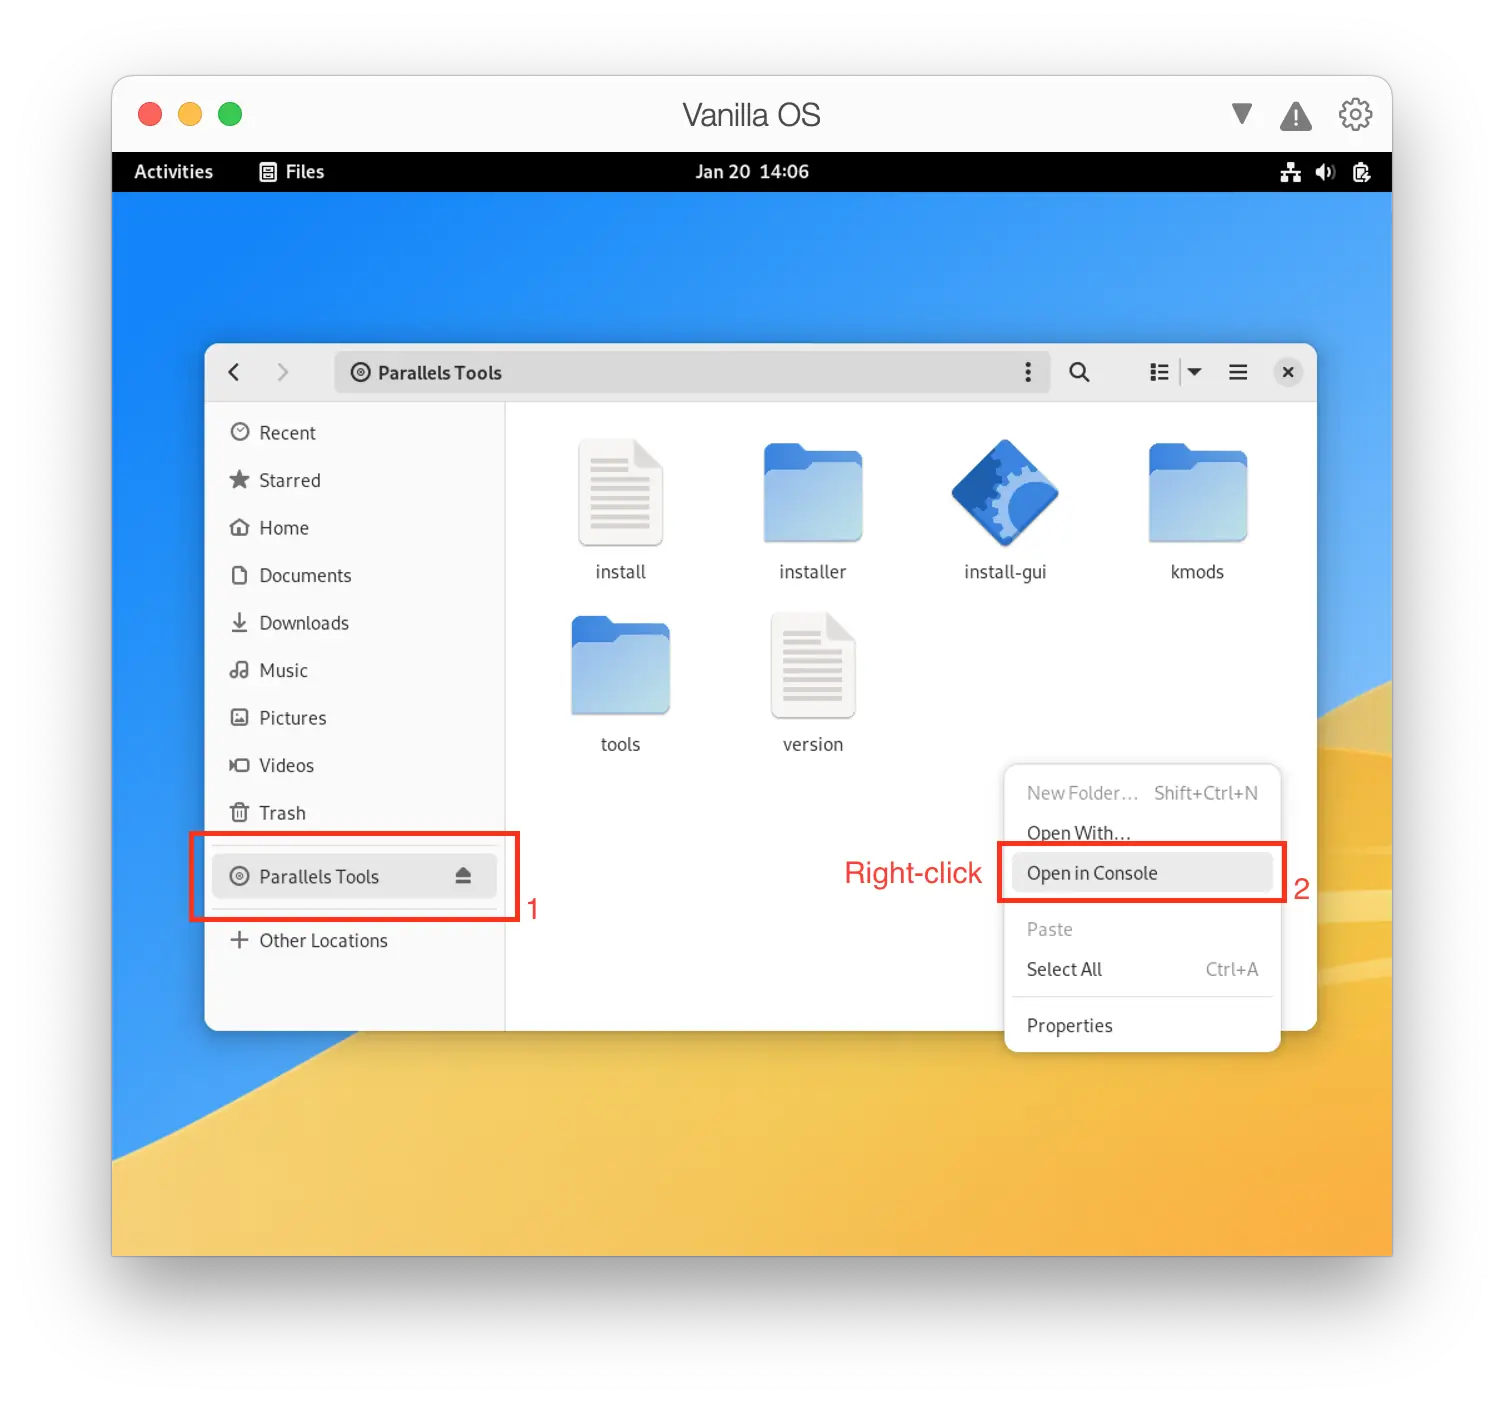
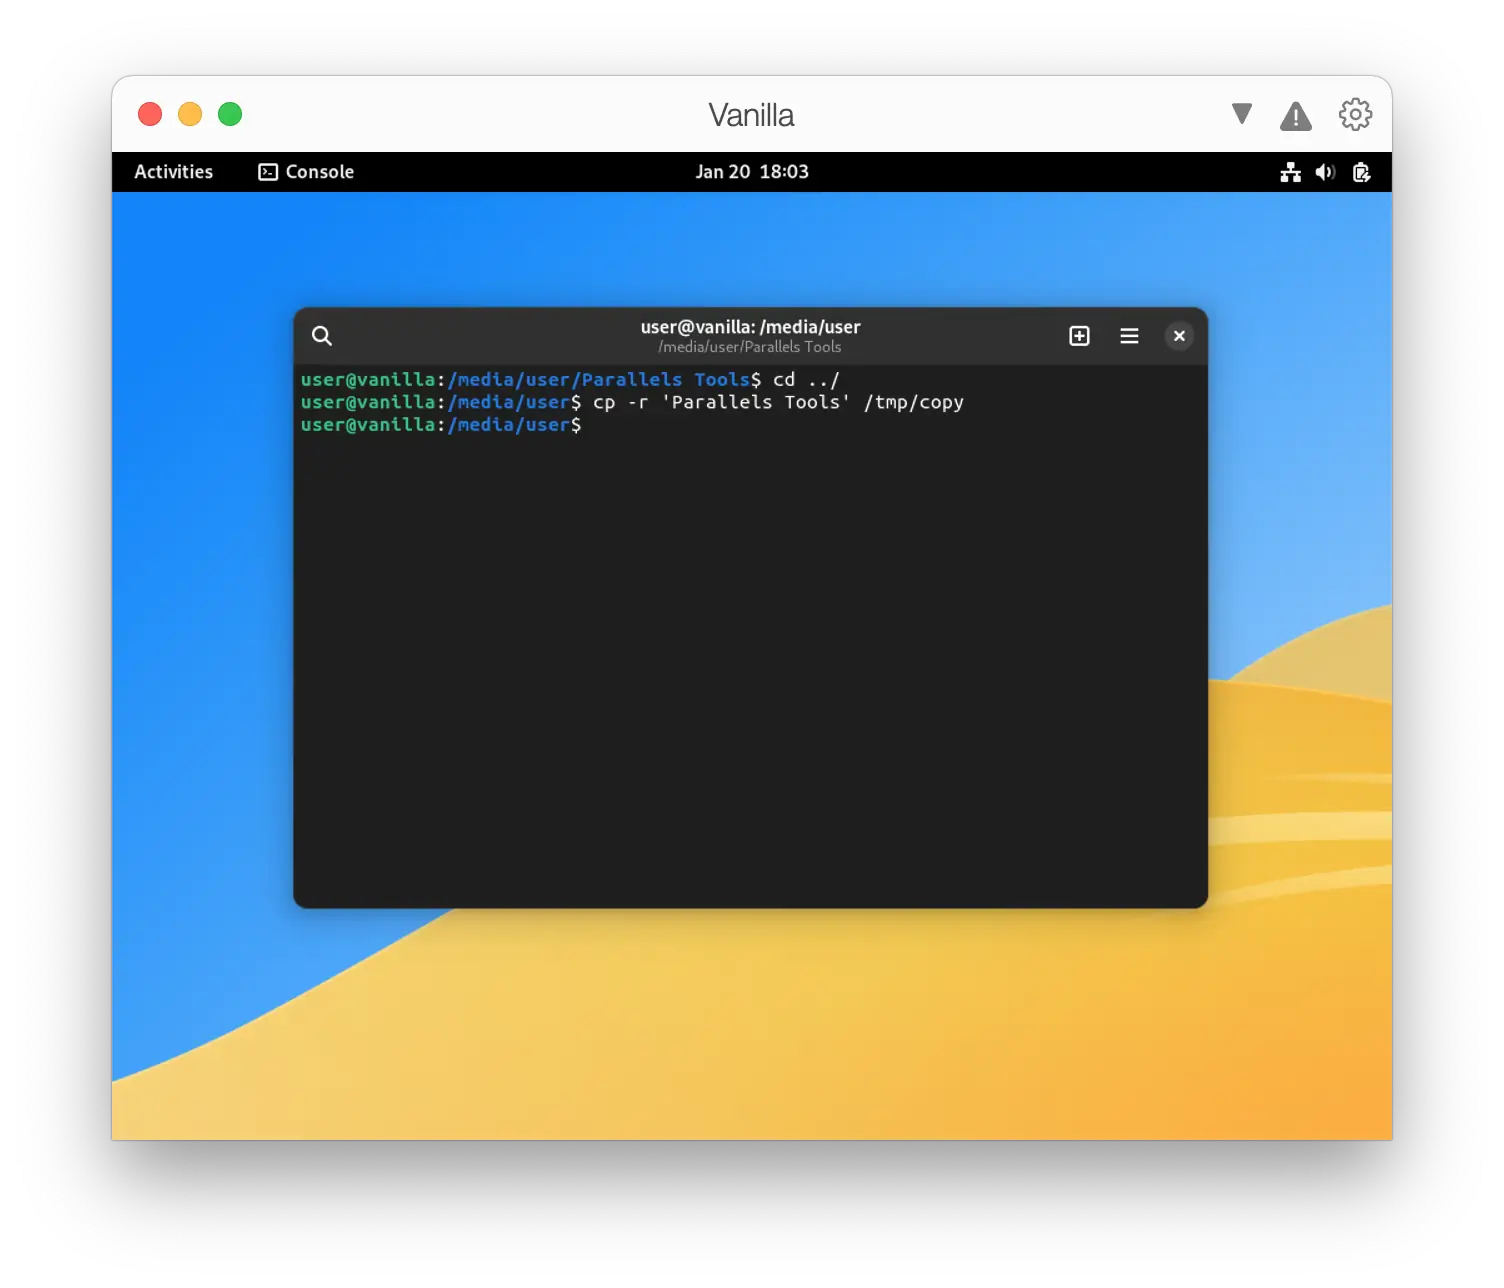
Type cd ../ and press enter to move up one directory in the Linux filesystem. Type cp -r 'Parallels Tools' /tmp/copy and press enter to copy the Parallels Tools disc image folder to a temporary directory (Temporary files in /tmp get removed after a reboot). Vanilla OS will not execute this mounted virtual image by default, so we must copy the folder and its contents to a safe temporary directory.
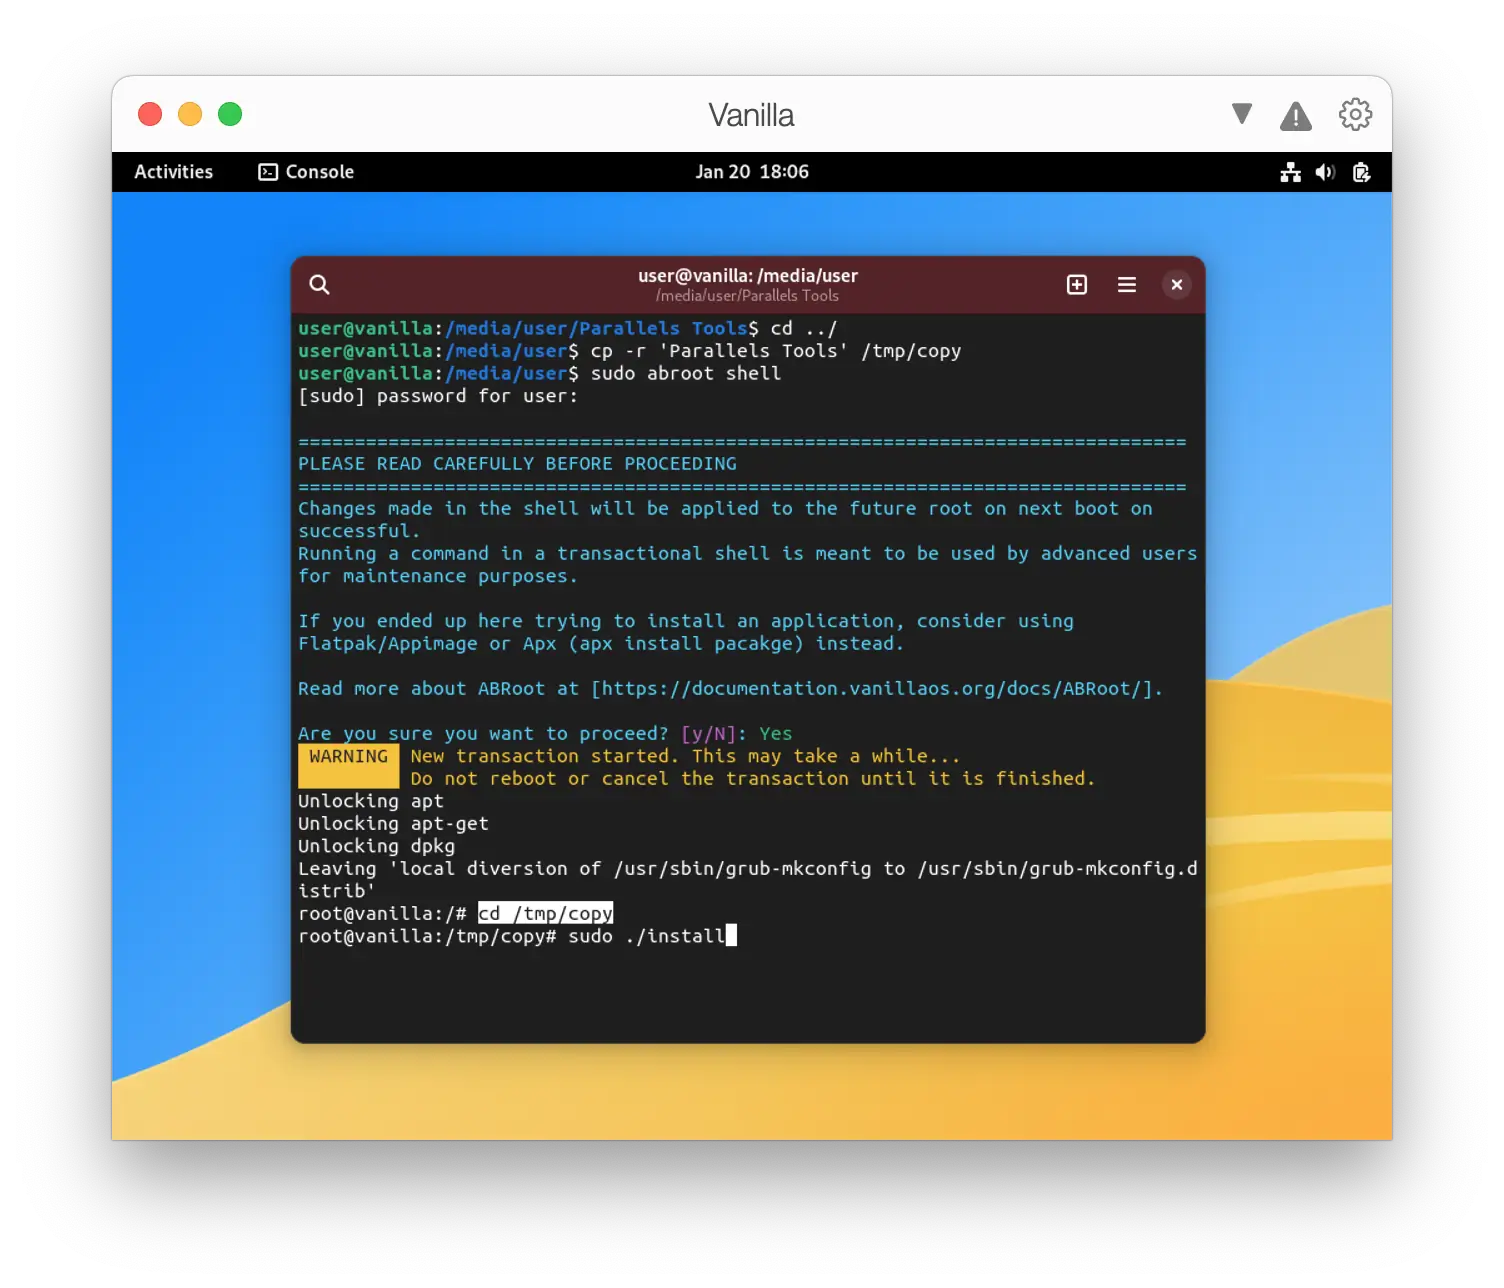
Type sudo abroot shell and press enter to open up the transactional shell again.
Type cd /tmp/copy and press enter to instruct the Console to navigate to the new temporary directory. Type sudo ./install and press enter to begin installing Parallels Tools.
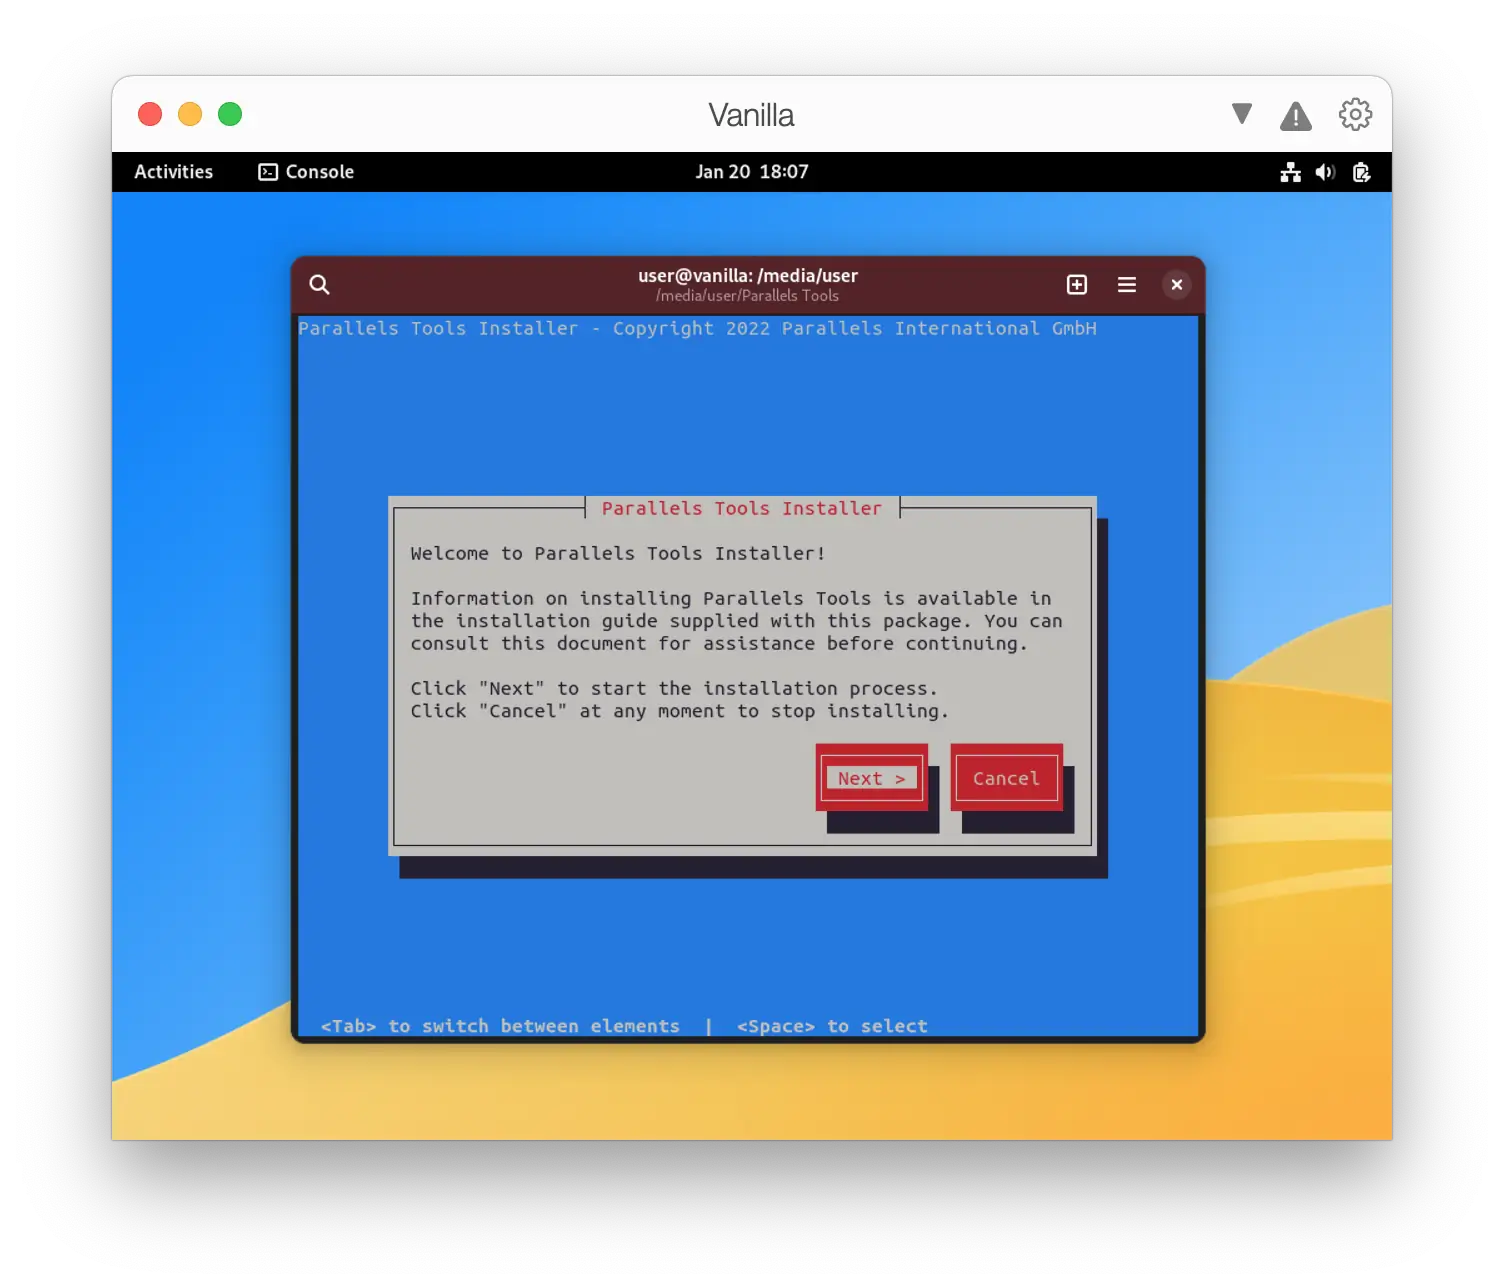
The Console app background should turn blue with a grey Parallels Tools Installer text window. Press the spacebar to select the “Next >” option.
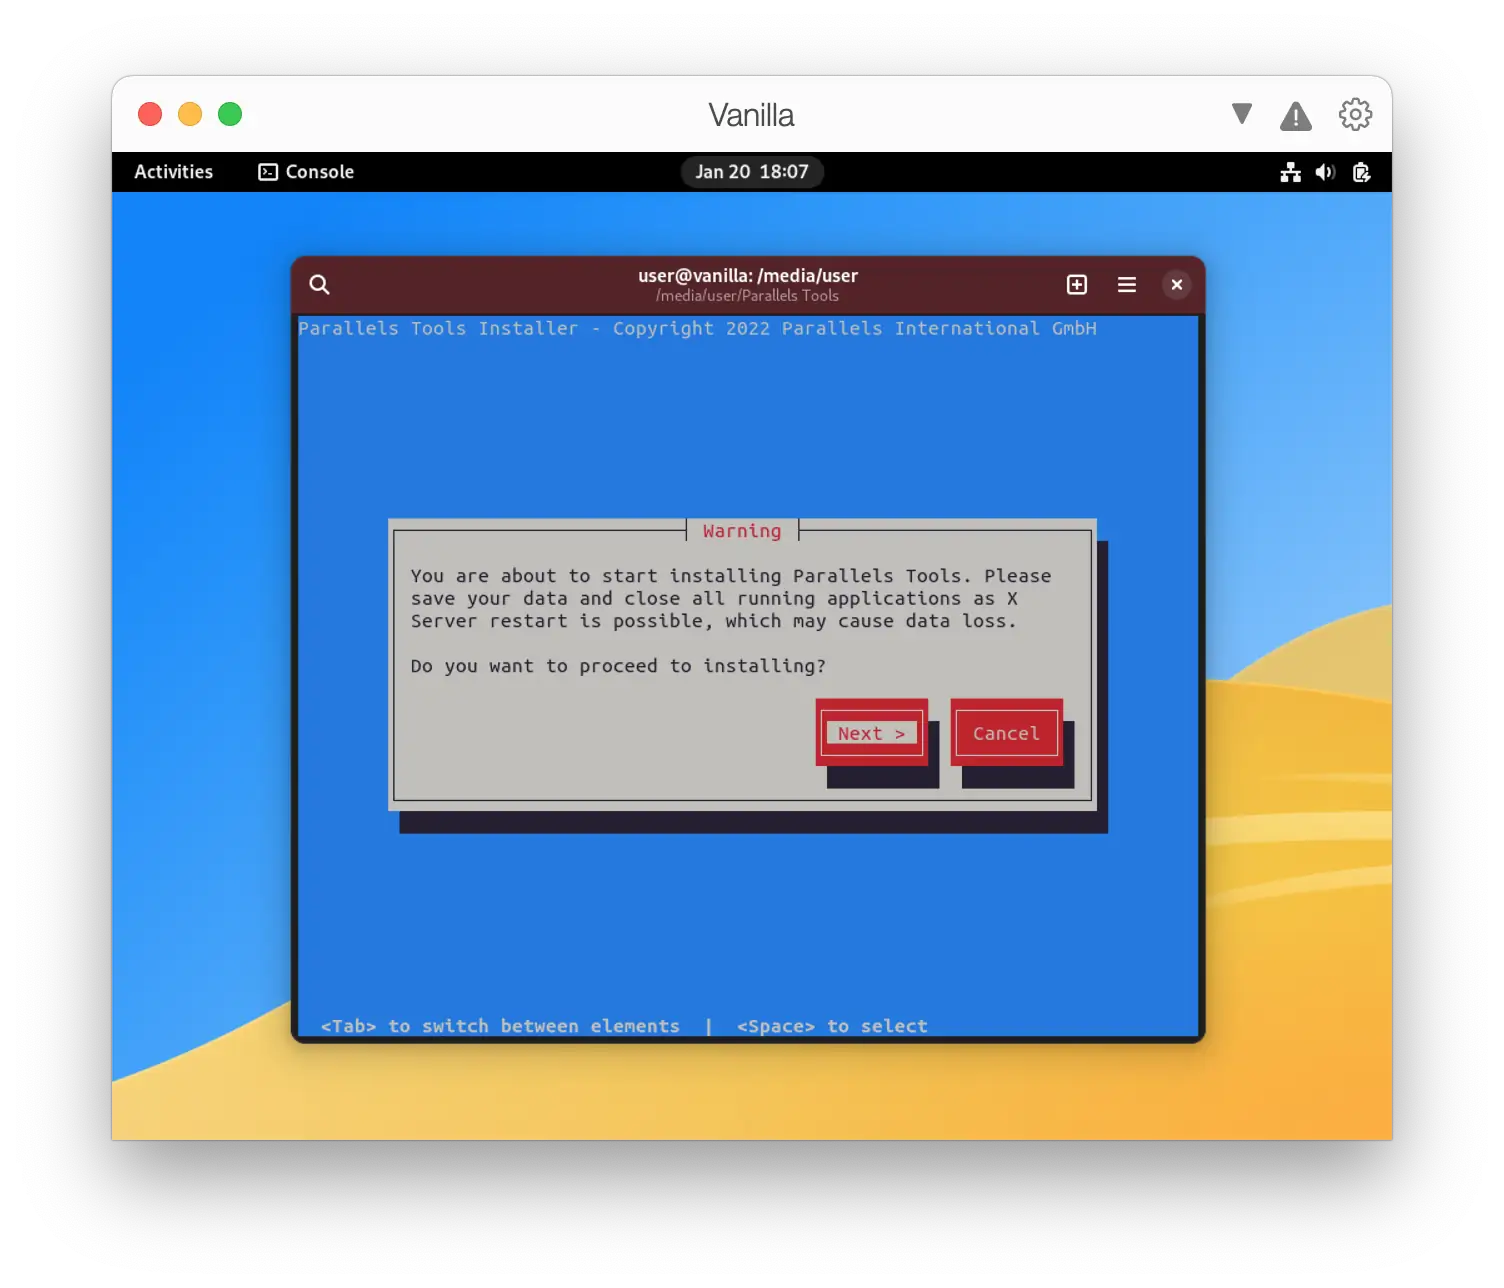
Confirm installation by pressing the spacebar to select “Next >” again.
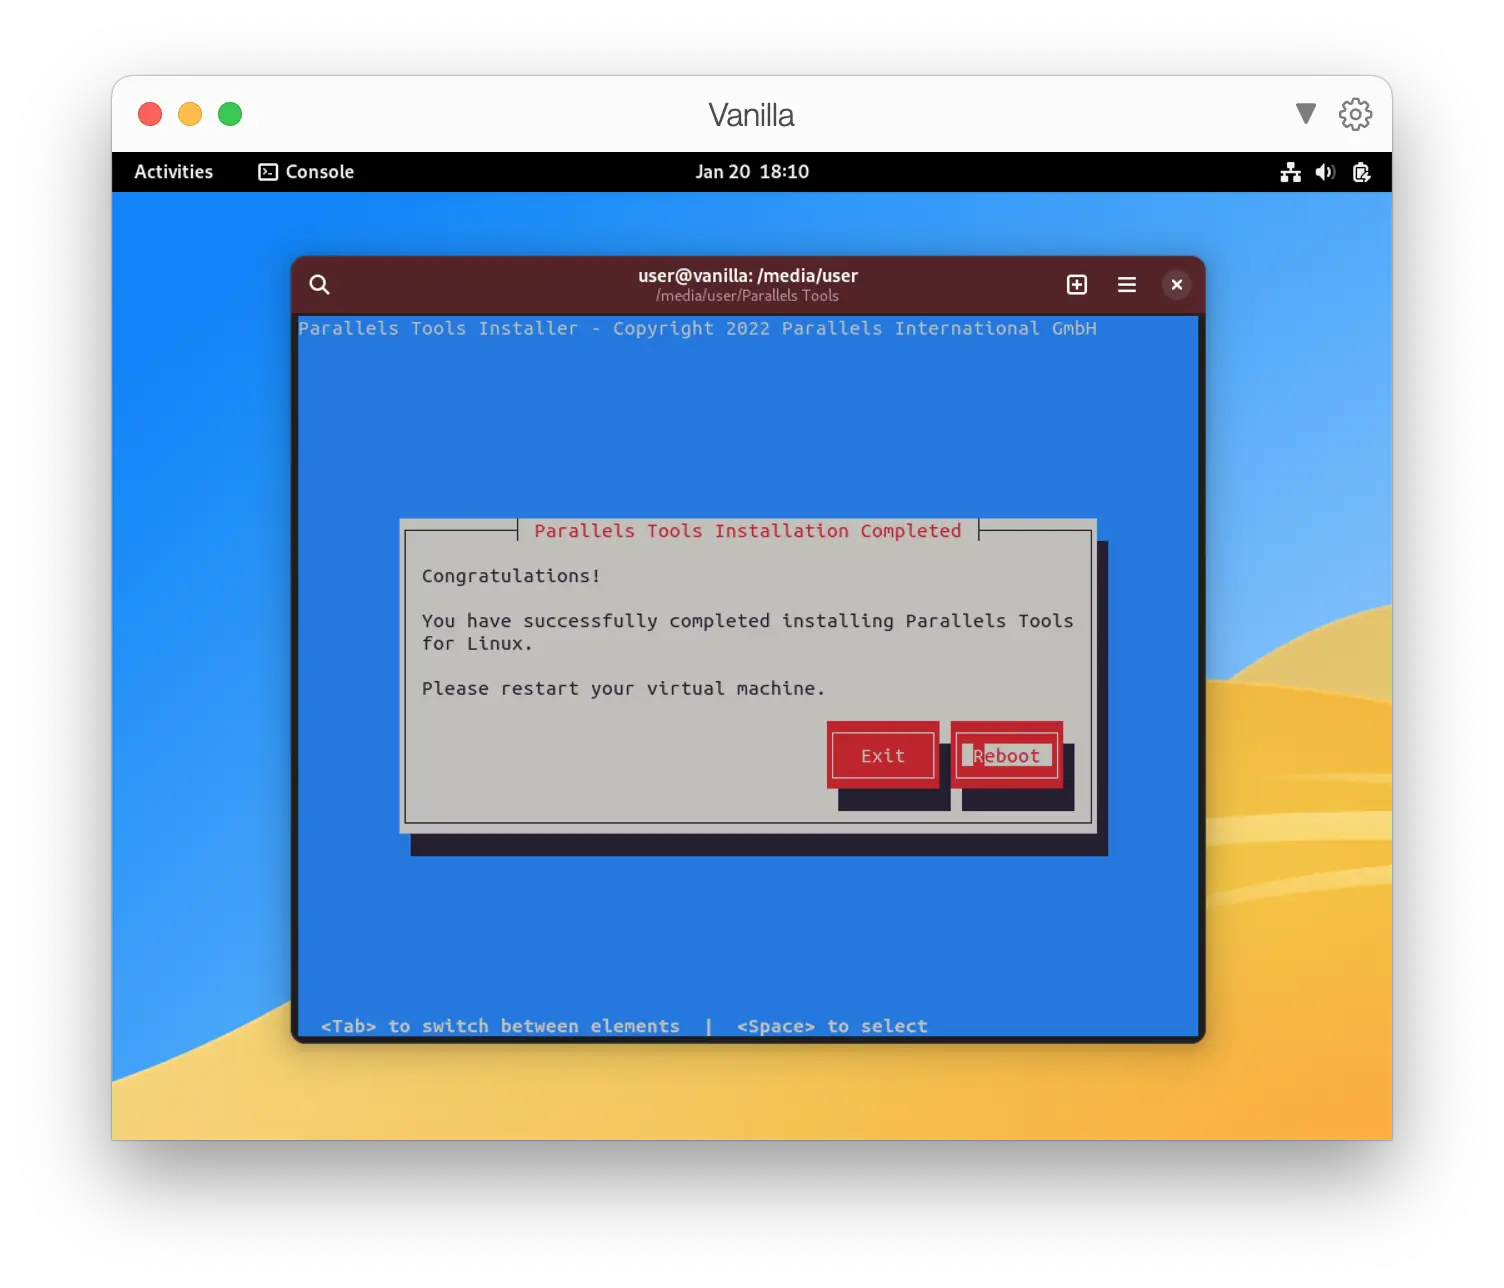
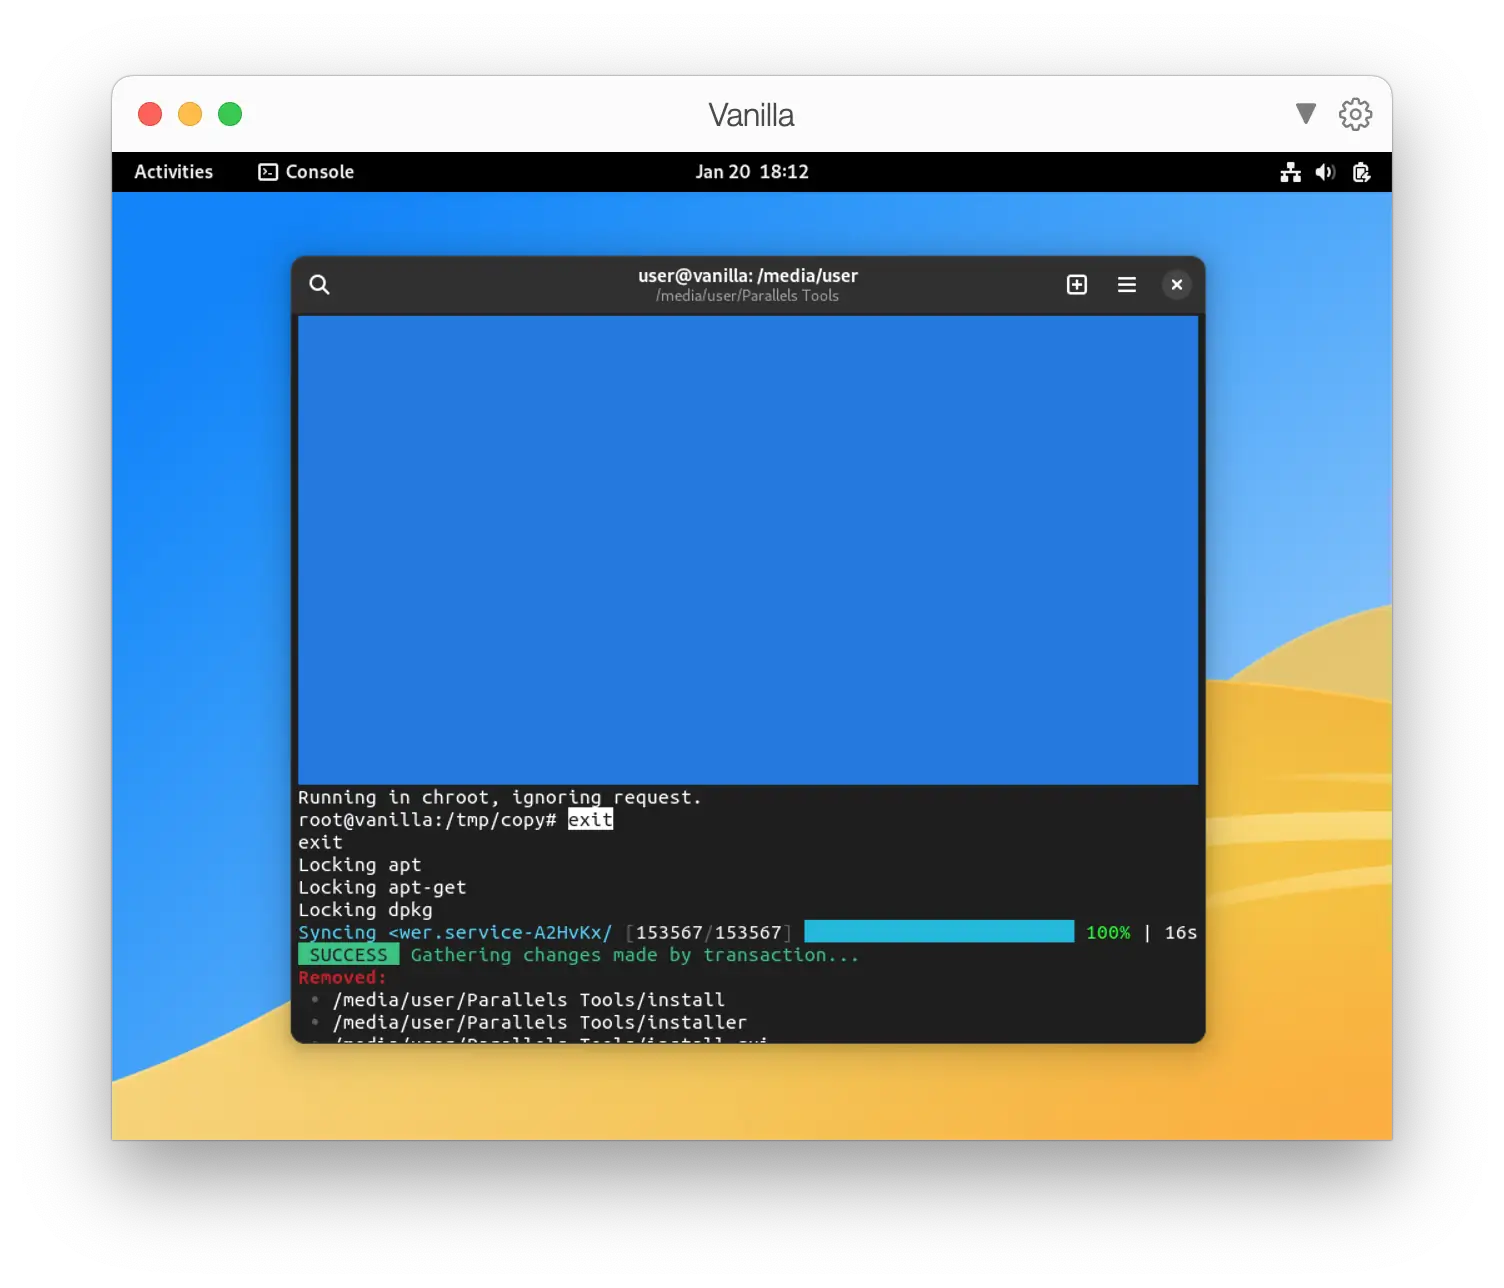
Wait for the installation to finish. Press the tab, and then press the spacebar to exit. We will reboot later once we have exited the transactional shell.
Type exit and press enter.
Type reboot and press enter. You have successfully configured your VM!
You can change more virtual machine performance/sharing/integration options using the Parallels settings menu in the Control Center. Please refer to the Parallels Knowledge Base for details.

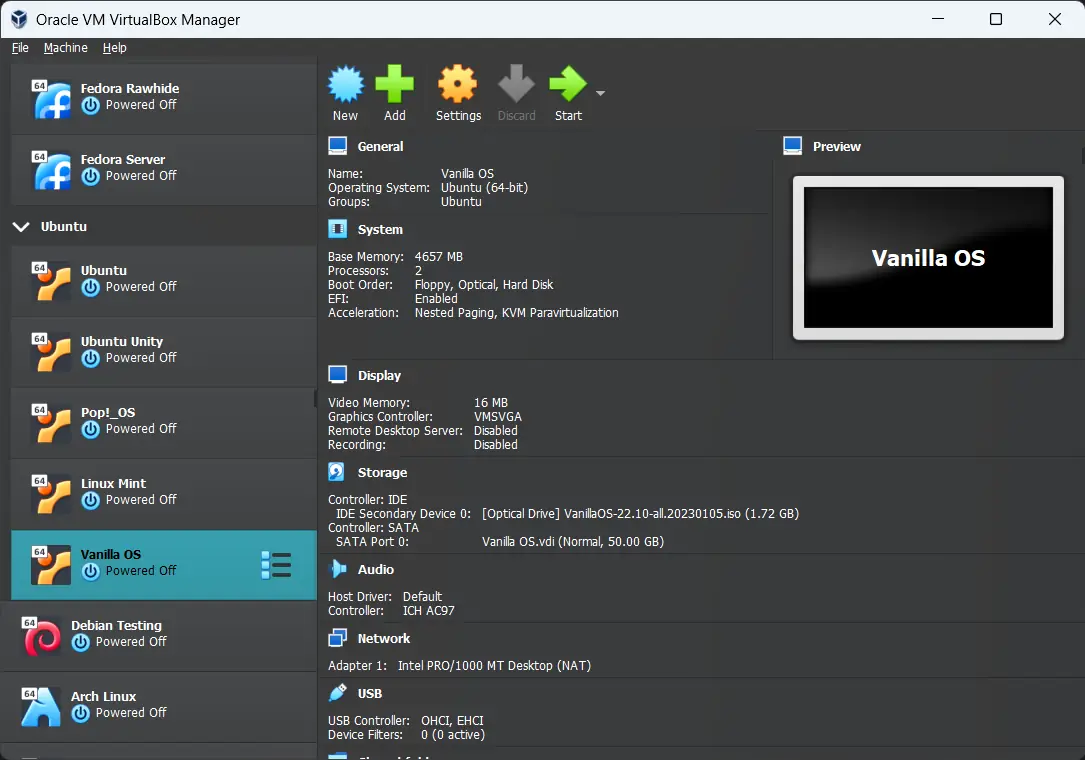
Install Vanilla OS in VirtualBox
Prerequisites
Installation
Launch VirtualBox from the App Grid. Alternatively, you can run it with the following command from the terminal:-
virtualbox
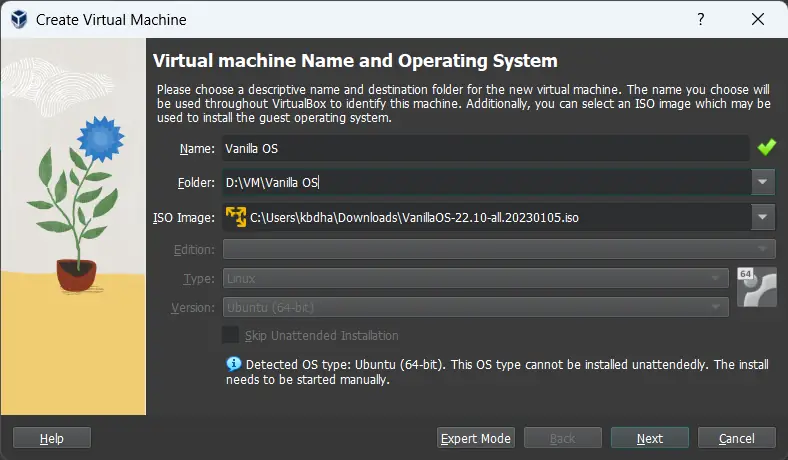
Click on “New”. (This will open the “Create Virtual Machine” Popup)
Specify the name of your Virtual Machine and Installation folder, then select the Vanilla OS ISO image you downloaded earlier. Click on “Next”.
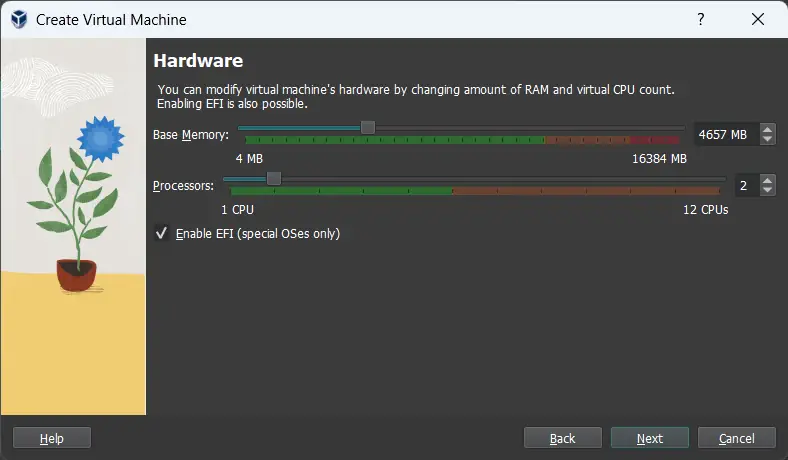
Allocate the base memory and the number of processors shared with your VM. Click the checkbox for “Enable EFI (special OSes only)”, now click on “Next”.
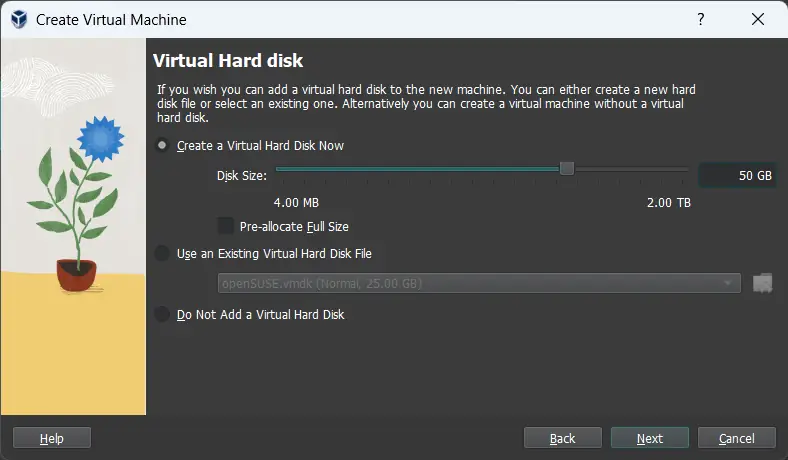
Allocate at least 50 GB of space for your VM, this is required for ABRoot. Now click on “Next”.
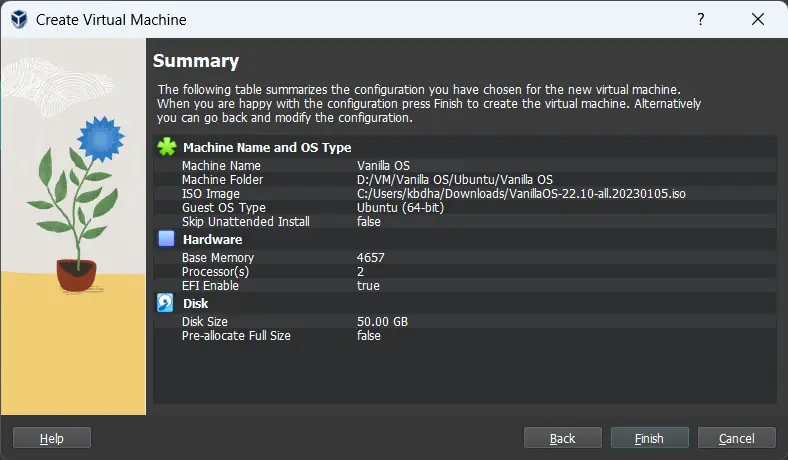
Confirm the options you selected in the “Summary” and click on the “Finish” button.
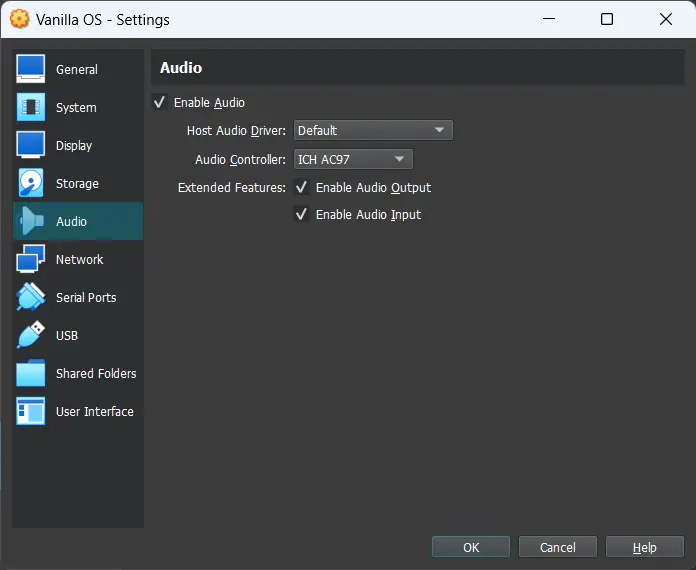
Click on “Settings”, navigate to “System”, and change the boot order to Harddisk -> Optical -> Floppy. Go to “Display” and increase the Video memory fully (128 MB here).
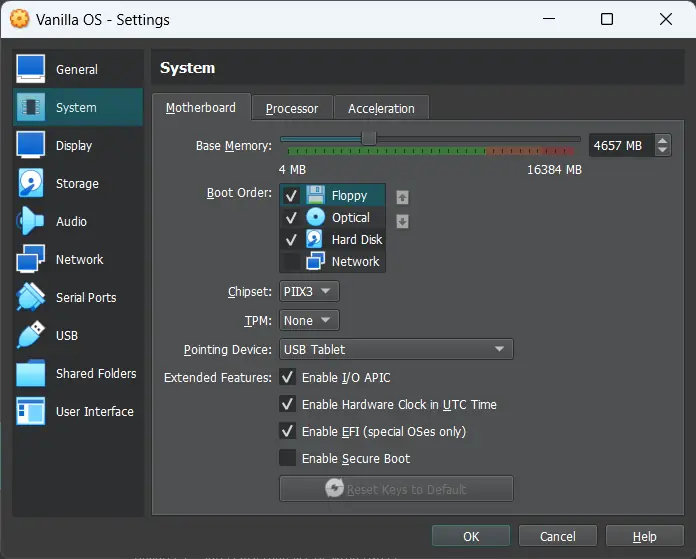 |
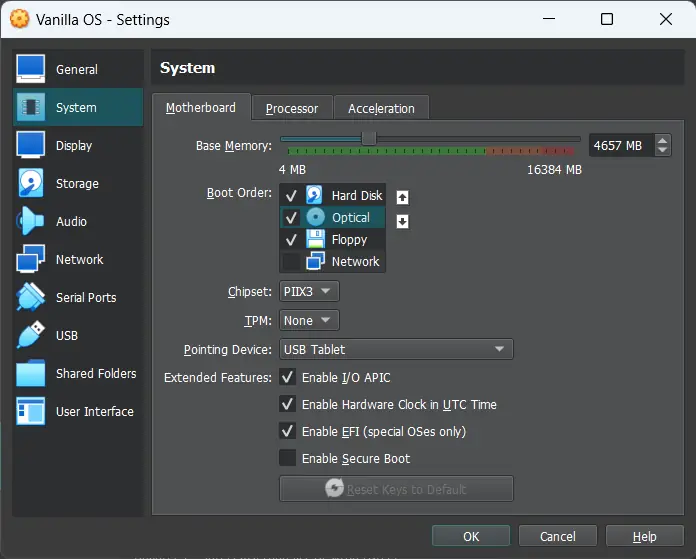 |
|---|---|
| Default order | Recommended order |
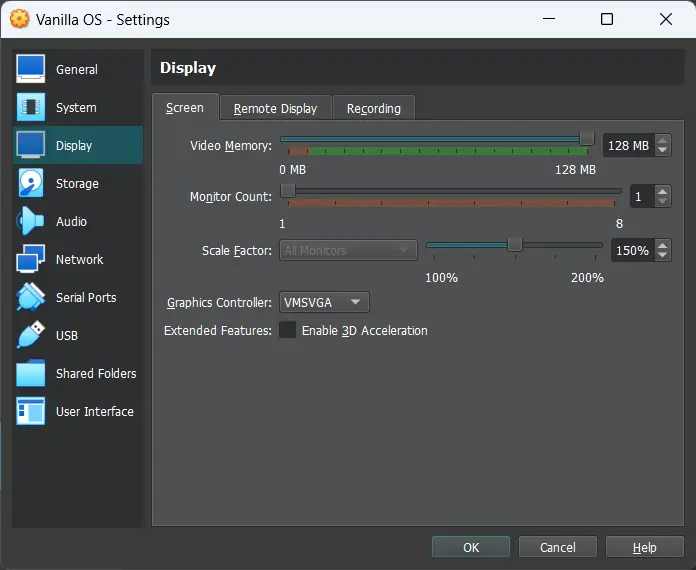
If you intend on using a Microphone with your VM, go to “Audio” and click on “Enable Audio Input”. With all the changes done, click on “Ok”.
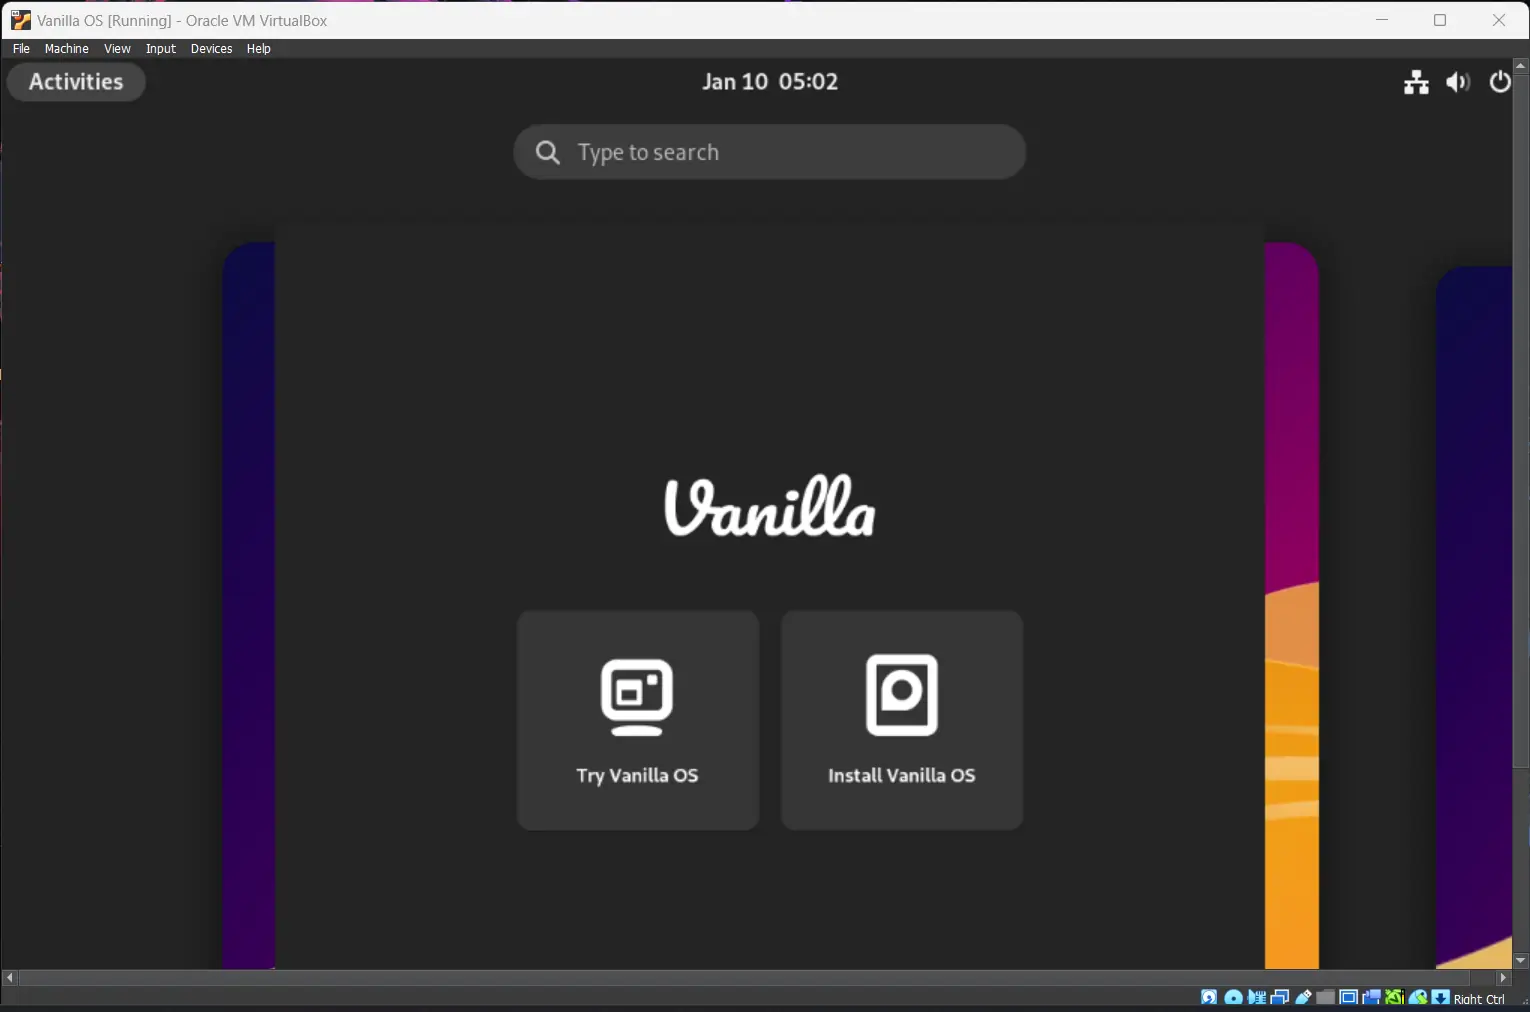
Now, click the “Start” button to start your VM.
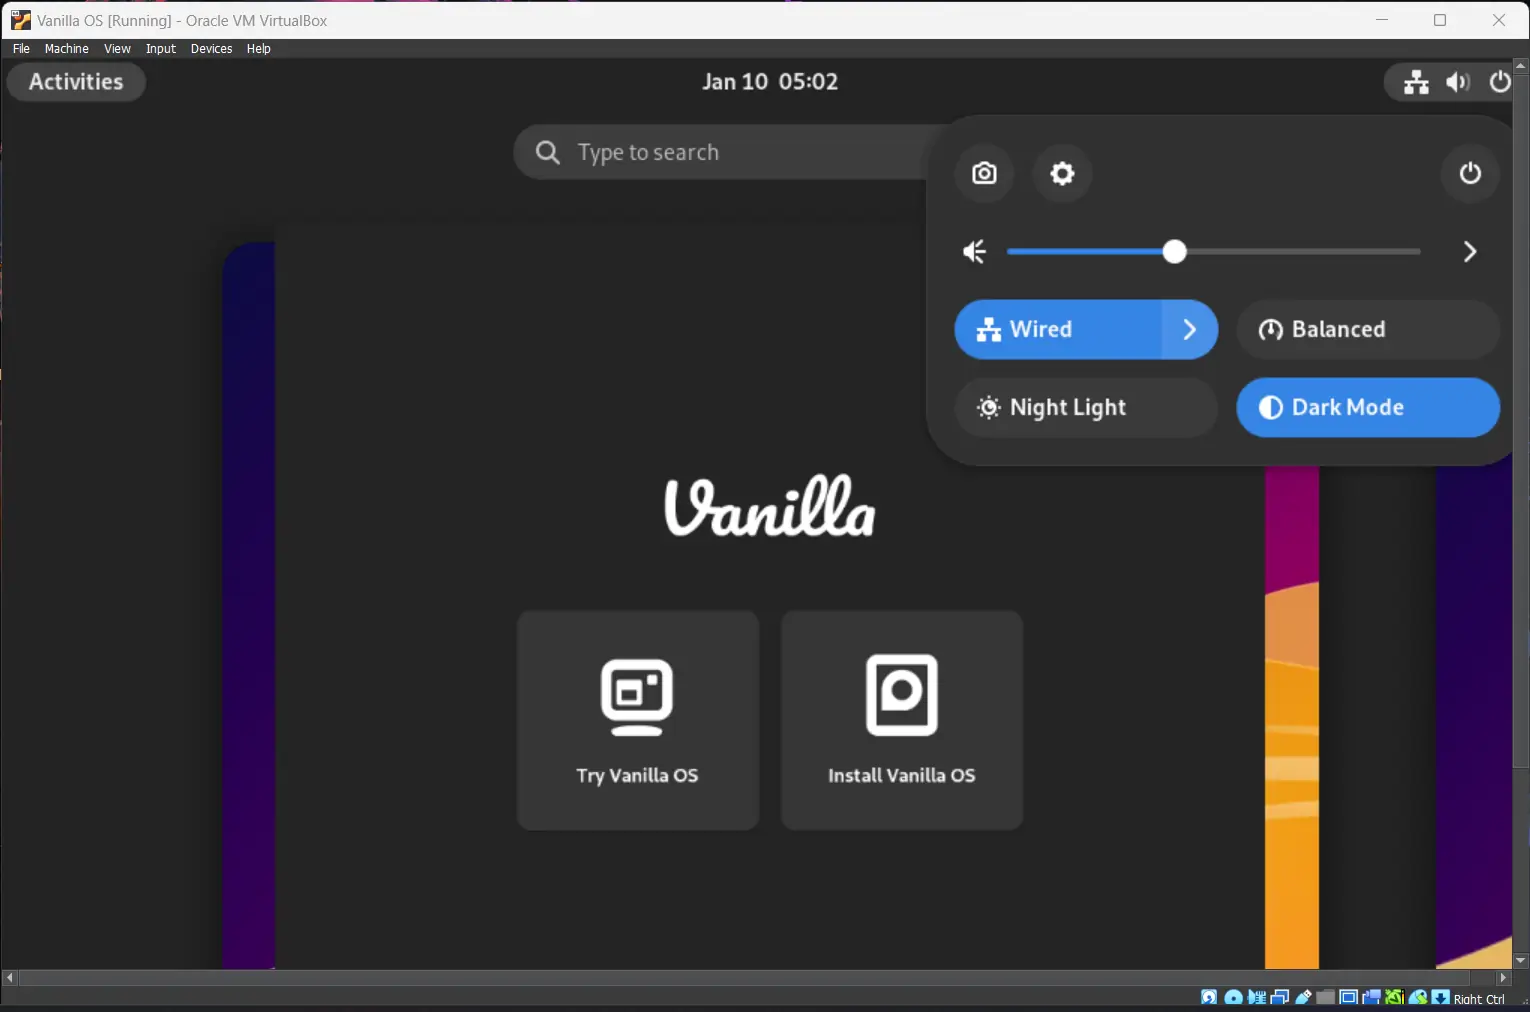
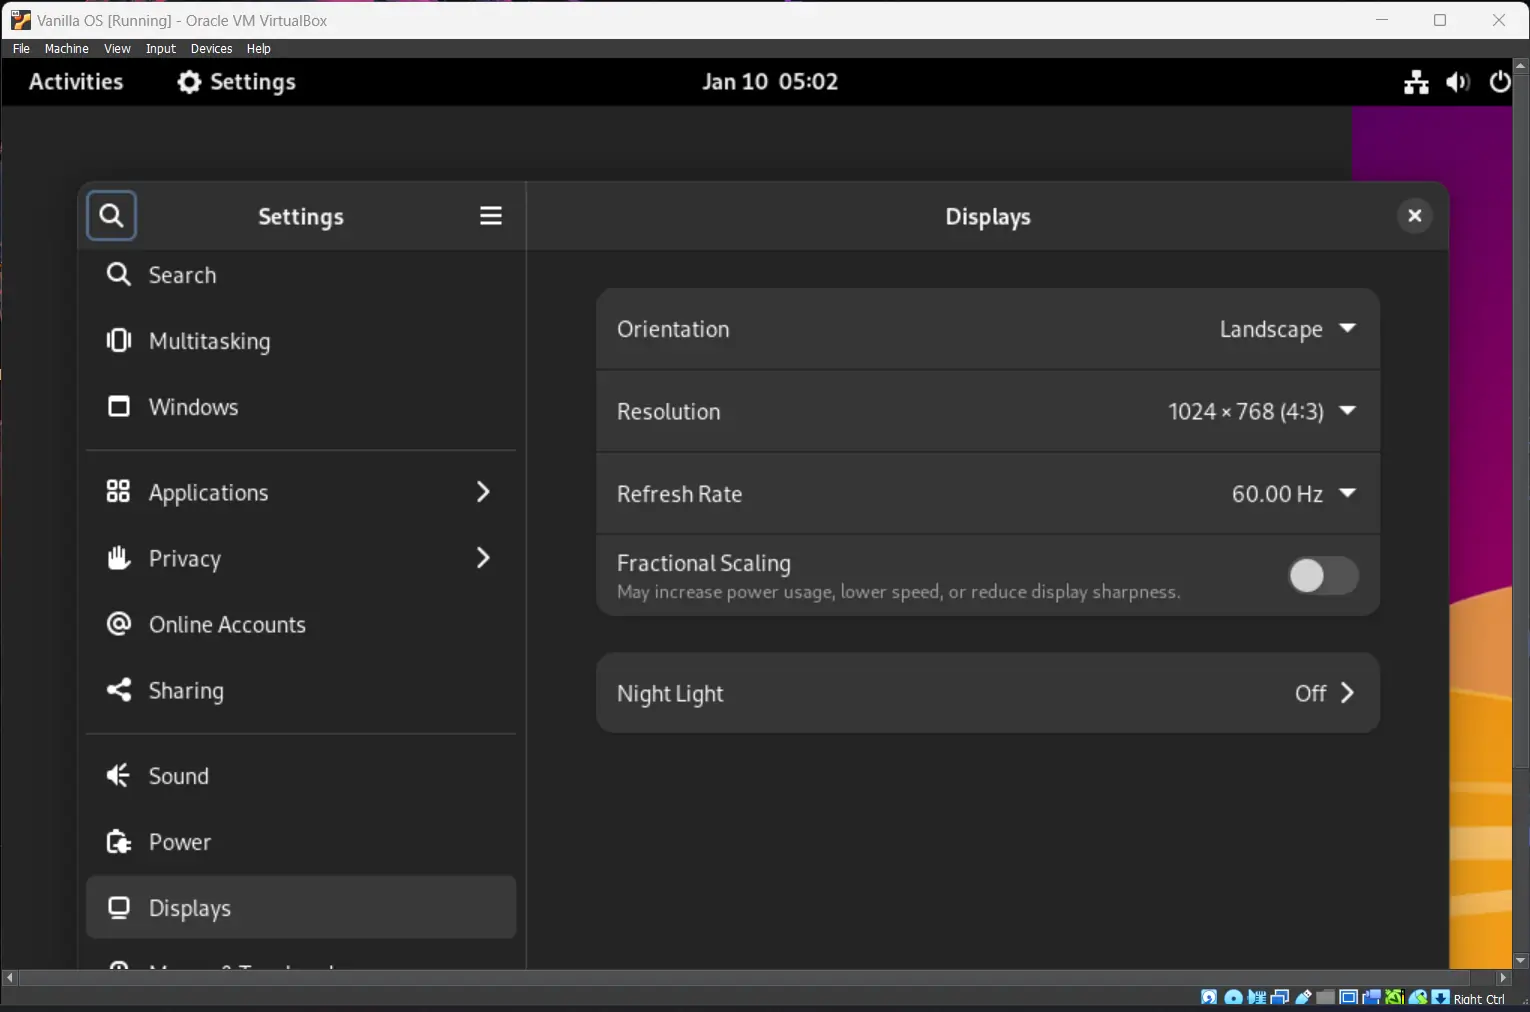
Inside the live session, Click on the top right corner and click on the “Settings” icon. Alternatively, you can press on Windows or the Super key to open the “Activities overview” and then type “Settings” to access it. Now, Navigate to “Displays”, and under “Resolution”, select a different resolution.
Now, proceed with the Vanilla OS Installation.
For additional installation steps, refer to this guide.
Installing VirtualBox Guest Additions
Virtualbox Guest Additions offers enhanced features, between the virtual machine and host, like Clipboard sharing, Seamless Windows, etc.
Due to the nature of ABRoot, the process of its installation is different. Follow this guide to install it in Vanilla OS.
First, enter the transactional shell using the sudo abroot shell command, then execute the sudo apt update command.
Now, install the required packages and dependencies using the following command:-
sudo apt install -y build-essential linux-headers-$(uname -r)
exit the transaction shell and reboot your system.
In VirtualBox, select “Insert Guest Additions CD image…” from the “Devices” menu at the top bar.
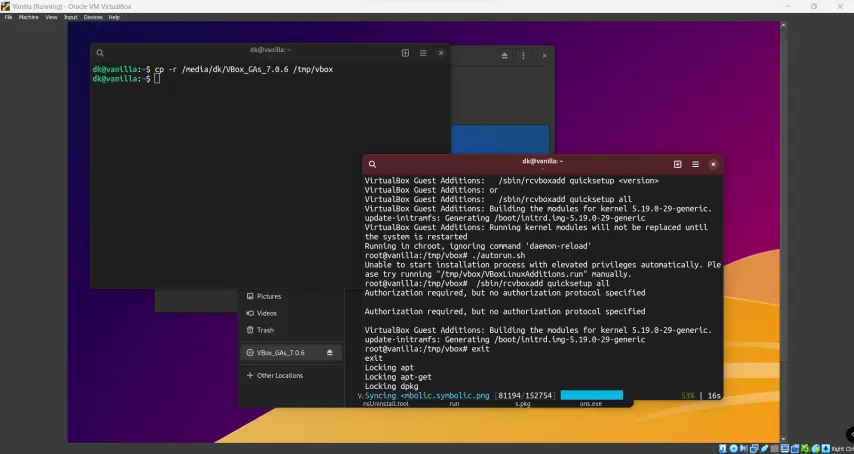
After mounting the CD image, type cp -r /media/<username>/Vbox_GAs_<version> /tmp/vbox in your terminal.
(Temporary files in /tmp gets removed after a reboot)
Note:- The content inside <> is a placeholder and must be replaced with the required details.
Now, enter the transactional shell using sudo abroot shell, then run cd /tmp/vbox to change the current working directory.
Now, execute ./VBoxLinuxAdditions.run. After the successful execution, build the Kernel modules by typing /sbin/rcvboxadd quicksetup all in the terminal.
exit the transaction shell and reboot your system.
Now, you have successfully installed VirtualBox Guest Additions.